EDIBLES
A simply sensational summer meal
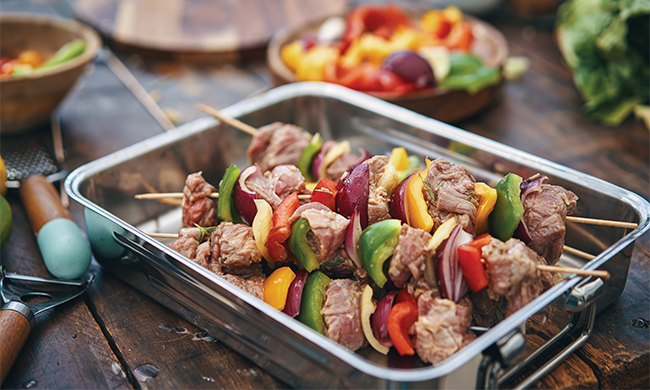
(Family Features) Whipping up a fresh cooked meal is one of the true joys of summer, especially when grilled grub is paired with tantalizing sides and tempting desserts.
Spice things up with Mexican Beef Sliders with Jalapeno Salsa and Avocado Cream coupled with a side like Roasted Potatoes then cap off a filling meal with these sweet and decadent Strawberry Cream Cheese Tartlets. If you’re looking for ways to mix meat and veggies all at once, these ideas for kebabs are a surefire way to please a variety of palates.
Find more summer meal ideas at Culinary.net.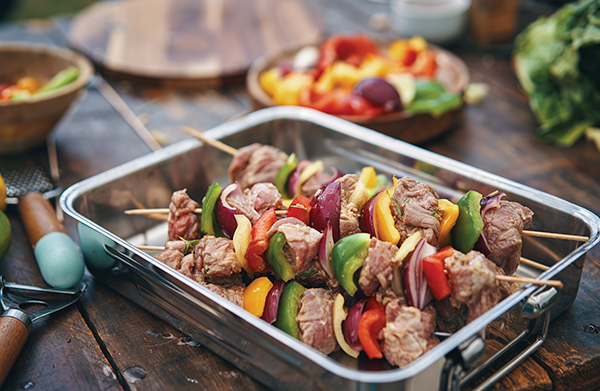
Cook Up Kebabs
As one of the most versatile main courses that can be grilled, kebabs offer nearly endless opportunities for customization. From protein to veggies, soaked wooden skewers can be loaded with just about any favorite flavors before hitting the grates. Consider these options for kicking your kebabs up a notch:
- Steak, cut into chunks
- Chicken, cut into chunks
- Bratwurst or sausage, cut into slices
- Ground beef, shaped into balls
- Lamb
- Shrimp
- Salmon, cut into chunks
- Bacon, cut into small pieces
- Sliced onions
- Sliced bell peppers
- Sliced jalapenos
- Sliced mushrooms
- Sliced cucumbers
- Cherry tomatoes
Summer Sliders with a Spicy Kick
Summer calls for firing up the grill for a fresh-cooked meal, and sliders are an ideal way to enjoy a downsized version of a warm weather favorite.
These Mexican Beef Sliders with Jalapeno Salsa and Avocado Cream are perfect for summer with their spicy kick of salsa and bright, cooling cream. Made with grass-fed beef from New Zealand, where the animals are allowed to roam and graze freely over lush green hills and pastures year-round, the mini burgers boast a lean, finely textured meat that tastes just as nature intended.
Find more tasty summer recipes at beefandlambnz.com.
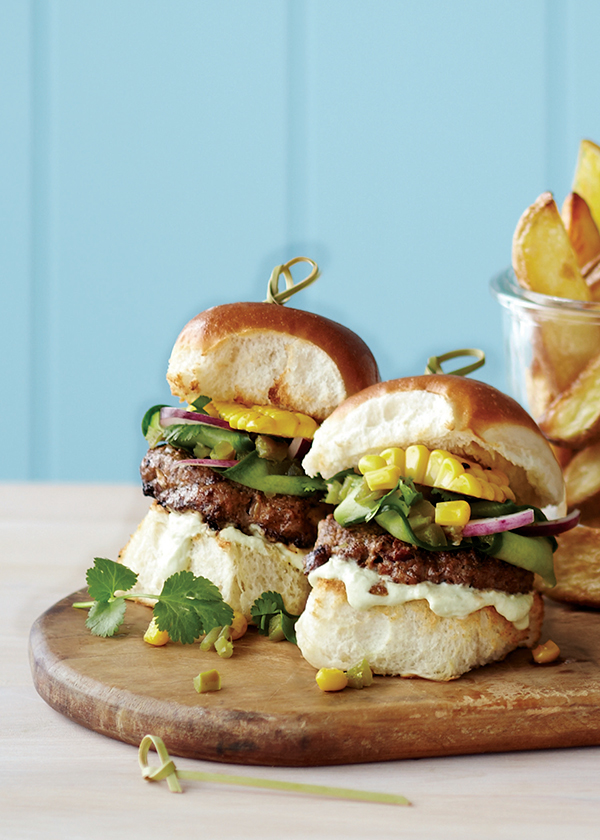
Mexican Beef Sliders with Jalapeno Salsa and Avocado Cream
Recipe courtesy of Beef + Lamb New Zealand
Prep time: 20 minutes
Cook time: 15 minutes
Servings: 4
Patties:
- 1 1/3 pounds lean New Zealand grass-fed ground beef
- 1 clove garlic, crushed
- 1 medium onion, grated or finely chopped
- 1 egg, lightly beaten
- 3/4 cup red kidney beans, rinsed and drained
- 2 tablespoons tomato paste
- 3 teaspoons dried oregano, chopped
- 2 teaspoons mild smoked paprika
- 2 teaspoons ground cumin
- 1 teaspoon ground coriander
- 1/2 cup Parmesan cheese, grated
- salt, to taste
- pepper, to taste
- olive oil
Jalapeno Salsa:
- 1 cup cucumber, thinly sliced into long ribbons
- 3/4 cup fresh cilantro leaves, chopped
- 1 red onion, finely sliced
- 1/2 cup pickled jalapenos, finely chopped
- salt, to taste
- pepper, to taste
- olive oil
- lime juice
Avocado Cream:
- 1 avocado, mashed
- 1/2 cup sour cream
- 1 lime, juice and zest only
- salt, to taste
- pepper, to taste
- 8-12 slider buns, halved
- 2-3 cobs sweet corn, cooked and sliced into shards
- 8-12 small bamboo skewers
- To make patties: In bowl, combine beef, garlic, onion, egg, kidney beans, tomato paste, oregano, paprika, cumin, coriander, Parmesan cheese, salt, to taste, and pepper, to taste. Shape into 8-12 small patties. Cover and refrigerate 15 minutes.
- Heat grill or frying pan to medium heat.
- Brush patties with oil on both sides. Cook 2-3 minutes on each side, turning once to brown both sides evenly, until cooked through.
- To make Jalapeno Salsa: In bowl, combine cucumber, cilantro, onion and jalapenos; season with salt and pepper, to taste. Drizzle with olive oil and lime juice.
- To make Avocado Cream: In bowl, combine avocado, sour cream, lime juice and lime zest; season with salt and pepper, to taste.
- Spread Avocado Cream on bottom buns and place patties on top. Top patties with Jalapeno Salsa, corn and top buns. Press down gently and poke in skewers to secure sliders.
A Sweet Summer Treat
Sweet flavors and warm weather go hand-in-hand, and many summer occasions and get-togethers call for dessert. Take advantage of warm weather favorites like strawberries and raspberries with these Strawberry Cream Cheese Tartlets.
Made using the best berries nature can provide, these bite-size tartlets feature a graham cracker crust base and an indulgent cream cheese filling flavored with sliced strawberries, honey and lemon topped with Well•Pict’s sweet, juicy strawberries and raspberries, which come fresh in clamshell packaging made from 70% recycled water bottles.
Find more sweet recipes that can bring a smile to your loved ones’ faces at wellpict.com/recipe.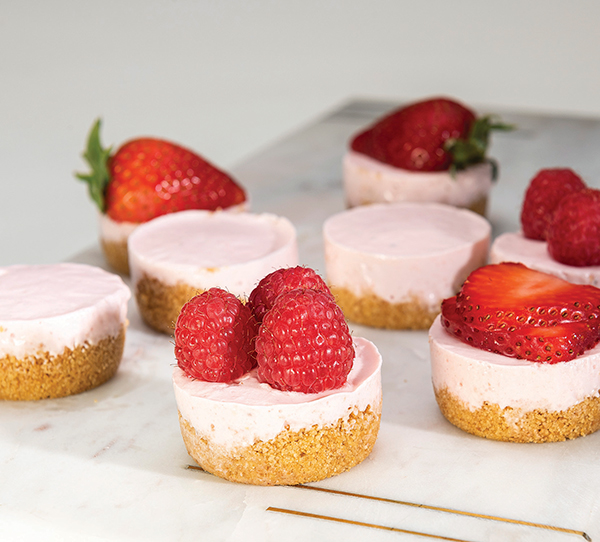
Strawberry Cream Cheese Tartlets
Makes: 24 tartlets (4 ounces each)
- 1/2 cup water
- 2 tablespoons lemon juice
- 3 tablespoons lemon zest
- 2 tablespoons gelatin
- 4 cups Well•Pict Strawberries, sliced, divided
- 1/3 cup honey
- 2 packages (8 ounces each) cream cheese
- 1/2 cup sour cream
- 1 cup ice cubes
- 2 cups graham cracker crumbs
- 1/2 cup melted butter
- 1 cup Well•Pict Strawberries, rinsed, for garnish
- 1 cup Well•Pict Raspberries, rinsed, for garnish
- In blender, mix water, lemon juice, lemon zest and gelatin until frothy.
- Add 2 cups strawberries and honey; blend until smooth. Pour into bowl and chill mix 15 minutes.
- In blender, mix cream cheese, sour cream and ice cubes while incorporating strawberry mixture. Mix in remaining strawberries.
- In blender or food processor, mix graham crackers and melted butter to crumb consistency. Lightly grease two medium muffin pans and pack graham cracker mixture at bottom of each opening. Pour strawberry mixture over graham cracker mixture and chill until set. Gently pull tartlets from muffin tins and place on serving tray. Garnish with strawberries and raspberries.
Roasted and Ready to Serve
Summer meals centered around grilled fare call for a complementary pairing that completes the classic profile of warm weather food. Using a versatile vegetable like potatoes allows you to think up different methods of cooking for a new flavor each time.
While you’re focused on the main dish being grilled, these Roasted Potatoes can bake away indoors for a simple side that requires little attention.
Find more health resources at usda.gov.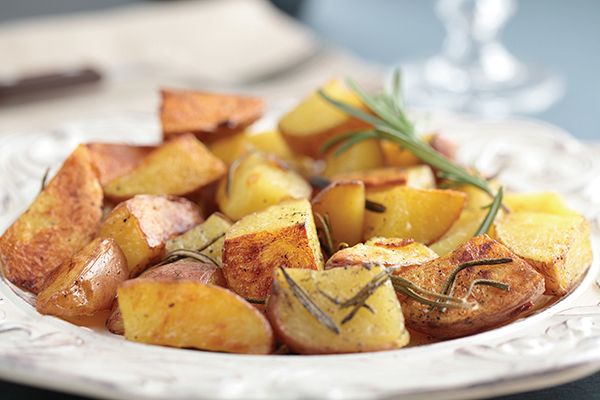
Roasted Potatoes
Recipe courtesy of “A Harvest of Recipes with USDA Foods”
Servings: 6
- 1 pound potatoes, chopped into 1-inch cubes
- 1/2 cup onion, chopped into 1-inch cubes
- 1/2 cup green pepper, chopped into 1-inch cubes
- 1 teaspoon garlic, finely chopped
- 1 teaspoon vegetable oil
- 1/4 teaspoon salt
- 1/4 teaspoon pepper
- 1 tablespoon parsley, finely chopped
- 1/2 teaspoon paprika
- Preheat oven to 350° F.
- In medium bowl, mix potatoes, onions, green peppers and garlic.
- Add vegetable oil, salt, pepper, parsley and paprika. Mix well.
- Cover bowl and refrigerate 15 minutes.
- Spread potato mixture evenly on cookie sheet. Bake about 35 minutes.
Photos courtesy of Getty Images (Kebabs and Roasted Potatoes)
EDIBLES
Empower yourself with nutrition know-how

(Family Features) Eating a balanced diet with fruits, vegetables, whole grains, dairy and proteins is a crucial first step toward a healthy life.
Even with hectic schedules and convenience foods readily available, it’s important to incorporate habits like regular family meals and meal planning so you have a variety of better-for-you snacks and recipes on hand. Also important is leading by example and modeling healthy eating habits to help improve overall nutrition for you and your family members, especially children.
If you are looking for ways to make nutrition fun, the experts at Healthy Family Project, along with its fruit and vegetable partners, are offering an online nutrition resource center as part of Mission for Nutrition 2024.
Geared toward dietitians, nutrition professionals and anyone involved in nutrition education, the resource center is a one-stop shop to make nutrition education fun and inspiring, featuring more than 600 dietitian-approved recipes; tips to pick, prepare and store more than 50 fruits and vegetables during every season; a podcast, e-cookbook and monthly newsletter; and free downloadables, infographics, activities for kids and more.
Dietitians and nutrition professionals can sign up to receive this year’s Mission for Nutrition kit, which is full of resources to use in classrooms, in-store with customers or wherever they’re supporting nutrition education. Available by request only, the kit includes a roll of “I’m a Healthy Eater” stickers, seasonal counter cards, mini magazines, demo ideas, a Healthy Family Project spatula and additional resources and information from produce partners.
As part of the mission, the partner brands are making a donation to improve access to fresh produce in schools through the Foundation for Fresh Produce.
To find more resources, tips and recipes to encourage proper nutrition, visit HealthyFamilyProject.com.
Photo courtesy of Shutterstock
SOURCE:
Healthy Family Project
EDIBLES
Get creative with Easter sweets

Kid-friendly crafts that bring loved ones together
(Family Features) Holiday hams and deviled eggs may take center stage at Easter gatherings, but edible crafts offer a reminder of the magic of the season that’s found in moments spent together. Simple recipes that call for a dose of creativity are perfect ways to bring the kids to the kitchen, made even easier when all that work leads to sweet treats.
While plastic eggs may have led to a decline in good, old-fashioned egg-dyeing, there are still fun ways to bring crafts back to Easter celebrations. Consider these Kids Krafty Easter Cake Pops, which call for little ones to help dip seasonal shapes in chocolate, use cake molds and more.
Children of virtually any age can relish in the joys of using cookie cutters and decorating Easter Sugar Cookies, all with a little supervision and short list of instructions. This version shows how to make the cookies and homemade icing so you can create any color you desire for maximum creativity.
Remember, these delicious crafts don’t have to be perfect – having fun and making memories that last a lifetime are what make Easter truly special.
Visit Culinary.net to find more Easter inspiration and recipes from “Cookin’ Savvy.”
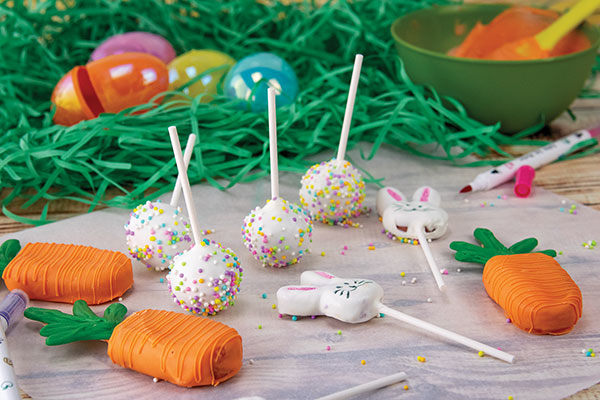
Kids Krafty Easter Cake Pops
Recipe courtesy of “Cookin’ Savvy”
- 1 box cake mix
- 1 can frosting
- 1 bunny chocolate mold
- 1 cakesicle mold
- ice pop sticks
- 1 bag white chocolate chips or melting chips
- cake pop sticks
- 1 bag orange melting chips
- 2 tablespoons canola or coconut oil, divided
- 1 bag green melting chips
- pastel sprinkles
- 1 piece hard foam (optional)
- edible markers
- Bake cake according to package instructions and let cool completely.
- Crumble cake and mix with 1/2 can frosting until dough forms. Add more frosting, if needed. Using small cookie scoop, form dough into balls and set aside. Place dough in bunny molds then pop out and set aside with balls. Place dough in cakesicle mold, insert ice pop stick in each slot and freeze 5-10 minutes.
- Melt handful of white melting chips. Stick tip of each cake pop stick in chocolate then insert into every cake ball and bunny until each has one stick. Set aside to dry.
- Remove cakesicles from freezer and pop out of molds. In bowl, melt orange melts then mix in 1 tablespoon oil and transfer to cup. Dip cakesicles and scrape off excess using rim of cup. Place on parchment paper to dry.
- In bowl, melt green melts then place in zip-top or piping bag. Cut tip off bag, pipe carrot leaves onto piece of parchment paper and let dry.
- Melt remaining white melts and mix in remaining oil. Transfer to cup and dip ball-shaped cake pops and bunnies then tap stick on edge of cup to remove excess.
- Over separate bowl, sprinkle ball-shaped pops with pastel sprinkles. To keep ball shape, let dry by sticking in piece of hard foam. Bunnies can dry face side up on parchment paper. After bunnies are dry, use edible markers to make face and color in ears.
- When carrots and leaves are dry, remelt orange melts and place in piping or zip-top bag. Cut off tip and drizzle orange over carrots. Add small line of orange on each ice pop stick and place leaves on each stick. Let dry.
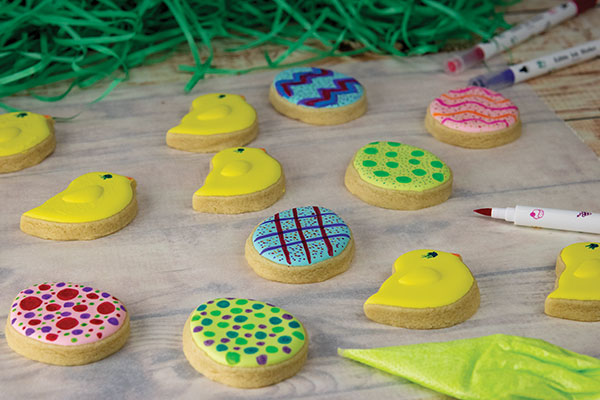
Easter Sugar Cookies
Recipe courtesy of “Cookin’ Savvy”
Icing:
- 1/3 cup meringue powder
- 1/2 cup warm water, plus additional for thinning (optional), divided
- 3 tablespoons vanilla
- 1 bag (2 pounds) powdered sugar
- 2 tablespoons corn syrup
- assorted food coloring
Cookies:
- 2 sticks unsalted butter, at room temperature
- 1 cup sugar
- 1 egg
- 1 tablespoon vanilla
- 2 teaspoons baking powder
- 1 dash salt
- 3 cups all-purpose flour
- To make icing: Mix meringue powder, 1/2 cup warm water, vanilla, powdered sugar and corn syrup. Separate into bowls and add food coloring; mix with water, as needed, to thin for piping.
- To make cookies: Heat oven to 350 F.
- Cream butter and sugar. Mix in egg, vanilla, baking powder and salt. Mix in flour 1 cup at a time to form dough. Roll dough out to 1/4-1/2-inch thickness.
- Cut into shapes, place on baking sheet and freeze 10 minutes. Bake 8-12 minutes. Cool completely before icing.
- Place icing in zip-top or piping bags and cut off tips. Put cookies on parchment paper. Trace outline first then fill in middle. Use toothpicks to smooth out.
- Let dry 6 hours and finish decorating with different icing colors or edible markers.
SOURCE:
Culinary.net
EDIBLES
Go big with a yummy bread bowl
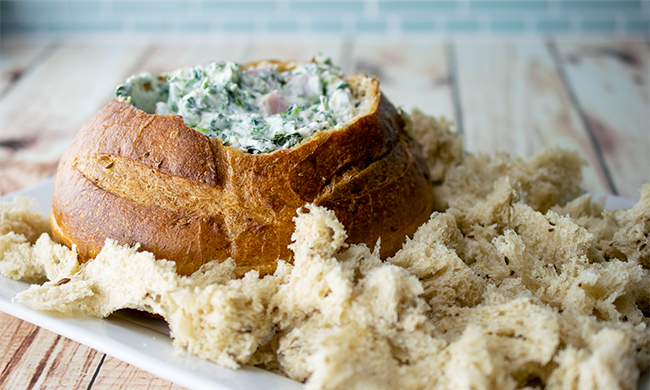
(Culinary.net) Perfect for afternoon snacking or as an appetizer, this Spinach-Ham Dip is warmed inside a bread bowl and can be served with bread cubes, crackers or tortilla chips.
Find more snack ideas at Culinary.net.
Watch video to see how to make this recipe!
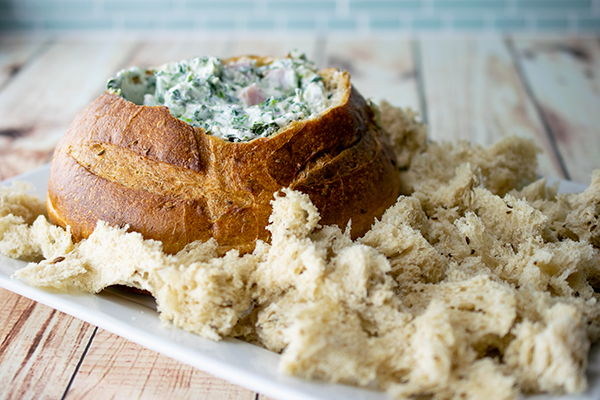
Spinach-Ham Dip
- 2 cups ricotta cheese
- 1 cup sour cream
- 1 package (10 ounces) frozen spinach, thawed and squeezed dry
- 1/4 pound ham, cubed
- 3/4 cup shredded Parmesan cheese
- 2 green onions, thinly sliced
- 1 round bread loaf (16 ounces), unsliced
- Heat oven to 350° F.
- In medium bowl, blend ricotta cheese and sour cream until smooth. Add spinach, ham, Parmesan cheese and green onions; mix until blended.
- Cut 1-2-inch diameter circle out of top of bread loaf. Reserve top. Remove bread inside loaf, leaving about 1 inch along sides. Pour cheese mixture into bread bowl. Replace top. Cover bread loaf in aluminum foil and bake 60 minutes, or until warmed through.
- Take bread removed from inside bread bowl and cut into dipping sized chunks.
- Remove bread from aluminum foil and place on platter. Scatter bread chunks around bread bowl to use for dunking in cheese sauce.
SOURCE:
Culinary.net
-

 NEWS1 year ago
2 hurt, 1 jailed after shooting incident north of Nocona
-

 NEWS5 months ago
Suspect indicted, jailed in Tia Hutson murder
-

 NEWS12 months ago
SO investigating possible murder/suicide
-

 NEWS1 year ago
Wreck takes the life of BHS teen, 16
-

 NEWS9 months ago
Murder unsolved – 1 year later Tia Hutson’s family angry, frustrated with no arrest
-

 NEWS12 months ago
Sheriff’s office called out to infant’s death
-

 NEWS1 year ago
Bowie Police face three-hour standoff after possible domestic fight
-

 NEWS1 year ago
Driver stopped by a man running into the street, robbed at knifepoint


