EDIBLES
Create a truly memorable summer menu
(Family Features) Summer days are often spent with family and friends, soaking in the sun’s rays and enjoying outdoor living with warm-weather activities. Complement this year’s summertime excitement with food that matches your enthusiasm for the season.
Your menu can start with a fruity dip and a salad before diving into steak for the main course and a kid-friendly treat to top it all off. These recipes make the most of what summer has to offer with fresh fruits and veggies, bright and refreshing greens, tender cuts of meat and frozen treats that celebrate those memorable moments together.
Find more summer recipe inspiration at Culinary.net.
Dip Up a Good Time
Whether your summer days include planning extravagant meals or your on-the-go lifestyle calls for quick and easy recipes, simple snacks can fit a wide variety of menus. Dips are a perfect solution for afternoon pick-me-ups or evening appetizers when the whole family comes together.
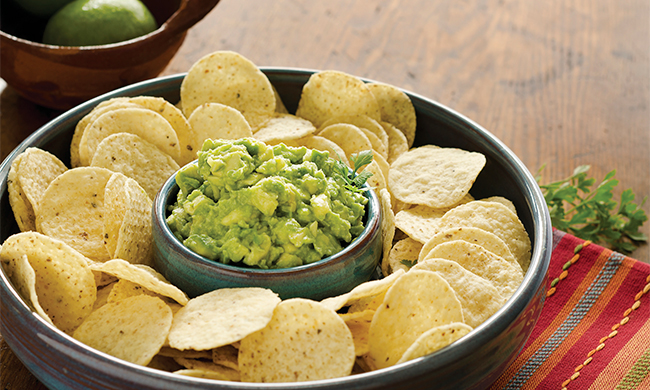
This Apple Guacamole can be made in mere minutes, making it an ideal shareable among loved ones, by combining mashed avocados and seasonings with chopped Granny Smith apple pieces.
Visit Culinary.net for more snack ideas.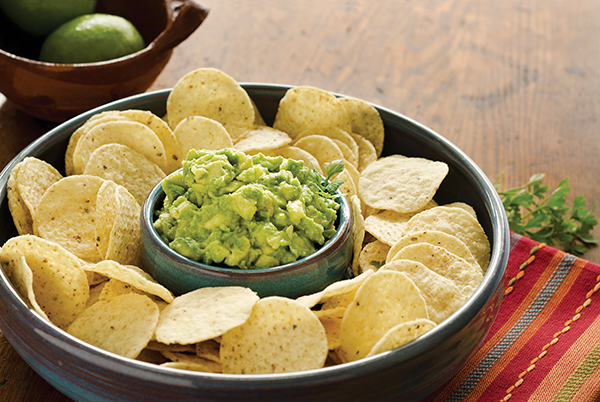
Apple Guacamole
Recipe adapted from the Meredith Corporation
Prep time: 10 minutes
Servings: 8-10
- 3 ripe avocados, halved and pitted
- 1/2 cup finely chopped Vidalia onion
- 1/2 cup snipped fresh cilantro
- 1 lime, juice only
- bottled hot pepper sauce, to taste
- 1 Granny Smith apple, peeled, cored and finely chopped
- kosher salt, to taste
- tortilla chips
- In bowl, use fork to mash avocados, onion, cilantro, lime juice and hot pepper sauce to desired consistency. Stir in apple and season with salt, to taste.
- Serve with tortilla chips.
Savor a Bite of Steak
A hearty flavor profile and perfectly prepared, high-quality meat can make a summer meal truly spectacular, especially when paired with fresh veggies in a protein-packed sandwich.
Inspired by Vietnamese tradition, this Steak Banh Mi recipe – which features tender grass-fed flat iron steak, pickled carrots, bright lettuce and crunchy cucumbers – is sure to be a crowd-pleaser at your next summer gathering. Take your taste buds to new heights with Silver Fern Farms natural cuts of 100% grass-fed beef from New Zealand, which is minimally processed with no added growth hormones or antibiotics. There, the animals roam and graze freely over lush green hills and pastures, resulting in lean, flavorful, nutritious meat that tastes just as nature intended.
Visit silverfernfarms.com for more inspiration.
Steak Banh Mi
Prep time: 2 hours
Cook time: 15 minutes
Servings: 2
- 10 ounces Silver Fern Farms New Zealand grass-fed beef flat iron steak
- 2 teaspoons hoisin sauce
- 2 teaspoons soy sauce
- 2 teaspoons honey
- 1 teaspoon fish sauce
- 1 clove garlic, minced
- 1 teaspoon, plus 1/2 cup, rice vinegar, divided
- 1/8 teaspoon five-spice powder
- 2 tablespoons sugar
- 1 pinch salt
- 1 small carrot, cut into matchsticks
- 1 tablespoon vegetable oil
- 1/4 cup water
- 2 Vietnamese baguettes or dinner rolls
- 1/4 cup mayonnaise
- 4 Batavia lettuce leaves
- 1/4 cup cilantro, chopped
- 1 Persian cucumber, sliced
- Remove steak from packaging and set aside 10 minutes. Once steak reaches room temperature, place steak in deep plate or storage container. In small bowl, combine hoisin sauce, soy sauce, honey, fish sauce, garlic, 1 teaspoon rice vinegar and five-spice powder; pour over steak. Cover and marinate in fridge at least 2 hours, or overnight.
- In small pot over medium heat, heat remaining rice vinegar, sugar and salt. Cook and stir until sugar and salt dissolve. Remove from heat and let cool.
- Place carrots in deep plate or storage container. Pour cooled pickling liquid over carrots. Set aside to marinate.
- Remove steak from marinade and pat dry. Reserve marinade.
- Heat oven to 325 F.
- Heat heavy-bottomed pan over high heat and add oil. Once oil begins to smoke, add steak. Sear both sides, about 1 minute per side. Lower heat to medium.
- Add reserved marinade and water to pan. Cook, covered, 3 minutes, removing lid to flip meat occasionally. Remove lid and let sauce reduce 1 minute, or until slightly thickened.
- Transfer steak and sauce to large plate and let rest 10 minutes before slicing.
- Toast baguettes in oven 5 minutes. Let cool 5-10 minutes.
- Slice baguettes along middle without cutting through.
- Slice steak into thin pieces.
- Spread mayonnaise on baguettes and add 1-2 lettuce leaves to each. Layer steak on lettuce leaves followed by cilantro, cucumbers and pickled carrots. Slice baguette into two sandwiches.
Go for Satisfying Summer Greens
Many summer meals start with a simple yet satisfying appetizer: salad. This year, make sure you set the table with a bright, delightful bowl of greens that sets the tone for an enjoyable and festive meal with loved ones.
This Apple, Strawberry, Blueberry Salad calls for an array of fruits, including a homemade blueberry dressing, paired with Fresh Express 5-Lettuce Mix for a fresh and flavorful base with pecan halves to add crunch. The salads are thoroughly washed, rinsed and gently dried then sealed in Keep-Crisp bags to maintain freshness.
Find more salad inspiration at freshexpress.com.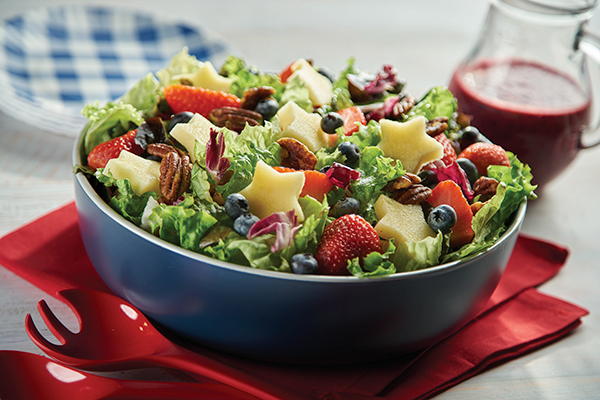
Apple, Strawberry, Blueberry Salad
Total Time: 30 minutes
Servings: 6
Blueberry Dressing:
- 2 cups fresh blueberries
- 1/4 cup balsamic vinegar
- 2 tablespoons honey
- 1 tablespoon lemon juice
- 1/2 cup olive oil
- salt, to taste
- pepper, to taste
- 2 large apples
- 2 packages (6 ounces each) Fresh Express 5-Lettuce Mix
- 1 pint strawberries, cut in half
- 1 pint blueberries
- 1/2 cup pecan halves, toasted
- blueberry dressing
- To make blueberry dressing: In blender, process blueberries, balsamic vinegar, honey, lemon juice, olive oil and salt and pepper, to taste, until smooth. Set aside.
- To prepare salad: Cut apples into 1/4-inch thick slices. Using 1-1/2-inch diameter star-shaped cutter, cut apple slices into stars.
- Place lettuce mix in large bowl; add apples, strawberries and blueberries. Sprinkle with pecans. Before serving, drizzle each salad with blueberry dressing.
Sweet, Summery Treats
After some fun in the pool and time spent in the sun, a cooling treat is often the perfect way to cap off a summer day. Fresh fruits make those sweet eats even tastier and easier by making dessert in the morning and letting it freeze while you enjoy the warmth outdoors.
These Watermelon Berry Frozen Pops make dessert about as simple as possible by blending watermelon, blueberries, raspberries and honey before adding to ice pop molds and freezing throughout the day. With the addition of refreshing watermelon, you’re opting for a flavorful fruit that includes just 80 calories and no fat while providing an excellent source of vitamin C (25%) and higher levels of lycopene (12.7 milligrams per 2-cup serving) – an antioxidant being studied for its role in sun protection – than any other fresh fruit or vegetable.
To find more summertime snacks, meals and treats, visit watermelon.org.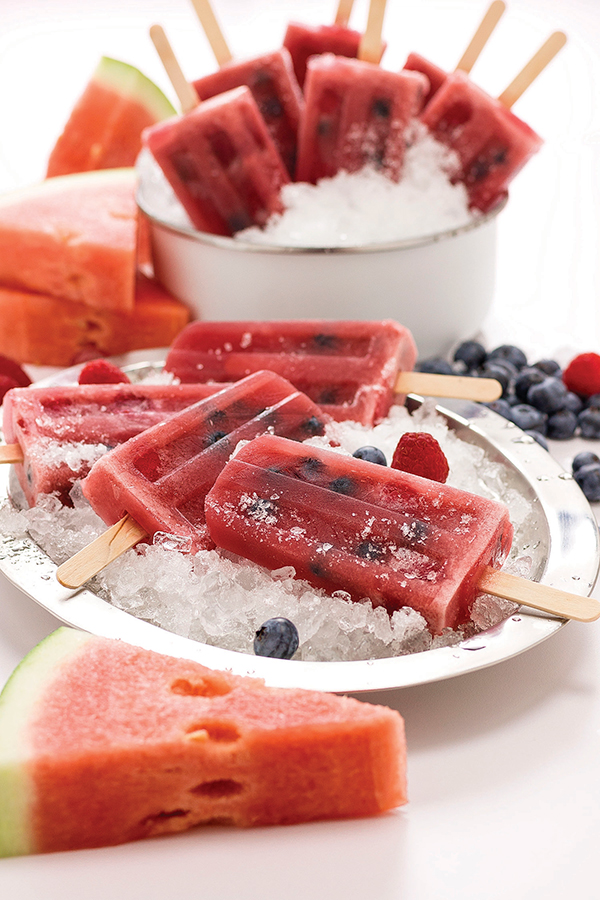
Watermelon Berry Frozen Pops
Servings: 8
- 6 cups watermelon
- 1 cup blueberries, divided
- 1 cup raspberries, divided
- 3 tablespoons honey
- In blender, blend watermelon, 1/2 cup blueberries, 1/2 cup raspberries and honey until smooth. Press through fine mesh strainer to remove pulp and seeds.
- Fill ice pop molds 3/4 full with liquid. Add remaining whole blueberries and raspberries to molds. Insert sticks and freeze at least 4 hours, or until completely frozen.
Photo courtesy of Getty Images (Apple Guacamole)
SOURCE:
Beef + Lamb New Zealand
Fresh Express
National Watermelon Promotion Board
EDIBLES
Empower yourself with nutrition know-how

(Family Features) Eating a balanced diet with fruits, vegetables, whole grains, dairy and proteins is a crucial first step toward a healthy life.
Even with hectic schedules and convenience foods readily available, it’s important to incorporate habits like regular family meals and meal planning so you have a variety of better-for-you snacks and recipes on hand. Also important is leading by example and modeling healthy eating habits to help improve overall nutrition for you and your family members, especially children.
If you are looking for ways to make nutrition fun, the experts at Healthy Family Project, along with its fruit and vegetable partners, are offering an online nutrition resource center as part of Mission for Nutrition 2024.
Geared toward dietitians, nutrition professionals and anyone involved in nutrition education, the resource center is a one-stop shop to make nutrition education fun and inspiring, featuring more than 600 dietitian-approved recipes; tips to pick, prepare and store more than 50 fruits and vegetables during every season; a podcast, e-cookbook and monthly newsletter; and free downloadables, infographics, activities for kids and more.
Dietitians and nutrition professionals can sign up to receive this year’s Mission for Nutrition kit, which is full of resources to use in classrooms, in-store with customers or wherever they’re supporting nutrition education. Available by request only, the kit includes a roll of “I’m a Healthy Eater” stickers, seasonal counter cards, mini magazines, demo ideas, a Healthy Family Project spatula and additional resources and information from produce partners.
As part of the mission, the partner brands are making a donation to improve access to fresh produce in schools through the Foundation for Fresh Produce.
To find more resources, tips and recipes to encourage proper nutrition, visit HealthyFamilyProject.com.
Photo courtesy of Shutterstock
SOURCE:
Healthy Family Project
EDIBLES
Get creative with Easter sweets

Kid-friendly crafts that bring loved ones together
(Family Features) Holiday hams and deviled eggs may take center stage at Easter gatherings, but edible crafts offer a reminder of the magic of the season that’s found in moments spent together. Simple recipes that call for a dose of creativity are perfect ways to bring the kids to the kitchen, made even easier when all that work leads to sweet treats.
While plastic eggs may have led to a decline in good, old-fashioned egg-dyeing, there are still fun ways to bring crafts back to Easter celebrations. Consider these Kids Krafty Easter Cake Pops, which call for little ones to help dip seasonal shapes in chocolate, use cake molds and more.
Children of virtually any age can relish in the joys of using cookie cutters and decorating Easter Sugar Cookies, all with a little supervision and short list of instructions. This version shows how to make the cookies and homemade icing so you can create any color you desire for maximum creativity.
Remember, these delicious crafts don’t have to be perfect – having fun and making memories that last a lifetime are what make Easter truly special.
Visit Culinary.net to find more Easter inspiration and recipes from “Cookin’ Savvy.”
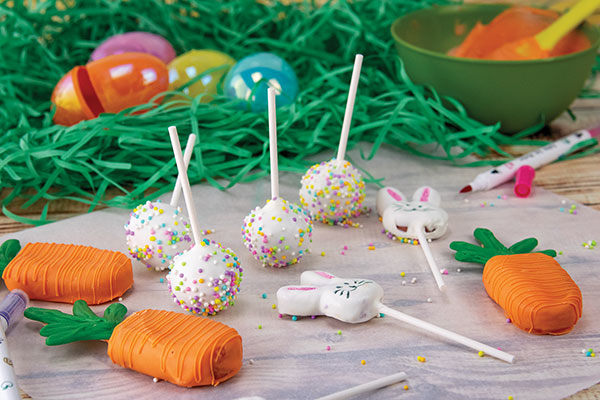
Kids Krafty Easter Cake Pops
Recipe courtesy of “Cookin’ Savvy”
- 1 box cake mix
- 1 can frosting
- 1 bunny chocolate mold
- 1 cakesicle mold
- ice pop sticks
- 1 bag white chocolate chips or melting chips
- cake pop sticks
- 1 bag orange melting chips
- 2 tablespoons canola or coconut oil, divided
- 1 bag green melting chips
- pastel sprinkles
- 1 piece hard foam (optional)
- edible markers
- Bake cake according to package instructions and let cool completely.
- Crumble cake and mix with 1/2 can frosting until dough forms. Add more frosting, if needed. Using small cookie scoop, form dough into balls and set aside. Place dough in bunny molds then pop out and set aside with balls. Place dough in cakesicle mold, insert ice pop stick in each slot and freeze 5-10 minutes.
- Melt handful of white melting chips. Stick tip of each cake pop stick in chocolate then insert into every cake ball and bunny until each has one stick. Set aside to dry.
- Remove cakesicles from freezer and pop out of molds. In bowl, melt orange melts then mix in 1 tablespoon oil and transfer to cup. Dip cakesicles and scrape off excess using rim of cup. Place on parchment paper to dry.
- In bowl, melt green melts then place in zip-top or piping bag. Cut tip off bag, pipe carrot leaves onto piece of parchment paper and let dry.
- Melt remaining white melts and mix in remaining oil. Transfer to cup and dip ball-shaped cake pops and bunnies then tap stick on edge of cup to remove excess.
- Over separate bowl, sprinkle ball-shaped pops with pastel sprinkles. To keep ball shape, let dry by sticking in piece of hard foam. Bunnies can dry face side up on parchment paper. After bunnies are dry, use edible markers to make face and color in ears.
- When carrots and leaves are dry, remelt orange melts and place in piping or zip-top bag. Cut off tip and drizzle orange over carrots. Add small line of orange on each ice pop stick and place leaves on each stick. Let dry.
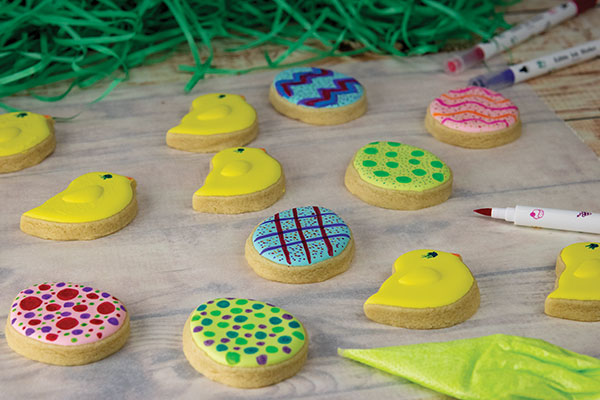
Easter Sugar Cookies
Recipe courtesy of “Cookin’ Savvy”
Icing:
- 1/3 cup meringue powder
- 1/2 cup warm water, plus additional for thinning (optional), divided
- 3 tablespoons vanilla
- 1 bag (2 pounds) powdered sugar
- 2 tablespoons corn syrup
- assorted food coloring
Cookies:
- 2 sticks unsalted butter, at room temperature
- 1 cup sugar
- 1 egg
- 1 tablespoon vanilla
- 2 teaspoons baking powder
- 1 dash salt
- 3 cups all-purpose flour
- To make icing: Mix meringue powder, 1/2 cup warm water, vanilla, powdered sugar and corn syrup. Separate into bowls and add food coloring; mix with water, as needed, to thin for piping.
- To make cookies: Heat oven to 350 F.
- Cream butter and sugar. Mix in egg, vanilla, baking powder and salt. Mix in flour 1 cup at a time to form dough. Roll dough out to 1/4-1/2-inch thickness.
- Cut into shapes, place on baking sheet and freeze 10 minutes. Bake 8-12 minutes. Cool completely before icing.
- Place icing in zip-top or piping bags and cut off tips. Put cookies on parchment paper. Trace outline first then fill in middle. Use toothpicks to smooth out.
- Let dry 6 hours and finish decorating with different icing colors or edible markers.
SOURCE:
Culinary.net
EDIBLES
Go big with a yummy bread bowl
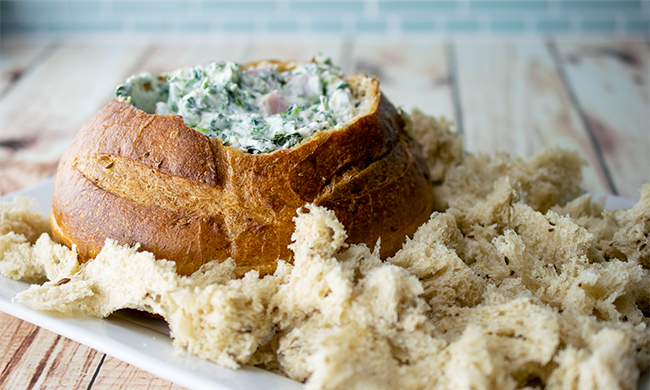
(Culinary.net) Perfect for afternoon snacking or as an appetizer, this Spinach-Ham Dip is warmed inside a bread bowl and can be served with bread cubes, crackers or tortilla chips.
Find more snack ideas at Culinary.net.
Watch video to see how to make this recipe!
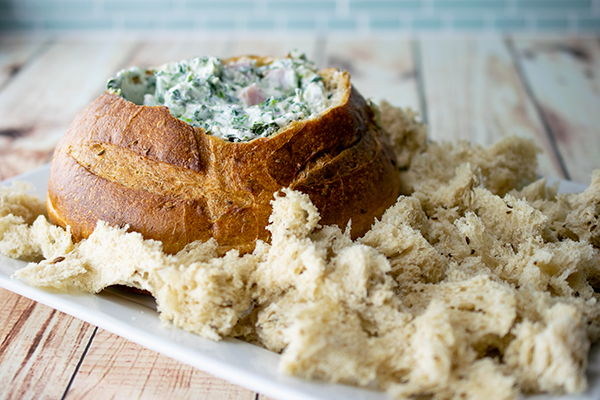
Spinach-Ham Dip
- 2 cups ricotta cheese
- 1 cup sour cream
- 1 package (10 ounces) frozen spinach, thawed and squeezed dry
- 1/4 pound ham, cubed
- 3/4 cup shredded Parmesan cheese
- 2 green onions, thinly sliced
- 1 round bread loaf (16 ounces), unsliced
- Heat oven to 350° F.
- In medium bowl, blend ricotta cheese and sour cream until smooth. Add spinach, ham, Parmesan cheese and green onions; mix until blended.
- Cut 1-2-inch diameter circle out of top of bread loaf. Reserve top. Remove bread inside loaf, leaving about 1 inch along sides. Pour cheese mixture into bread bowl. Replace top. Cover bread loaf in aluminum foil and bake 60 minutes, or until warmed through.
- Take bread removed from inside bread bowl and cut into dipping sized chunks.
- Remove bread from aluminum foil and place on platter. Scatter bread chunks around bread bowl to use for dunking in cheese sauce.
SOURCE:
Culinary.net
-

 NEWS1 year ago
2 hurt, 1 jailed after shooting incident north of Nocona
-

 NEWS5 months ago
Suspect indicted, jailed in Tia Hutson murder
-

 NEWS12 months ago
SO investigating possible murder/suicide
-

 NEWS1 year ago
Wreck takes the life of BHS teen, 16
-

 NEWS8 months ago
Murder unsolved – 1 year later Tia Hutson’s family angry, frustrated with no arrest
-

 NEWS12 months ago
Sheriff’s office called out to infant’s death
-

 NEWS1 year ago
Bowie Police face three-hour standoff after possible domestic fight
-

 NEWS1 year ago
Driver stopped by a man running into the street, robbed at knifepoint


