
EDIBLES
A full day of family favorites

(Family Features) Each day calls for a multitude of meals and snacks to make sure the entire family is energized for the classroom, the office and evening activities together. From breakfast to dinner and sweet rewards after a long day of school and work, it’s important to keep the family on schedule with favorite recipes.
Visit Culinary.net to find more family-friendly dishes.
Say Goodbye to Basic Breakfast
The same old breakfast routine week after week can become tiresome and dull, especially for little ones.
It’s time to add something new to the table with fresh ingredients and simple instructions to enhance the start to busy weekdays. Try this recipe for an Easy Breakfast Quiche that is sure to have your senses swirling with every bite while fueling kiddos for the day ahead.
Find more breakfast recipes at Culinary.net.
Easy Breakfast Quiche
Servings: 12
- 1 package (10 ounces) frozen broccoli with cheese
- 12 slices bacon, chopped
- 1/2 cup green onions, sliced
- 1 cup mushrooms, sliced
- 4 eggs
- 1 cup milk
- 1 1/2 cups shredded cheese, divided
- 2 frozen deep-dish pie shells (9 inches each)
- Heat oven to 350 F.
- In medium bowl, add broccoli and cheese contents from package. Microwave 5 minutes, or until cheese is saucy. Set aside.
- In skillet, cook chopped bacon 4 minutes. Add green onions; cook 2 minutes. Add mushrooms; cook 4 minutes, or until bacon is completely cooked and mushrooms are tender. Drain onto paper towel over plate. Set aside.
- In medium bowl, whisk eggs and milk until combined. Add broccoli and cheese mixture. Add 1 cup cheese. Stir to combine. Set aside.
- In pie shells, divide drained bacon mixture evenly. Divide broccoli mixture evenly and pour over bacon mixture. Sprinkle remaining cheese over both pies.
- Bake 40 minutes.
- Allow to cool at least 12 minutes before serving.
Note: To keep edges of crust from burning, place aluminum foil over pies for first 20 minutes of cook time. Remove after 20 minutes and allow to cook uncovered until completed.

A Tasty Take on School Night Tradition
Put a twist on taco Tuesday and get outside the burger bun with this easy weekday dinner idea.
Pick up a few simple ingredients you can feel good about feeding your family including Coleman Natural uncured bacon, which has no artificial ingredients or preservatives and is sourced from American family farms that humanely raise their animals with no antibiotics or added hormones.
For more creative, kid-friendly recipes, visit ColemanNatural.com/recipes.
Bacon Cheeseburger Tacos
Servings: 4
- 8-10 slices Coleman Natural bacon
- 1 pound ground beef
- salt
- pepper
- 4 slices cheese
- 1 cup canola oil
- 8 soft corn tortillas
- 1 medium red onion, sliced
- 1 avocado, skin removed and sliced
- 1 medium tomato, chopped
- 8-10 romaine lettuce leaves, torn
- In large frying pan or cast-iron skillet, cook bacon until crispy. Remove slices from skillet to drain on paper towel. Pour bacon fat from pan.
- Shape ground beef into four burger patties, seasoning both sides of patties with salt and pepper.
- In skillet over medium-high heat, cook burgers about 4 minutes per side for medium doneness.
- Top each burger with one slice cheese then cover skillet with lid and cook until cheese melts. Remove from heat.
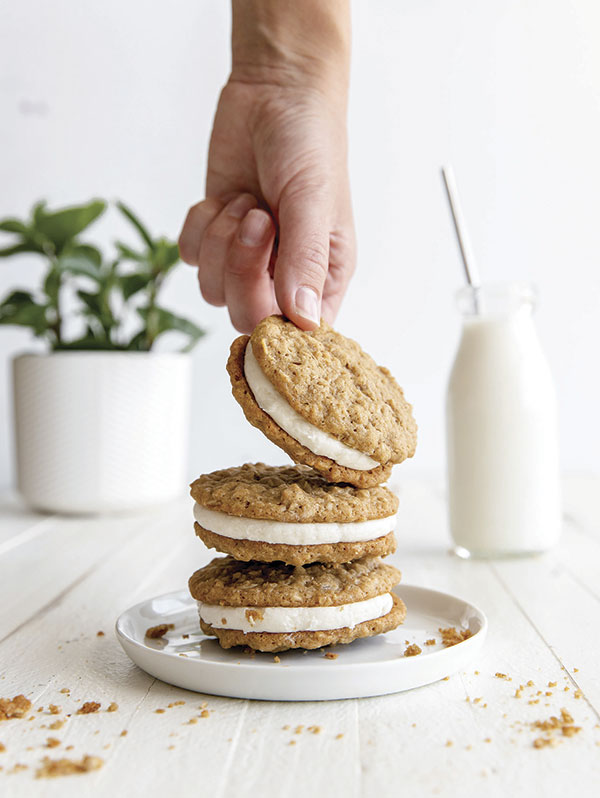
Cap Off School Nights with a Creamy Cookie
Once the school day is done, homework is complete and dinner is finished, there’s just one thing left for many families: dessert. After all the day’s accomplishments, sometimes a sweet treat is the perfect way to reward kiddos for their hard work in the classroom.
These Oatmeal Creme Cookies are a tasty example of a tempting dish that comes together in less than half an hour, so you don’t add more stress to a busy day. Plus, with high-quality ingredients like C&H Sugars, they can keep the whole family happy while allowing little ones to help in the kitchen.
Visit chsugar.com for more back-to-school recipe inspiration.
Oatmeal Creme Cookies
Recipe courtesy of chef Haley Williams @IfYouGiveABlondeAKitchen
Prep time: 10 minutes
Cook time: 12 minutes
Oatmeal Cookies:
- 1 1/2 cups all-purpose flour
- 1 teaspoon baking soda
- 1/2 teaspoon salt
- 1 teaspoon ground cinnamon
- 1/4 teaspoon ground cloves (optional)
- 1 cup (2 sticks) unsalted butter, at room temperature
- 3/4 cup Dark Brown Sugar
- 1/2 cup Organic Raw Cane Sugar
- 2 large eggs, at room temperature
- 1 1/2 teaspoons pure vanilla extract
- 3 cups quick oats
Creme Filling:
- 3/4 cup unsalted butter, at room temperature
- 2 cups Confectioners’ Sugar
- 1-2 tablespoons heavy cream
- 1 teaspoon pure vanilla extract
- 1 pinch salt
- To make oatmeal cookies: Preheat oven to 350 F. Line two cookie sheets with parchment paper and set aside.
- In large bowl, whisk flour, baking soda, salt, cinnamon and cloves, if desired. Set aside.
- In bowl of stand mixer, beat butter, dark brown sugar and raw cane sugar on medium-high speed until light and creamy, about 1 minute. Add eggs and vanilla; beat until combined. Scrape down sides and bottom of bowl.
- With mixer on low, slowly add dry ingredients to wet ingredients. Mix until combined while avoiding overmixing. Add oats and mix until incorporated.
- Scoop about 2 tablespoons dough onto prepared cookie sheet. Space dough balls at least 3 inches apart. Bake 10-12 minutes, or until edges are light brown. Let cookies cool 5 minutes before transferring to wire rack to cool completely.
- To make creme filling: In bowl of stand mixer, beat butter on medium-high speed until light in color, about 3 minutes. With mixer on low, gradually add confectioners’ sugar and mix until well combined, about 1 minute. Add 1 tablespoon heavy cream, vanilla and salt. Beat on medium-high speed until fluffy. If filling is too thick, add second tablespoon heavy cream.
- Once cookies cool, pipe or spread creme filling on flat sides of half the cookies. Top with remaining cookies to form sandwiches.
Simplify dinnertime with convenient recipes and digital tools
(Family Features) While meals savored with loved ones are intended to produce smiles and shared moments, the process of grocery shopping, planning and cooking has become a chore for many families. Take the first step toward bringing back the joy and magic of making your favorite foods with tools that do the work for you.
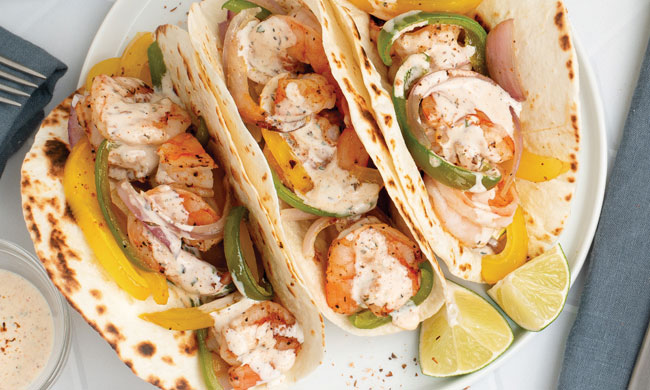
For example, the all-in-one Albertsons Meal Plans and Recipes tool allows you to focus on what you want to eat rather than what you need to buy as it empowers everyday home cooks to plan, shop and prepare personalized recipes based on dietary preferences, allergies or family likes and dislikes. The app features a library of 9,000 exclusive recipes created by professional chefs (with new recipes added each month) and includes tasty dishes such as Sheet Pan Cajun Shrimp Fajitas with Bell Pepper, Onion and Spicy Ranch; Cheese Tortellini and Cauliflower with Creamy Spinach Marinara; and Garlic-Parmesan Chicken Tenders with Green Beans and Honey Mustard Dip.
The free digital tool also includes an artificial intelligence-powered “Scan Your Own Recipe” feature that allows you to snap a photo with your phone of grandma’s handwritten, not-so-secret recipe and transforms it into a digital version saved in the app. Recipes are instantly turned into shoppable ingredients and added to your cart for quick, convenient checkout. Now, you can turn all of your recipes into a digital library for quick and easy access in one place. No more flipping through cookbooks or recipe cards searching for your favorites.
Designed to provide culinary inspiration throughout the week while saving time and money, the app also features a budget tracker and hands-free cooking mode with a step-by-step timer.
“The Albertsons Meal Plans tool is the ultimate life hack,” said Jill Pavlovich, senior vice president of digital customer experience for Albertsons Cos. “This all-in-one app makes it simple for anyone to plan, shop and prepare inspiring recipes from anywhere – whether it is an old family favorite, a best-seller from a favorite food blogger or one of our 9,000 delicious recipes. Best of all, it’s completely free to use on our grocery app and website.”
The tool is available on the store apps and websites across the Albertsons Cos. banner of stores including Albertsons, Safeway, Vons, Jewel-Osco, Shaw’s, Acme, Tom Thumb, Randalls, United Supermarkets, Pavilions, Star Market, Haggen, Carrs, Kings Food Markets and Balducci’s Food Lovers Market.
Find more information and a seemingly endless collection of recipes at Albertsons.com.
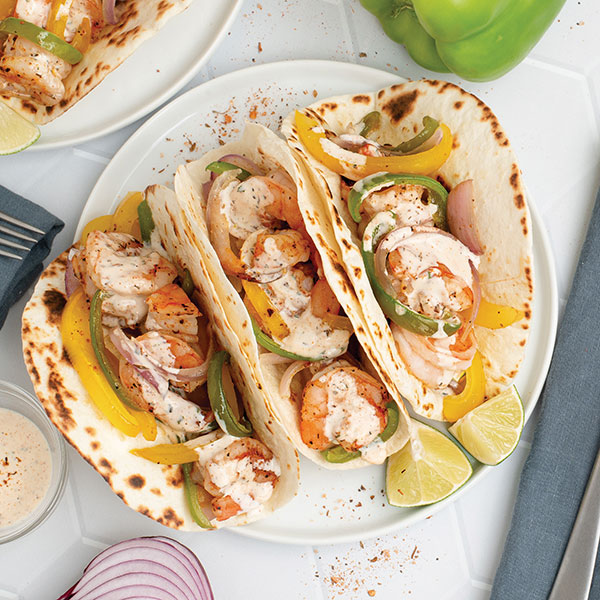
Sheet Pan Cajun Shrimp Fajitas with Bell Pepper, Onion and Spicy Ranch
Recipe courtesy of Albertsons
Total time: 30 minutes
Servings: 4
- 2 green bell peppers
- 2 yellow bell peppers
- 1 lime
- 1 medium red onion
- 2 tablespoons extra-virgin olive oil
- 1 1/2 pounds raw, peeled shrimp, fresh or frozen
- 5 teaspoons Cajun seasoning, divided
- 1 teaspoon salt
- 1/2cup ranch dressing
- 12 small flour tortillas
- Preheat oven to 450 F.
- Wash and dry green bell peppers, yellow bell peppers and lime.
- Trim, seed and slice bell peppers lengthwise into thin strips; transfer to large baking sheet.
- Peel, halve and slice onion lengthwise into thin pieces; add to baking sheet with bell peppers.
- Drizzle veggies with oil, toss to combine and spread in even layer. Bake until veggies have softened slightly, about 5 minutes.
- If using frozen shrimp, place them in colander and run under cold water to thaw slightly. Place shrimp on clean towel or paper towels and pat dry.
- Remove baking sheet from oven. Arrange shrimp over veggies then sprinkle with 4 teaspoons Cajun seasoning and salt; toss to combine and spread in even layer.
- Bake until veggies are tender and shrimp are cooked through, 5-7 minutes. Remove from oven.
- Cut lime into wedges.
- In small bowl, stir ranch dressing and remaining Cajun seasoning.
- Warm tortillas in skillet, oven or microwave, if desired.
- Divide tortillas between plates and fill with shrimp and veggies; drizzle with spicy ranch and serve with squeeze of lime.
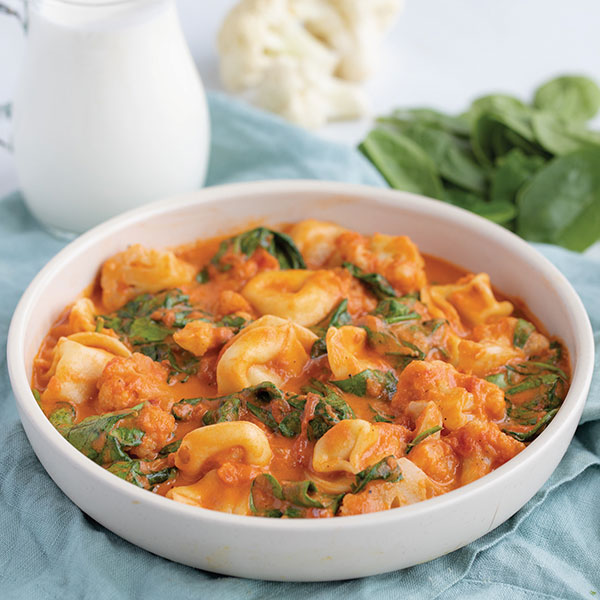
Cheese Tortellini and Cauliflower with Creamy Spinach Marinara
Recipe courtesy of Albertsons
Total time: 20 minutes
Servings: 4
- 2 bags (10 ounces each) cauliflower florets
- 18 ounces cheese tortellini, fresh or frozen
- 1/2 tablespoon salt
- 1 jar (24 ounces) marinara sauce
- 8 fluid ounces heavy whipping cream
- 1/2 teaspoon basil, dried
- 1/4 teaspoon black pepper
- 2 packages (5 ounces each) baby spinach
- Fill large pot halfway with hot water, cover and bring to boil. Uncover then add cauliflower, tortellini and salt; stir for a few seconds. Cook, stirring occasionally, until just tender, about 5 minutes, or cook according to package instructions.
- In separate large pot over medium heat, stir marinara sauce, cream, basil and black pepper to combine and bring sauce to simmer. Once simmering, reduce heat to medium-low and cook until slightly thickened, 3-4 minutes.
- Wash and dry spinach.
- When sauce has thickened, add spinach to pot in handfuls, waiting for spinach to wilt slightly before adding next handful. Remove from heat and cover to keep warm.
- When cauliflower and tortellini are done, drain and add to pot with creamy marinara sauce; stir to combine.
- To serve, divide pasta between plates or bowls.
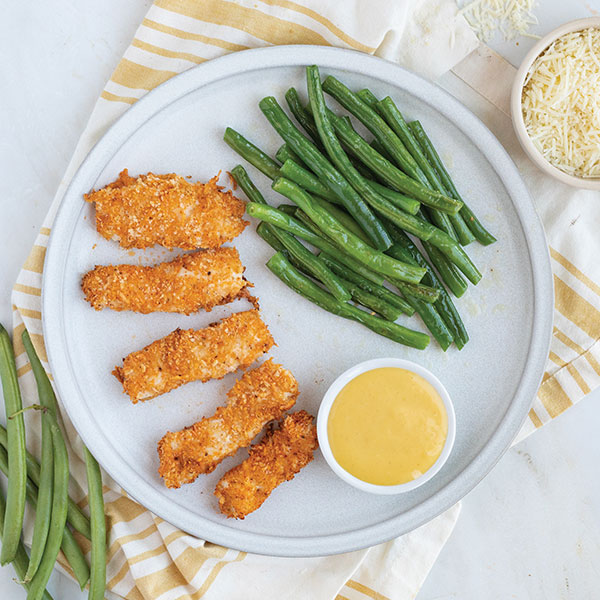
Garlic-Parmesan Chicken Tenders with Green Beans and Honey Mustard Dip
Recipe courtesy of Albertsons
Total time: 30 minutes
Servings: 4
- 2 tablespoons extra-virgin olive oil, divided
- 1/4 cup mayonnaise
- 1 teaspoon garlic powder
- 1 teaspoon salt, divided
- 2/3 cup Parmesan cheese, shredded
- 1/2 cup panko breadcrumbs
- 1/2 teaspoon paprika
- 1 1/2 pounds boneless, skinless chicken breasts
- 1 1/2 pounds green beans
- 1/2 cup honey mustard dressing
- Preheat oven to 450 F. Coat baking sheet with 2 teaspoons oil.
- In medium bowl, stir mayo, garlic powder and 1/2 teaspoon salt to combine.
- In separate medium bowl, stir Parmesan, breadcrumbs and paprika to combine.
- Pat chicken dry with paper towels and slice into 3/4-inch tenders. Add to bowl with mayo mixture and toss to coat.
- Working in batches, dredge tenders in breadcrumb coating, pressing to adhere. Transfer to baking sheet.
- Bake until tenders start to turn golden, about 10 minutes.
- On clean cutting board, wash, dry and trim green beans. Set aside.
- When chicken is golden, flip and bake until cooked through, 6-8 minutes. Remove from oven.
- Preheat large skillet over medium-high heat.
- Add remaining oil and swirl to coat bottom. Add green beans and remaining salt; cook, stirring occasionally, until tender-crisp, 4-5 minutes. Remove from heat.
- Divide chicken tenders and green beans between plates. Serve with dressing for dipping.
SOURCE:
Albertsons

(Family Features) Eating a balanced diet with fruits, vegetables, whole grains, dairy and proteins is a crucial first step toward a healthy life.
Even with hectic schedules and convenience foods readily available, it’s important to incorporate habits like regular family meals and meal planning so you have a variety of better-for-you snacks and recipes on hand. Also important is leading by example and modeling healthy eating habits to help improve overall nutrition for you and your family members, especially children.
If you are looking for ways to make nutrition fun, the experts at Healthy Family Project, along with its fruit and vegetable partners, are offering an online nutrition resource center as part of Mission for Nutrition 2024.
Geared toward dietitians, nutrition professionals and anyone involved in nutrition education, the resource center is a one-stop shop to make nutrition education fun and inspiring, featuring more than 600 dietitian-approved recipes; tips to pick, prepare and store more than 50 fruits and vegetables during every season; a podcast, e-cookbook and monthly newsletter; and free downloadables, infographics, activities for kids and more.
Dietitians and nutrition professionals can sign up to receive this year’s Mission for Nutrition kit, which is full of resources to use in classrooms, in-store with customers or wherever they’re supporting nutrition education. Available by request only, the kit includes a roll of “I’m a Healthy Eater” stickers, seasonal counter cards, mini magazines, demo ideas, a Healthy Family Project spatula and additional resources and information from produce partners.
As part of the mission, the partner brands are making a donation to improve access to fresh produce in schools through the Foundation for Fresh Produce.
To find more resources, tips and recipes to encourage proper nutrition, visit HealthyFamilyProject.com.
Photo courtesy of Shutterstock
SOURCE:
Healthy Family Project

Kid-friendly crafts that bring loved ones together
(Family Features) Holiday hams and deviled eggs may take center stage at Easter gatherings, but edible crafts offer a reminder of the magic of the season that’s found in moments spent together. Simple recipes that call for a dose of creativity are perfect ways to bring the kids to the kitchen, made even easier when all that work leads to sweet treats.
While plastic eggs may have led to a decline in good, old-fashioned egg-dyeing, there are still fun ways to bring crafts back to Easter celebrations. Consider these Kids Krafty Easter Cake Pops, which call for little ones to help dip seasonal shapes in chocolate, use cake molds and more.
Children of virtually any age can relish in the joys of using cookie cutters and decorating Easter Sugar Cookies, all with a little supervision and short list of instructions. This version shows how to make the cookies and homemade icing so you can create any color you desire for maximum creativity.
Remember, these delicious crafts don’t have to be perfect – having fun and making memories that last a lifetime are what make Easter truly special.
Visit Culinary.net to find more Easter inspiration and recipes from “Cookin’ Savvy.”

Kids Krafty Easter Cake Pops
Recipe courtesy of “Cookin’ Savvy”
- 1 box cake mix
- 1 can frosting
- 1 bunny chocolate mold
- 1 cakesicle mold
- ice pop sticks
- 1 bag white chocolate chips or melting chips
- cake pop sticks
- 1 bag orange melting chips
- 2 tablespoons canola or coconut oil, divided
- 1 bag green melting chips
- pastel sprinkles
- 1 piece hard foam (optional)
- edible markers
- Bake cake according to package instructions and let cool completely.
- Crumble cake and mix with 1/2 can frosting until dough forms. Add more frosting, if needed. Using small cookie scoop, form dough into balls and set aside. Place dough in bunny molds then pop out and set aside with balls. Place dough in cakesicle mold, insert ice pop stick in each slot and freeze 5-10 minutes.
- Melt handful of white melting chips. Stick tip of each cake pop stick in chocolate then insert into every cake ball and bunny until each has one stick. Set aside to dry.
- Remove cakesicles from freezer and pop out of molds. In bowl, melt orange melts then mix in 1 tablespoon oil and transfer to cup. Dip cakesicles and scrape off excess using rim of cup. Place on parchment paper to dry.
- In bowl, melt green melts then place in zip-top or piping bag. Cut tip off bag, pipe carrot leaves onto piece of parchment paper and let dry.
- Melt remaining white melts and mix in remaining oil. Transfer to cup and dip ball-shaped cake pops and bunnies then tap stick on edge of cup to remove excess.
- Over separate bowl, sprinkle ball-shaped pops with pastel sprinkles. To keep ball shape, let dry by sticking in piece of hard foam. Bunnies can dry face side up on parchment paper. After bunnies are dry, use edible markers to make face and color in ears.
- When carrots and leaves are dry, remelt orange melts and place in piping or zip-top bag. Cut off tip and drizzle orange over carrots. Add small line of orange on each ice pop stick and place leaves on each stick. Let dry.
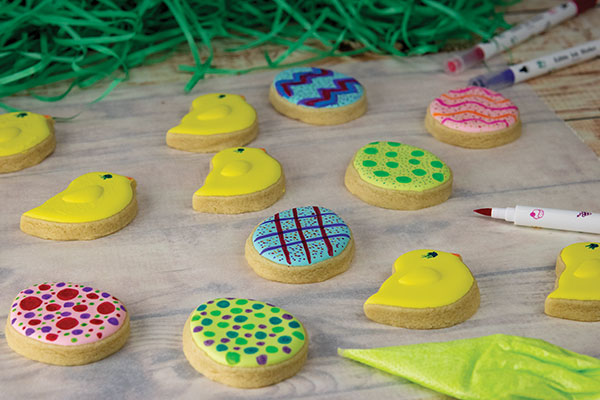
Easter Sugar Cookies
Recipe courtesy of “Cookin’ Savvy”
Icing:
- 1/3 cup meringue powder
- 1/2 cup warm water, plus additional for thinning (optional), divided
- 3 tablespoons vanilla
- 1 bag (2 pounds) powdered sugar
- 2 tablespoons corn syrup
- assorted food coloring
Cookies:
- 2 sticks unsalted butter, at room temperature
- 1 cup sugar
- 1 egg
- 1 tablespoon vanilla
- 2 teaspoons baking powder
- 1 dash salt
- 3 cups all-purpose flour
- To make icing: Mix meringue powder, 1/2 cup warm water, vanilla, powdered sugar and corn syrup. Separate into bowls and add food coloring; mix with water, as needed, to thin for piping.
- To make cookies: Heat oven to 350 F.
- Cream butter and sugar. Mix in egg, vanilla, baking powder and salt. Mix in flour 1 cup at a time to form dough. Roll dough out to 1/4-1/2-inch thickness.
- Cut into shapes, place on baking sheet and freeze 10 minutes. Bake 8-12 minutes. Cool completely before icing.
- Place icing in zip-top or piping bags and cut off tips. Put cookies on parchment paper. Trace outline first then fill in middle. Use toothpicks to smooth out.
- Let dry 6 hours and finish decorating with different icing colors or edible markers.
SOURCE:
Culinary.net


-
 NEWS1 year ago
2 hurt, 1 jailed after shooting incident north of Nocona
-

 NEWS5 months ago
Suspect indicted, jailed in Tia Hutson murder
-
 NEWS1 year ago
SO investigating possible murder/suicide
-

 NEWS1 year ago
Wreck takes the life of BHS teen, 16
-
 NEWS9 months ago
Murder unsolved – 1 year later Tia Hutson’s family angry, frustrated with no arrest
-
NEWS12 months ago
Sheriff’s office called out to infant’s death
-
 NEWS1 year ago
Bowie Police face three-hour standoff after possible domestic fight
-
NEWS1 year ago
Driver stopped by a man running into the street, robbed at knifepoint