
EDIBLES
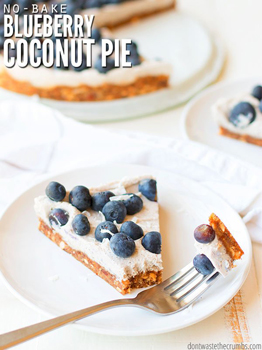
No-bake coconut blueberry pie
When you’re on the Whole30, desserts and snacks are off limits. Removing certain food groups (sugar, gluten, grains, dairy, alcohol and legumes) is just as important as re-training the way your brain and stomach communicate so that everything is working the best way possible.
No sugar wasn’t too bad since we’ve been in the process of quitting sugar anyway. We followed the no-snacks and no-dessert rule pretty strict. Anytime the kids had a “snack” it was actually a mini-meal, and there was fruit at the dinner table to satisfy that “sweet” craving after our meal.
The only time I broke the rule was on Easter Sunday, when my good friend Katie visited with her family. On that day, I busted out avocado chocolate pudding cups and this no-bake coconut blueberry pie recipe.
And I don’t regret it for one moment.
It was a special occasion AND we had company… and despite the fact that it was technically dessert, we served it as soon as dinner was over AND the ingredients are entirely Whole30 compliant.
- No gluten
- No dairy
- No sugar
There’s also no baking involved either, but that’s just a perk!
You’d think that this no-bake coconut blueberry pie would be have no taste, given the lack of ingredients we usually think of when it comes to dessert (i.e. sugar, butter and flour in homemade chocolate cake or pumpkin cookies with cream cheese icing or even healthy sugar cookies), but it’s quite the opposite – this dessert is a flavor bomb!
NO-BAKE COCONUT BLUEBERRY PIE RECIPE
Let’s break down what this no-bake coconut blueberry pie recipe consists of:
THE CRUST
My famous homemade pie crust consists of flour, butter and a smidgen of milk. All three of which are a no-go on the Whole30.
I still wanted that defined “crust,” so I used whole almonds and dates.
Once the almonds are put through a food processor or blender, they become a combination of almond flour and finely chopped almonds.
Add the dates to the mix and you get what looks like a huge ball of sticky almonds… But this sticky ball is malleable, and can be pushed down into the bottom of your springform pan to make a lovely crust.
It also hardens in the fridge, making it more “crust-like” than soft ball of dates
WHICH COCONUT MILK SHOULD YOU BUY FOR THE FILLING?
I tested more cans of coconut milk than I could count trying to perfect this recipe, so take note of my cautions.
First, you need canned coconut milk. The coconut milk you find in the dairy case by the regular milk will not work.
Second, your canned coconut milk should have these ingredients, in this order: coconut, water, guar gum. If you can find coconut milk without guar gum, that’s awesome because it’s one less additive you’re eating.
You DON’T want is coconut extract or coconut milk to be listed as an ingredient.
Once you find the right coconut milk, put it in the fridge for at least 24 hours. The longer the better really, because as it sits, the coconut solids will separate from the water and rise to the top of the can. These solids are called coconut cream and they MUST rise to the top and become a solid in order to make the filling for the pie.
If you just went to the store and you’re hankering for this no-bake coconut blueberry pie, I’m so sorry. Please put your cans of coconut milk in the fridge and patiently wait until tomorrow. Or preferably, the next day.
THE BEST WAY TO GET COCONUT CREAM OUT OF THE CAN
I forget where I saw this, but here’s the best way to get coconut cream out of the can.
- Remove the can from the fridge.
- Turn it upside down.
- Open the can with a can opener.
- Pour out the water from the can.
- Scoop out the coconut cream with a spoon or spatula.
I’ve tried it the other way – where you open the can from the top and scoop until you reach the liquid – but you sometimes scoop out water with the solids when you use that method… and you certainly don’t want the liquid in this recipe!
Opening the can upside is a game changer – I’ll never go back!
THE FILLING
The filling is nothing more that whipped coconut cream. To make whipped coconut cream, you put the coconut solids (and no liquids) in the bowl of a stand mixer. Attach the whisk, turn the speed up to high and let it whip for 3-5 minutes. The whipped coconut cream is ready when you pull the whisk through the cream and it leaves a clear line and the coconut does not fill in on itself.
I added vanilla powder for a bit of extra flavor, but it’s not necessary.
You can’t have vanilla extract on the Whole30, so I have not tested making whipped coconut cream with it. I personally wouldn’t recommend it, if anything, because the additional liquid might interfere with whipping the coconut cream.
THE TOPPING
I kept the topping super simple: fresh blueberries.
I added a smidgen of shredded coconut for the sake of pretty pictures, but you don’t have to do that if you don’t want to.
For that matter, you don’t even have to use blueberries if you don’t want to… fresh
strawberries, blackberries or raspberries would all work.
Granted, it wouldn’t be a coconut blueberry pie anymore, but it would still be amazing!
FINAL THOUGHTS BEFORE YOU DIG IN
Please read this recipe through all the way before you start making it. The coconut milk needs to be refrigerated, the crust needs to be refrigerated and the entire pie needs to be refrigerated. The timing of all of this should be taken into account before you dig in.
This pie keeps well in the fridge for 2-3 days. I’m sure it can last 4, but my family eats the entire thing well before then!
To cut, I recommend using a sharp knife. Run the knife through water before slicing to help get a clean cut.
You can freeze the pie to speed up the process. The first time I made this pie, it was just a few hours before Easter dinner. I put the pie in the freezer to speed up the cooling and solidifying process and it worked, but the filling was more icey than creamy. It wasn’t bad, just different. If you’re short on time, the freezer can work in a pinch.
The cost of the dates prevent this recipe from being super frugal… but if you’re on a restricted diet, sometimes its worth the splurge to feel like you can eat normal again.
COCONUT BLUEBERRY PIE IS AN ALLERGY FRIENDLY DESSERT, PERFECT FOR CELEBRATING ANY OCCASION.
- Get a perfectly round pie that’s easy to slice with a springform pan like this one.
- Blend up your almonds and dates in a food processor or high-powered blender to get the best consistency.
- Don’t end up with a “coconut milk emergency” and keep a can of this type of coconut milk in your fridge.
- If blueberries aren’t in season, use a different seasonal fruit to save money and try new flavors!
While ingredients like almonds and dates aren’t typically frugal, you CAN stock your real food pantry with healthy options like these with the techniques learned in Grocery Budget Bootcamp!
- ¾ cup whole almonds
- 1½ cups dates, quartered (about 15 dates)*
- pinch of salt (optional)
- 2 cans canned coconut milk OR canned coconut cream, refrigerated for at least 24 hours**
- ½ tsp vanilla powder (optional)
- 1 pint fresh blueberries
- This recipe requires the canned coconut milk to be refrigerated for at least 24 hours BEFORE starting. The pie itself requires at least 2 hours of cooling in the fridge. Please keep this in mind before you begin.
- Prepare your pan: Line an 8-9″ springform pan with parchment paper. Put the ring on the base and tighten.
- In a food process or blender (I used my Blendtec with the four-sided jar), place whole almonds and quartered dates. If your almonds are unsalted, add just a pinch of salt, if desired.
- Pulse until the almonds are finely chopped and the dates are no longer in large chunks. This took several rounds in my Blendtec and I ended up with a large ball of mashed dates and almonds. This is normal.
- Put the almond date mixture into the bottom of the lined springform pan. Using wet knuckles, push the mixture to the outer edges of the pan, doing your best to make an even layer of crust. Re-wet your knuckles as kneeded.
- Put the crust in the fridge as you prepare the filling.
- Remove the cans of coconut milk from the refrigerator. Turn them upside down, open them with a can opener and pour out the water. Use a spoon and/or spatula to get ALL of the remaining solid (coconut cream) from the can and place it in the base of a stand mixer. Add the vanilla powder, if using.
- Using the whisk attachment, turn the mixer on high and whip the coconut cream for 3-5 minutes. The coconut cream is done when you can make a line through the cream with the attachment and the coconut cream does not fold in on itself.
- Remove the crust from the fridge. Using a spatula, very gently spread the whipped coconut cream evenly over the crust.
- Top with fresh blueberries and place in the fridge to set for at least 2 hours.
- Cut and serve, storing the pie in the fridge.
** See notes for choosing the right coconut milk.

(Family Features) Chasing away those final cool days in the spring can be done in a cinch: just turn classic chicken noodle soup into a fresh, lemony meal. This Lemon Chicken Orzo Soup calls to mind those classic brothy soups from when you were a kid but with a flavorful spring twist. Serve with fresh cucumber sandwiches for a veggie-forward meal and find more soup inspiration at Culinary.net.
Lemon Chicken Orzo Soup
Recipe courtesy of “Cookin’ Savvy”
Servings: 4-6
- 2 carrots
- 2 celery stalks
- 3 tablespoons butter
- 2 cups cooked, chopped chicken
- 1/3 cup lemon juice
- 2 teaspoons lemon pepper
- 6 cups broth
- 1 cup orzo
- 1 tablespoon garlic powder
- 1 tablespoon onion powder
- 1 tablespoon thyme
- 1 tablespoon sugar
- 1 cup heavy cream
- salt, to taste
- pepper, to taste
- cucumber sandwiches, for serving
- Chop carrots and celery. In pot, saute with butter.
- In bowl, mix chicken with lemon juice and lemon pepper then set aside.
- After carrots and celery are tender, add broth and orzo to pot. Then add garlic powder, onion powder, thyme and sugar. Simmer 10 minutes then add chicken and cream; simmer about 5 minutes.
- Add salt and pepper, to taste. Serve with cucumber sandwiches.
SOURCE:

(Family Features) Watermelon, strawberries, corn and green beans get all the fresh produce love in the summer, but don’t forget broccoli as a warm-weather staple. Instead of dunking in dressing or smothering with melted cheese, go for a lighter dish with this Broccoli Salad – an ideal light lunch or simple summer side. Visit Culinary.net to find more veggie-inspired salad ideas.

Broccoli Salad
Recipe courtesy of “Cookin’ Savvy”
Servings: 4-6
- 2 medium heads broccoli
- 2 apples
- lemon juice
- 1 carrot
- 1 cup blueberries
- 1 cup dried cranberries
- 1 cup sunflower seeds
- 1 cup pecans
- 1 package (2 1/2 ounces) real bacon pieces
Dressing:
- 1 cup mayonnaise
- 1/3 cup milk
- 1/3 cup apple cider vinegar
- 2/3 cup sugar
- 2 tablespoons poppy seeds
- Coarsely chop broccoli and place in large bowl. Coarsely chop apples and brush with lemon juice to prevent browning; add to bowl. Shred carrot and add to bowl with blueberries, cranberries, sunflower seeds, pecans and bacon.
- To make dressing: Mix mayonnaise, milk, apple cider vinegar, sugar and poppy seeds. Pour over broccoli salad and mix well.
SOURCE:
Culinary.net
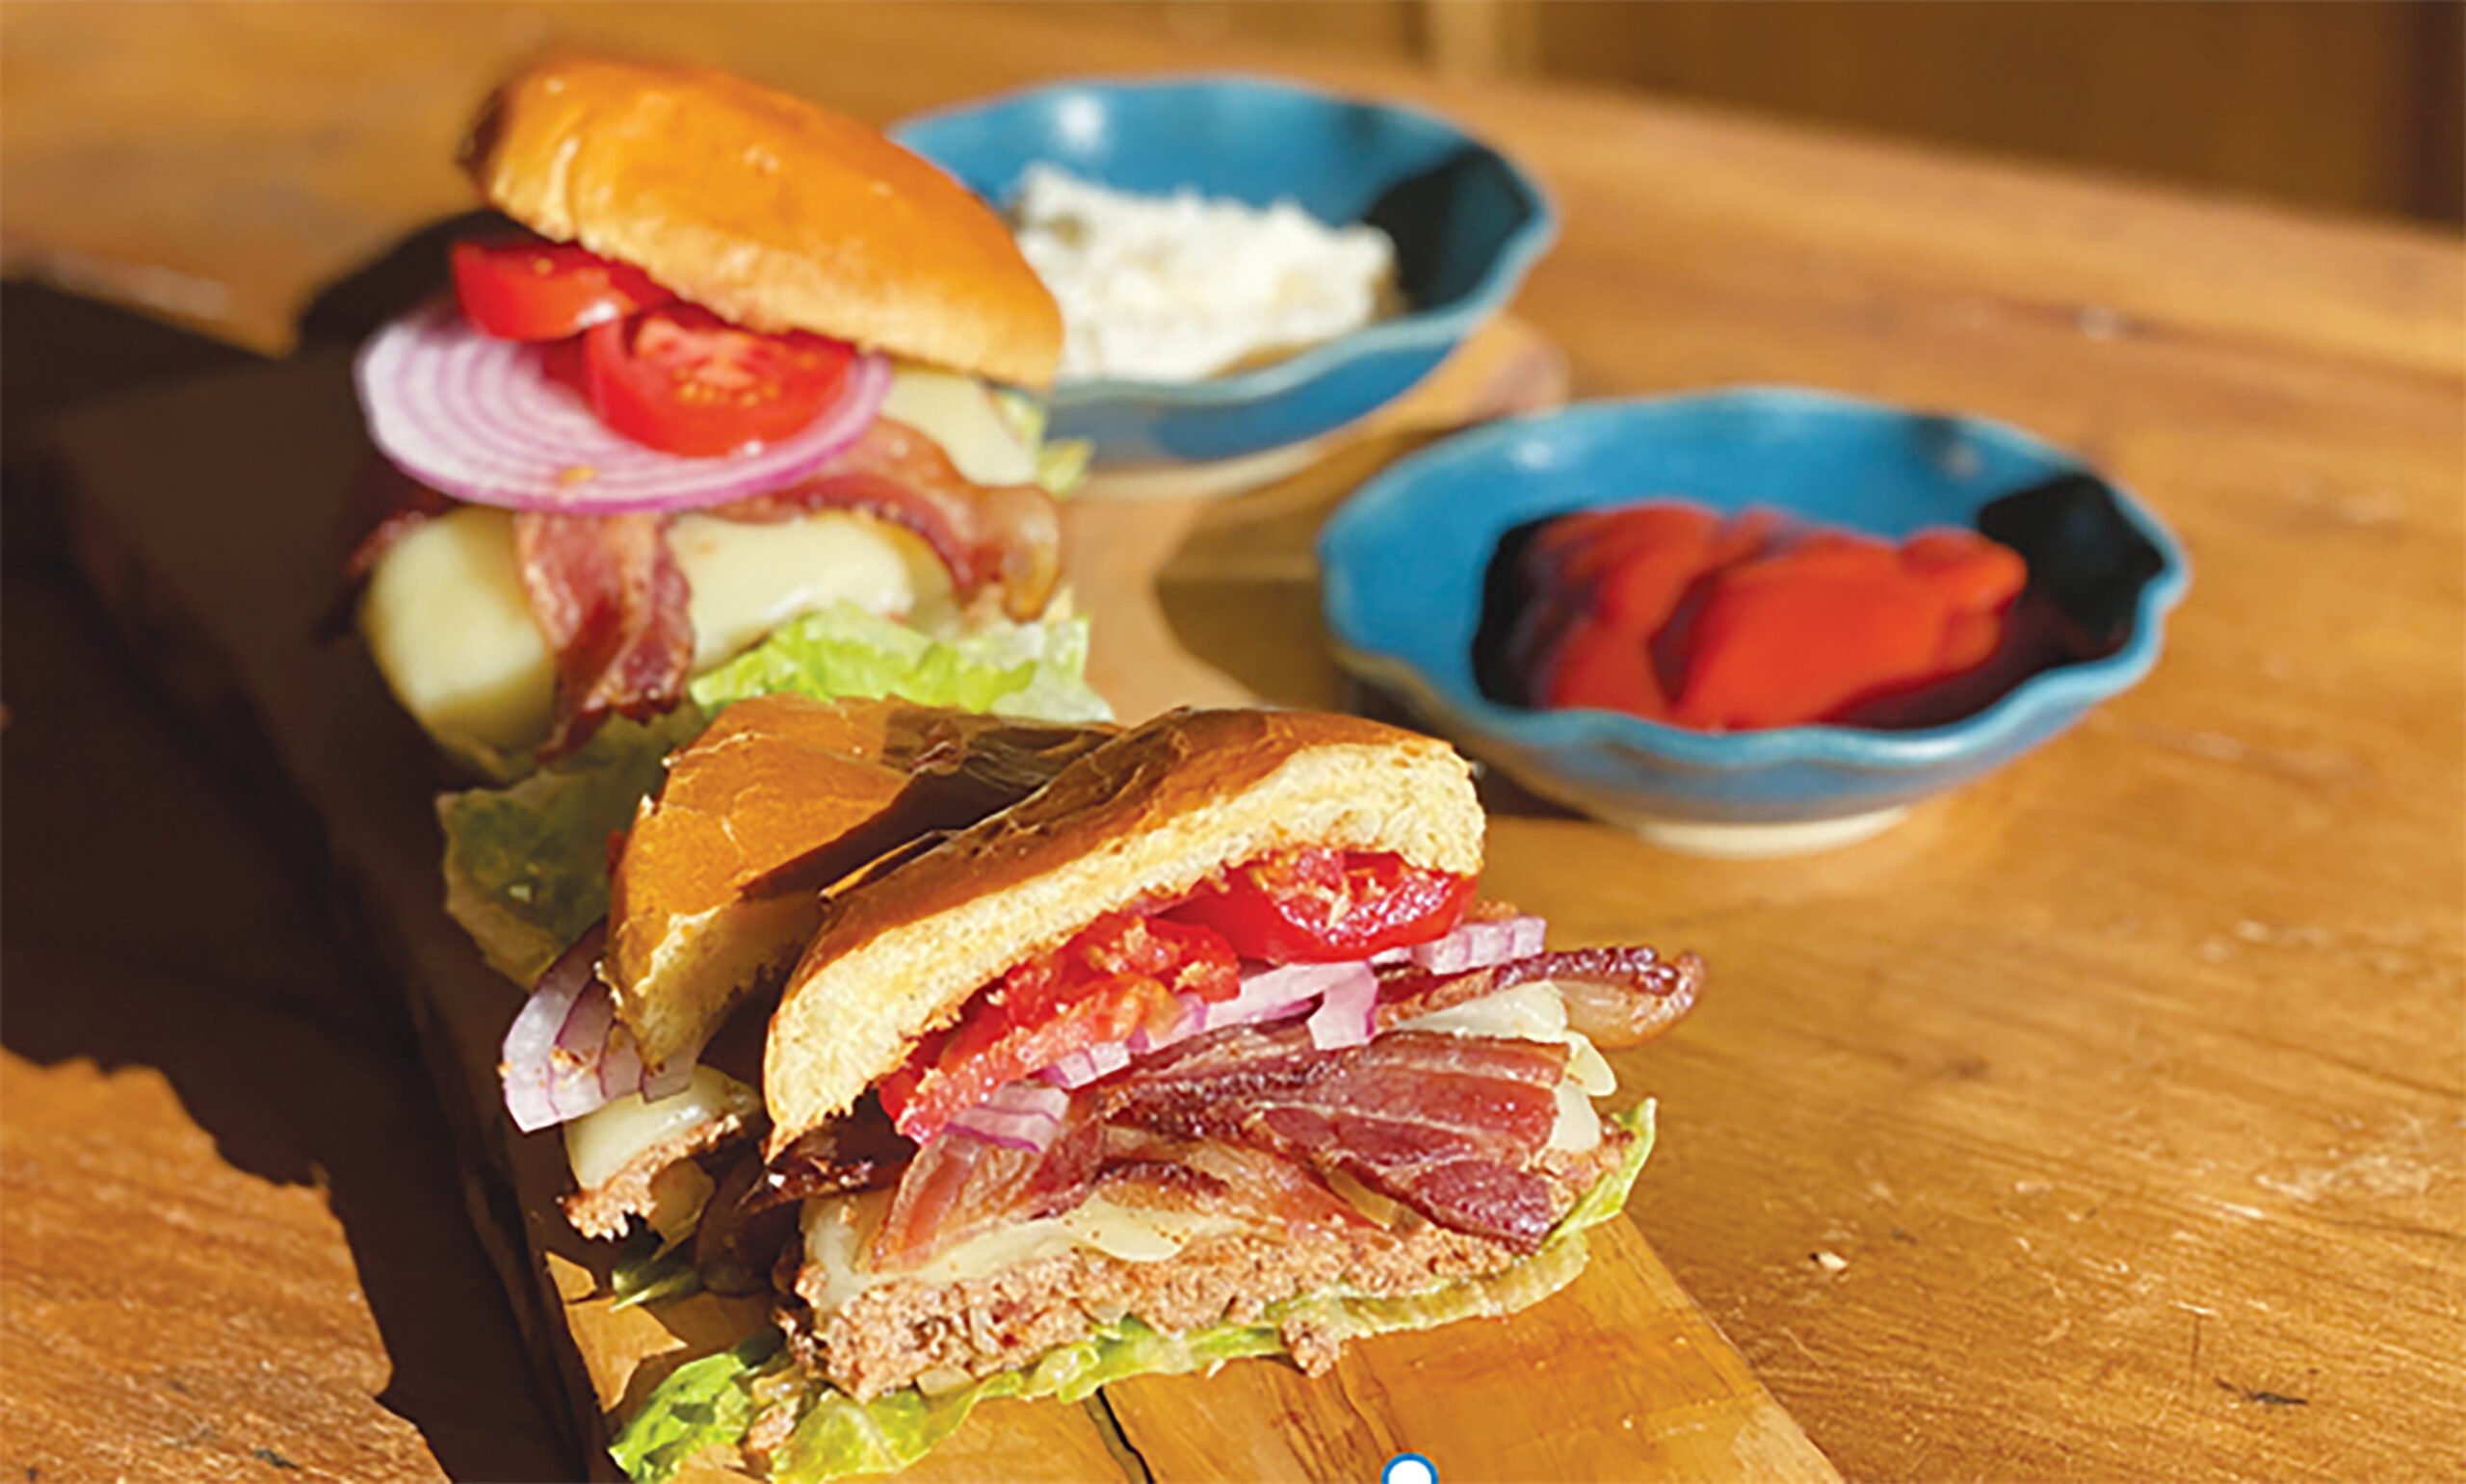
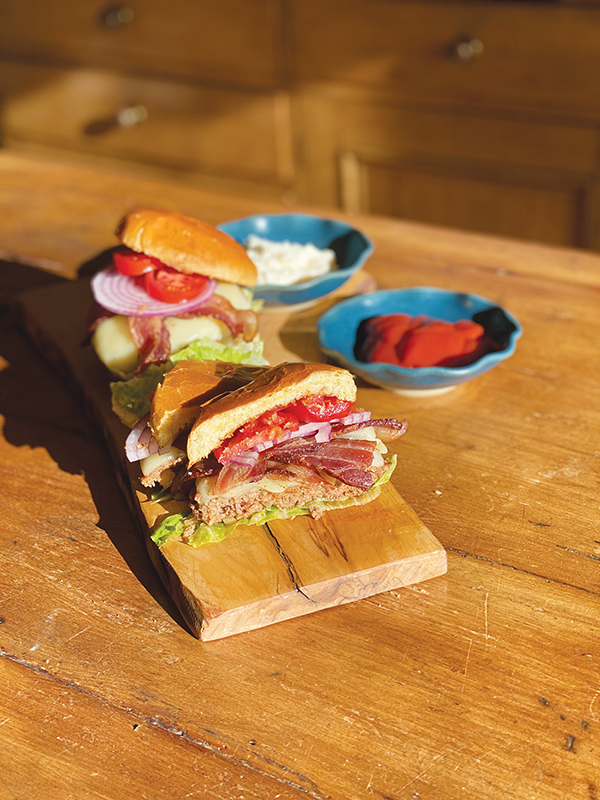
(Family Features) Summer is here and it’s time to hit the grill. Take at-home entertaining to the next level by upgrading everyone’s favorite cheeseburger with ground pork.
Family and friends will love this elevated twist on a summer favorite that is oh-so-deliciously different than the traditional beef patty. These Pork and Bacon Burgers are made with Heritage Duroc pork, known for its rich flavor and juiciness, and will be a hit at your next barbecue. The crispy bacon adds another level of texture and flavor, making these juicy burgers a gourmet treat that rivals any takeout burger. Celebrating 150 years as the premium all-natural meat choice for families, Coleman All Natural Meats offers a variety of products that are sourced from American family farmers who humanely raise livestock with no antibiotics ever and no added hormones.
Find more recipes to elevate your grilling experience at ColemanNatural.com.
Pork and Bacon Burgers
Prep time: 10 minutes
Cook time: 10 minutes
Servings: 6
- 2 pounds Coleman Ground Pork
- 1/4 pound ground pork chorizo
- 1 medium onion, diced
- 2 cloves garlic, minced
- 1 teaspoon pepper
- 1 teaspoon salt
- 6 cheese slices (optional)
- 6 hamburger buns
- 6-8 strips Coleman Hickory Smoked Uncured Bacon, cooked
- tomato slices (optional)
- red onion slices (optional)
- lettuce (optional)
- ketchup (optional)
- mayonnaise (optional)
- Preheat grill to medium heat.
- In large mixing bowl, combine ground pork, chorizo, onion, garlic, salt and pepper.
- Gently mix ingredients, being careful not to overwork meat.
- Divide meat into six burger patties.
- Cook burgers 3-4 minutes per side until internal temperature reaches 145 F or desired doneness.
- During last 2-3 minutes of cooking, place cheese slices on top of burgers to melt, if desired.
- Transfer burgers to platter. Assemble burgers with buns, bacon, tomato slices, red onion slices, lettuce, ketchup and mayonnaise, as desired.
Tip: Burger patties may be frozen up to 1 month. Fully defrost before cooking.
SOURCE:


-
 NEWS3 years ago
2 hurt, 1 jailed after shooting incident north of Nocona
-

 NEWS2 years ago
Suspect indicted, jailed in Tia Hutson murder
-
 NEWS2 years ago
SO investigating possible murder/suicide
-

 NEWS2 years ago
Wreck takes the life of BHS teen, 16
-

 NEWS2 years ago
Murder unsolved – 1 year later Tia Hutson’s family angry, frustrated with no arrest
-
NEWS2 years ago
Sheriff’s office called out to infant’s death
-
 NEWS2 years ago
Bowie Police face three-hour standoff after possible domestic fight
-
NEWS3 years ago
Driver stopped by a man running into the street, robbed at knifepoint