
Live Better
Dog grooming advice to keep pets clean, healthy

(Family Features) Regular grooming can keep your dog looking and smelling his or her best, but it’s also important for maintaining health. If you choose to groom at home rather than opting for (often expensive) professional care, it’s also an opportunity to examine your pet for potential concerns.
A proper grooming routine starts with the right tools. Consider these suggestions from The Humane Society of the United States:
- Dog-friendly nail clippers
- Rubber-bristled brush
- Dog-friendly toothbrush and toothpaste
- Dog-friendly shampoo and conditioner
- Cotton balls
- Blunt-ended shears or small clippers with guides
- Microfiber towel
Trimming Nails
When your dog’s nails nearly touch the ground, it’s time for a trim, typically every 3-4 weeks. Trimming the part of the nail that turns down helps prevent pain and damage to paws.
If your dog has white nails, avoid cutting the “quick,” the pink part that’s visible on white nails, which bleeds when cut. For dark nails, simply trim a bit at a time until evidence of the quick is visible.
Bathing and Brushing
Frequency for baths and brushing depends on your dog’s coat type – be sure to research optimal grooming schedules based on his or her breed. In general, The Humane Society of the United States recommends these guidelines:
- Short, smooth or wiry coat: Brush once a week with a rubber-bristled brush.
- Long, silky or curly coat: Brush once a day with a rubber-bristled brush or wire slicker brush. Use a steel comb to prevent tangles or mats, if necessary.
- Double coat: Use an undercoat rake or de-shedding tool to gently de-shed once a week in addition to regular brushing routines.
When it’s bath time, use a shampoo formulated for dogs and a damp cloth or cotton ball to clean around the eyes and ears without pushing anything into the eyes or ears. Dry with a microfiber towel or hair dryer on a low setting.
Cutting Fur
Be careful and work slowly to avoid mistakes and keep your dog calm and comfortable. Brush, bathe and completely dry prior to cutting fur with blunt-ended shears or small clippers with guide combs. Specifically trim hair covering the eyes and private areas and between your pup’s paw pads. It may be helpful to watch a tutorial online to ensure success.
Brushing Teeth
You can prevent gum disease and plaque buildup by brushing your dog’s teeth with a soft toothbrush and dog-friendly toothpaste. Make sure your pet is comfortable and start slow, staying on the outside surfaces of teeth and gently rubbing back and forth. Focus on the area where the tooth surface meets the gum.
Visit eLivingtoday.com to find more pet health advice.
Photo courtesy of Unsplash
SOURCE:
eLivingtoday.com

5 expert ways to make the most of seasonal gatherings
(Family Features) From summer holidays and pool parties to spontaneous backyard barbecues with friends and neighbors, the hottest season of the year brings people together. When it’s your turn to host, make the most of the occasion by setting up your space to maximize the fun while showing off your festive side.
“Summer is hands down my favorite time to host,” said Kristina Zias, lifestyle, beauty and fashion expert and mom. “I love any excuse to bring people together and – let’s be real – I’m always looking for a reason to throw a party. The key is keeping things low stress for the host and making sure guests feel comfortable the second they walk in.”
This season, Zias and Glade are teaming up to share some of her favorite summer entertaining tips, which are simple, low-effort ways to make every gathering feel special. Whether you’re planning a full-blown backyard bash or hosting a few friends for drinks, Zias’ go-to ideas are all about setting the mood and enjoying the moment.
1. Set the Scene Without the Stress
To achieve a beautiful scene and make cleanup a breeze, try using disposable plates, utensils, napkins and cups in red, white and blue. A self-serve drink station with strawberry-infused water and a table of colorful fruit skewers adds charm without requiring much prep.

2. Tap Into Nostalgia Through Scent
Scent can instantly transport guests back to cherished summer memories, making it a powerful way to set the tone and spark conversation. Zias suggests using home fragrances to do just that. The new Glade Americana collection, available exclusively in stores and online at Walmart, features three limited-edition scents inspired by nostalgic summer traditions like beach trips, ice pops and garden-fresh fruit. Masterfully crafted to help bring summer to every room of your home, they’re designed to evoke warm-weather traditions.
- Berries & Cream: Scents of a classic American summer treat spring to life in a picnic-perfect blend of apple, red berries, apricot, vanilla and sweet cream.
- Summer Pops: Reminisce on childhood memories of a cool ice pop on a warm summer day with bright notes of Brazilian orange, pineapple, strawberry, white peach and sandalwood.
- Beach Life: Transport yourself to a favorite summer vacation spot by the ocean with a breezy mix of sea salt, driftwood, white moss and white peony.
“These seasonal scents can help you evoke nostalgic memories and bring that summer energy into any room of your home,” Zias said. “They make everything feel a little more special and, honestly, they just make me happy.”
3. Keep It Simple and Guest-Friendly
Part of summer’s appeal is its easygoing vibe, so there’s no need to overdo it with complicated snacks or overwhelming decor. Lean into the simplicity of the season with ready-to-serve bites that can please guests of all ages, like berries, sliced or cubed watermelon, meat and cheese trays, sliders or chips and light dips. A separate kids station with games and snacks can keep little ones entertained.
4. Create Comfortable Hangout Spots
The hot summer sun and cool indoor air means guests will likely filter in and out of the house, so help them feel welcome and comfortable wherever they may be. Consider flexible seating guests can move around on the patio or in the yard, like bag chairs or foldable lawn chairs. Complement your festive indoor drink station with beverage-filled coolers to keep guests refreshed and designate an area for essentials like sunscreen and bug spray.
5. Have a Backup Plan
The best-laid plans can go awry when summer storms pop up. Before inviting the entire town for a barbecue, make sure you have enough indoor space and seating in case of rain or extreme heat. For grilling plans, Zias recommends prepping an alternate cooking method to avoid last-minute stress. A little backup planning can help keep the good vibes going, rain or shine.
For more summer entertaining ideas, visit Glade.com.
Photo courtesy of Shutterstock (group of friends eating)
Photo courtesy of Glade (candles)
SOURCE:
Physical activity is a valuable tool in the fight against chronic disease and other conditions. In fact, the Cleveland Clinic highlights physical activity among its nine ways to prevent disease in an effort to live a long and rewarding life.
Children, adolescents, young adults, and even men and women in middle age may not face too many physical hurdles when they try to exercise, but seniors are not always so lucky. Aging men and women with mobility issues may wonder if they can reap the rewards of physical activity, and thankfully there are many ways to exercise even if getting up and going isn’t as easy as it might have been in years past. Sometimes referred to as “aerobic exercise” or simply “cardio,” cardiovascular exercise is an umbrella term that encompasses a wide range of physical activities that raise the heart rate and improve endurance. Seniors with mobility issues can look to various forms of cardio for inspiration as they seek to be more physically active without compromising their overall health.
· Walk your way to a healthier you. Walking is a form of cardiovascular exercise that is ideal for older adults with mobility issues because it need not be physically demanding and it’s safe to walk just about anywhere. Walking in a place such as a local park can be particularly good for older adults because they can take periodic breaks on benches if aches, pains or stiffness is affecting their ability to keep moving.
· Take up swimming. Swimming might be tailor-made for seniors with mobility issues because it’s a great workout and exercising in water tends to be less taxing on muscles and joints. The Cleveland Clinic notes that swimming promotes heart health, strengthens the lungs, helps to burn calories, and builds muscle, among other benefits. And many seniors find swimming is just as fun in their golden years as it was in their youth, which means aging adults might not face problems with motivation when the time comes to get in the pool.
· Use an exercise bike or portable pedal exerciser. Cycling is a wonderful exercise but one that seniors with mobility issues may feel is no longer possible. If doctors advise against riding a traditional bike, an exercise bike or portable pedal exerciser can provide many of the benefits of cycling without as great a risk for accident or injury. A portable pedal exerciser can be carried to a park, where seniors can still spend time in the great outdoors, which is one of the most appealing reasons to get on a bike and go.
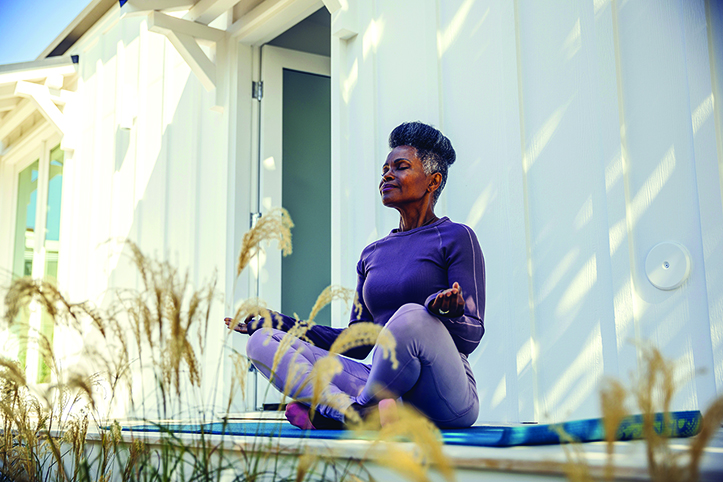
· Take beginner yoga or tai chi. HelpGuide.org notes that gentle yoga or tai chi can help to improve flexibility and reduce stress and anxiety. Though yoga and tai chi can provide as much demanding physical activity as individuals allow, beginner classes in each discipline don’t require much movement but do provide enough for seniors hoping to be less sedentary.
Even seniors with mobility issues can find safe and effective ways to be more physically active. Prior to beginning a new exercise regimen, seniors with mobility issues are urged to discuss activities with their physicians.

(Family Features) Throughout history, humans’ ability to rely on one another has been crucial to survival. Despite modern developments that help individuals live with minimal human engagement, the human need to connect remains.
However, in many parts of America, a trend toward isolation is emerging. Over the past two decades, people are spending more time alone and less time engaging with others in person, according to data from the Office of the U.S. Surgeon General. One segment of Americans at particular risk of social isolation, loneliness and their negative impacts are select populations who live in rural areas.
“There is an urgent need to take action and improve mental health in rural America,” said Jeff Winton, dairy farmer and founder and chairman of Rural Minds, a nonprofit mental health advocacy organization that partnered with Pfizer to raise awareness about the physical and mental risks of social isolation. “Challenges to mental health can be inherent in a rural lifestyle, including a belief in self-reliance as a virtue, fear of judgment and difficulty getting an appointment with a limited number of mental health professionals, among others.”
Many Americans are increasingly spending more time alone according to the American Time Use Survey. They are increasingly more likely to take meetings, shop, eat and enjoy entertainment at home, making it easier for them to stay within their own four walls and avoid social interactions.
Authentic human connection is a basic but often unacknowledged necessity for health, “as essential to survival as food, water and shelter,” according to the U.S. Surgeon General’s Advisory on the Health Effects of Social Connection and Community.
Understanding Social Isolation
According to the Centers for Disease Control and Prevention (CDC), about one-third of U.S. adults reported feeling lonely and about one-fourth said they don’t have social and emotional support (the basis of social isolation).
The concepts of social isolation and loneliness can go hand-in-hand, but the two are actually quite different.
Social isolation is defined by an absence of relationships or contact with others. Someone experiencing loneliness may or may not have social connections, but lacks feelings of closeness, support or belonging. Despite the distinction, both can have a negative impact on a person’s mental and even physical health.
Several factors can influence a person’s risk for social isolation and loneliness.
“Social connection is a dynamic that changes over time,” said Nikki Shaffer, senior director, occupational health and wellness, Pfizer. “Transient feelings of loneliness or solitude may be beneficial because they can serve as motivation to reconnect. However, chronic loneliness (even if someone is not isolated) and isolation (even if someone is not lonely) can represent significant health concerns.”

Isolation in Rural America
Compared to people who live in urban areas, many rural Americans experience higher rates of depression and suicide but are less likely to access mental health care services, according to the “Health Disparities in Rural America: Current Challenges and Future Solutions” study published in “Clinical Advisor.” What’s more, CDC data shows suicide rates among people living in rural areas can be 64-68% higherthan those in large urban areas.
Rural areas have 20% fewer primary care providers compared to urban areas, according to a report in JAMA, and the Health Resources and Services Administration reports more than 25 million rural Americans, more than half of rural residents, live in mental health professional shortage areas.
Among rural counties, 65% lack a psychiatrist. Nearly 30% of rural Americans don’t have internet access in their homes, which complicates the option for telehealth. These figures from Rural Minds exemplify the challenges facing rural America.
“Some people in rural communities still don’t understand or accept that mental illness is a disease,” said Winton, who grew up on a rural farm. “Rather, a mental illness can often be viewed as a personal weakness or character flaw. A lot of the stigma around mental illness results in unwarranted shame, which adds to the burden for someone already suffering from mental illness.”
Health Impacts of Social Isolation
Loneliness is far more than just a bad feeling; it harms both individual and societal health. In fact, loneliness and social isolation can increase the risk for premature death by 26% and 29%, respectively.
Lacking social connection can increase the risk for premature death as much as smoking up to 15 cigarettes a day or drinking six alcoholic drinks daily.
In addition, poor or insufficient social connection is associated with increased risk of disease, including a 29% increased risk of heart disease and a 32% increased risk of stroke.
Social isolation is also associated with increased risk for anxiety, depression and dementia. Additionally, a lack of social connection may increase susceptibility to viruses and respiratory illness.
Learn more about the impact of social isolation, especially on residents of rural areas, and the steps you can take to reduce isolation and loneliness by visiting ruralminds.org.
Boost Your Social Connections
Take a proactive approach to combatting social isolation and loneliness with these everyday actions that can promote stronger social ties.
- Invest time in nurturing your relationships through consistent, frequent and high-quality engagement with others. Take time each day to reach out to a friend or family member.
- Minimize distractions during conversation to increase the quality of the time you spend with others. For instance, don’t check your phone during meals with friends, important conversations and family time.
- Seek out opportunities to serve and support others, either by helping your family, co-workers, friends or people in your community or by participating in community service.
- Be responsive, supportive and practice gratitude. As you practice these behaviors, others are more likely to reciprocate, strengthening social bonds, improving relationship satisfaction and building social capital.
- Participate in social and community groups such as religious, hobby, fitness, professional and community service organizations to help foster a sense of belonging, meaning and purpose.
- Seek help during times of struggle with loneliness or isolation by reaching out to a family member, friend, counselor, health care provider or the 988 crisis line.
Photos courtesy of Shutterstock
SOURCE:
Rural Minds and Pfizer


-
 NEWS3 years ago
2 hurt, 1 jailed after shooting incident north of Nocona
-

 NEWS2 years ago
Suspect indicted, jailed in Tia Hutson murder
-
 NEWS2 years ago
SO investigating possible murder/suicide
-

 NEWS2 years ago
Wreck takes the life of BHS teen, 16
-
 NEWS2 years ago
Murder unsolved – 1 year later Tia Hutson’s family angry, frustrated with no arrest
-
NEWS2 years ago
Sheriff’s office called out to infant’s death
-
 NEWS2 years ago
Bowie Police face three-hour standoff after possible domestic fight
-
NEWS3 years ago
Driver stopped by a man running into the street, robbed at knifepoint