
EDIBLES
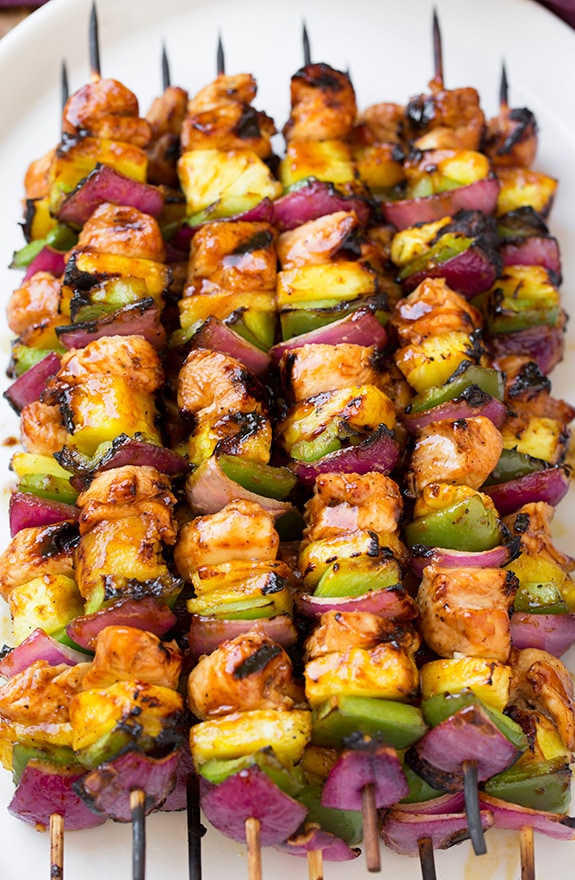
Hawaiian Chicken Kabobs
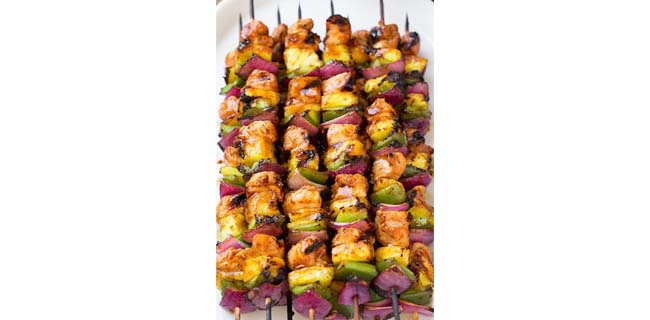
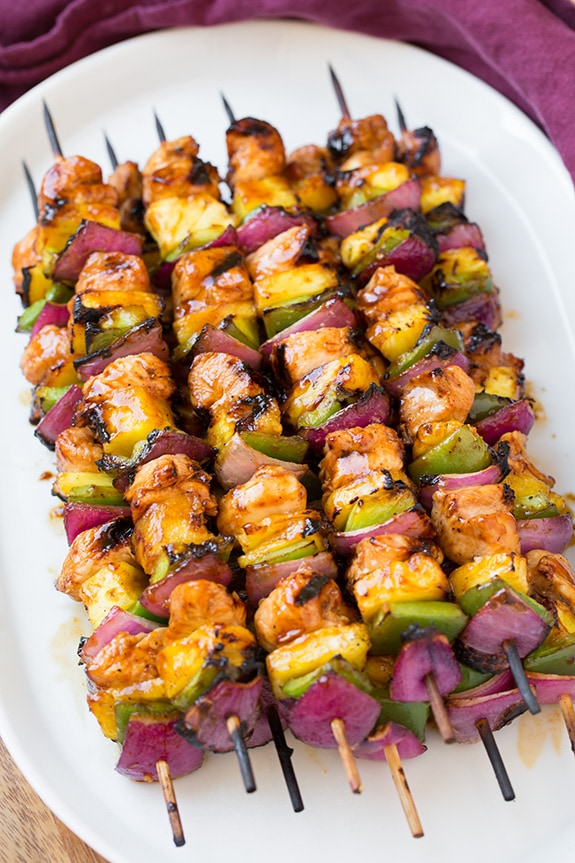
I love a good kabob recipe and what better entree to serve on a warm summer day than these Hawaiian Chicken Kebabs! One bite of these will leave you craving more, these kebabs are incredibly delicious! My husband and I absolutely loved them! The only thing I may change next time around is to do 1 1/2 of the sauce (marinade) recipe so I can have more for pouring over my rice (which you could also thicken up on the stovetop with just a little bit of cornstarch if you’d like). You can never have too much sauce right?
You will love the light sweetness of these paired with the pineapple, bell pepper and red onion. And the chicken turns out perfectly flavorful and tender thanks to the simple marinade. This is a recipe I will definitely make again. Yes threading everything onto the kebabs may take a little effort, but it’s well worth it. Plus, I love when I can cook my protein and veggie together, like so. These kabobs are a crowd pleaser, I mean who wouldn’t love them? Bring on that island feel tonight and get out and grill some of these island inspired kebabs! Your taste buds will thank you.
Ingredients
- 1/3 cup ketchup
- 1/3 cup packed dark brown sugar
- 1/3 cup low-sodium soy sauce
- 1/4 cup canned pineapple juice
- 4 Tbsp olive oil , divided, plus more for brushing grill
- 1 1/2 Tbsp rice vinegar
- 4 garlic cloves , minced (4 tsp)
- 1 Tbsp minced ginger
- 1/2 tsp sesame oil
- Salt and freshly ground black pepper
- 1 3/4 lb boneless , skinless chicken breast, chopped into 1 1/4-inch cubes
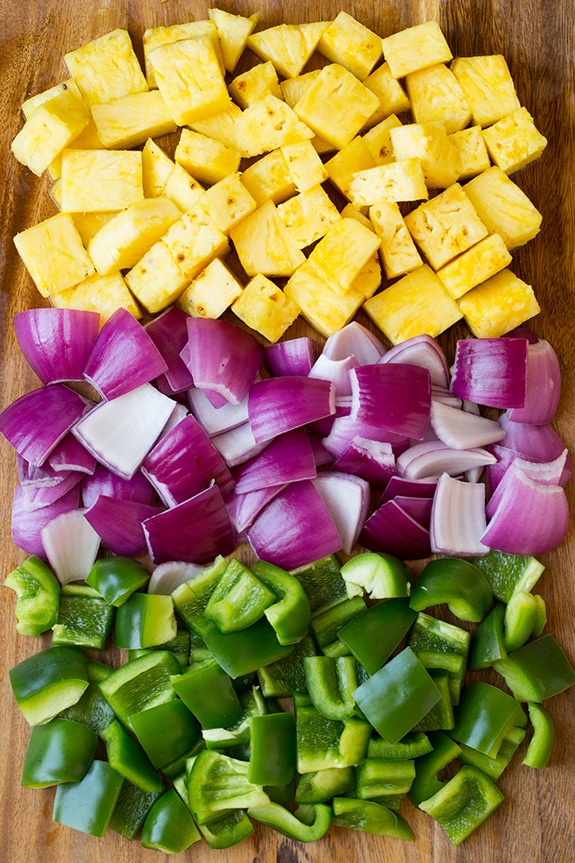
- 3 cups (heaping) fresh cubed pineapple (about 3/4 of 3 lb pineapple)
- 1 1/2 large green peppers , diced into 1 1/4-inch pieces
- 1 large red onion , diced into 1 1/4-inch pieces
Instructions
-
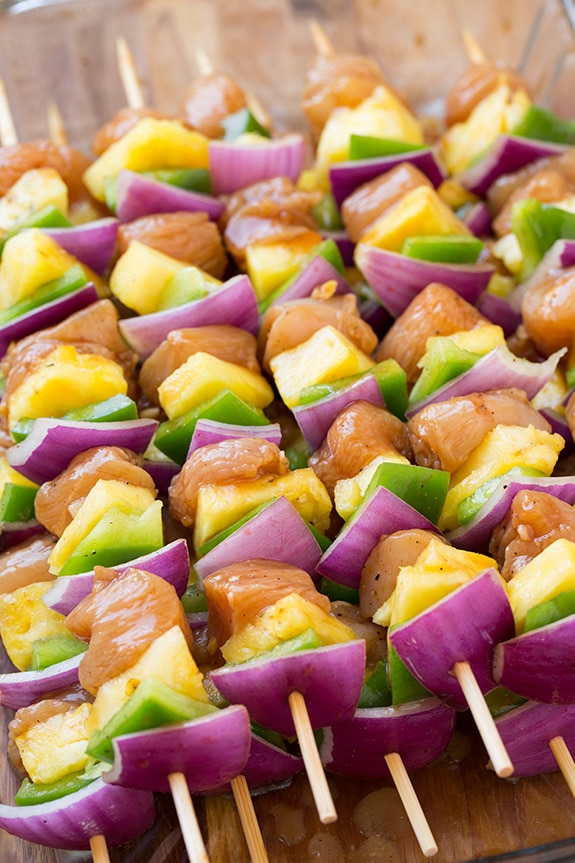
In a mixing bowl whisk together ketchup, brown sugar, soy sauce, pineapple juice, 2 Tbsp olive oil, rice vinegar, garlic, ginger and sesame oil. Stir in 3/4 tsp pepper and season with salt if desired. Place chicken in a gallon size resealable bag. Reserve 1/2 cup of the marinade in refrigerator then pour remaining marinade over chicken. Seal bag and refrigerate 1 – 2 hours (meanwhile soak 10 wooden skewer sticks in water for 1 hour).
-
Preheat a grill over medium heat to 400 degrees. Meanwhile, drizzle remaining 2 Tbsp olive oil over red onion, bell pepper and pineapple and toss. Season red onion and bell pepper with salt and pepper, then thread red onion, bell pepper, pineapple and chicken onto skewers until all of the chicken has been used. Brush grill grates with olive oil then place skewers on grill. Grill 5 minutes then brush along tops with 1/4 cup of remaining marinade. Rotate to opposite side and brush remaining 1/4 cup of marinade on opposite side and allow to grill about 4 minutes longer, or until chicken registers 165 degrees in center on an instant read thermometer. Serve warm.
-
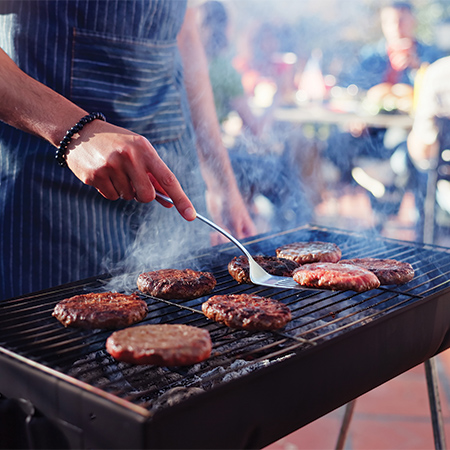
(Feature Impact) There’s just something timeless about a summer cookout with friends, family or neighbors. Whether it’s the sound of burgers sizzling on the grill or the smell of your favorite seasonal sides, the event invokes nostalgia and camaraderie.
While the spotlight may land on the burgers and barbecued fare, seasoned grill masters know the supporting cast matters, too. Makers of soft, delicious hamburger and hot dog buns fit to be the foundation of summer gatherings for more than 100 years, the bun experts at Wonder suggest a few ways to ensure your entertaining ventures are successful throughout the season.
Do What You Can Ahead of Time
Stick to a mix of easy favorites and make-ahead sides to keep prep manageable while offering something for everyone to enjoy. When possible, prep ahead of time so you can keep your focus on the fun and your attention on the hot grill. Chop vegetables, wash lettuce for burgers, make sure you have picked out the perfect buns, form and season beef patties and mix marinades the day before the big bash to avoid last-minute rushes around the kitchen.
Prep the Grill
Patience is key when it comes to grilling, as a properly heated grill is the foundation for good cooking. Give gas grills enough time to come to temperature, around 10-15 minutes, and allow charcoal to ash over completely. When grilling different types of food, it’s especially helpful to set up cooking zones – direct and indirect – so you can cook meat, veggies and buns differently or move finished food to one side, as needed.
Additionally, to help prevent sticking, lightly oil the clean grill grates before cooking. Using tongs and a paper towel dipped in oil is often more effective than coating foods with oil.
Use a Meat Thermometer
You may be a seasoned grill master, but guesswork can lead to mistakes, especially when cooking for a crowd. Avoid overcooked (or worse, undercooked) chicken and burgers by using an instant-read thermometer to help ensure meat is cooked safely while retaining its juicy flavor.
Grill Buns Correctly
 Burgers and hot dogs are classics for a reason, but avoiding soggy buns and mid-bite fallout requires the right bun for the job. Striking the perfect balance of pillowy softness with the structure to hold their shape through every loaded topping, condiment and bite is key when choosing the right bun for the job. More than just a vehicle for grilled favorites, Wonder Classic Hamburger and Hot Dog Buns are a familiar taste that makes cookouts delicious and have held it together, literally and figuratively, for more than a century. In continuing its longstanding partnership with the USO through the annual Deploy the Joy campaign, you can keep an eye out through Sept. 12 for special packaging on select products with scannable QR codes for a chance to win a $10,000 Birthday Bash.
For great grilled buns, follow a few easy steps:
- Brush cut sides of buns with softened butter, mayo or both to help the bun brown evenly.
- Lightly salt the buttered side before grilling.
- During the last 2 minutes of cooking burgers or dogs, place buns cut-side down over medium-low heat for 30-60 seconds. Look for a light golden toast, crisp enough to hold up.
Let Food Rest Before Serving
After grilling, give meat a few minutes to rest before serving or slicing. This allows juices to redistribute throughout the food for better texture and flavor.
Layer Burgers, Condiments and Toppings
After toasting buns, add a thin layer of sauce to coat the bun then lettuce that’s been patted dry to remove moisture. Add cheese to the opposite bun and be sure to place the burger and other toppings in the center to keep moisture away from the bread, preventing sogginess. Follow this simple order for sturdy buns:
- Toasted top bun
- Condiment or sauce
- Cheese
- Burger
- Tomato and onion
- Lettuce
- Condiment or sauce
- Toasted bottom bun
From simple, practical menus to crave-worthy twists on classics, you can find more ways to host a successful summer barbecue by visiting WonderBread.com/recipes.
Photo courtesy of Shutterstock (grilling hamburgers)
SOURCE:
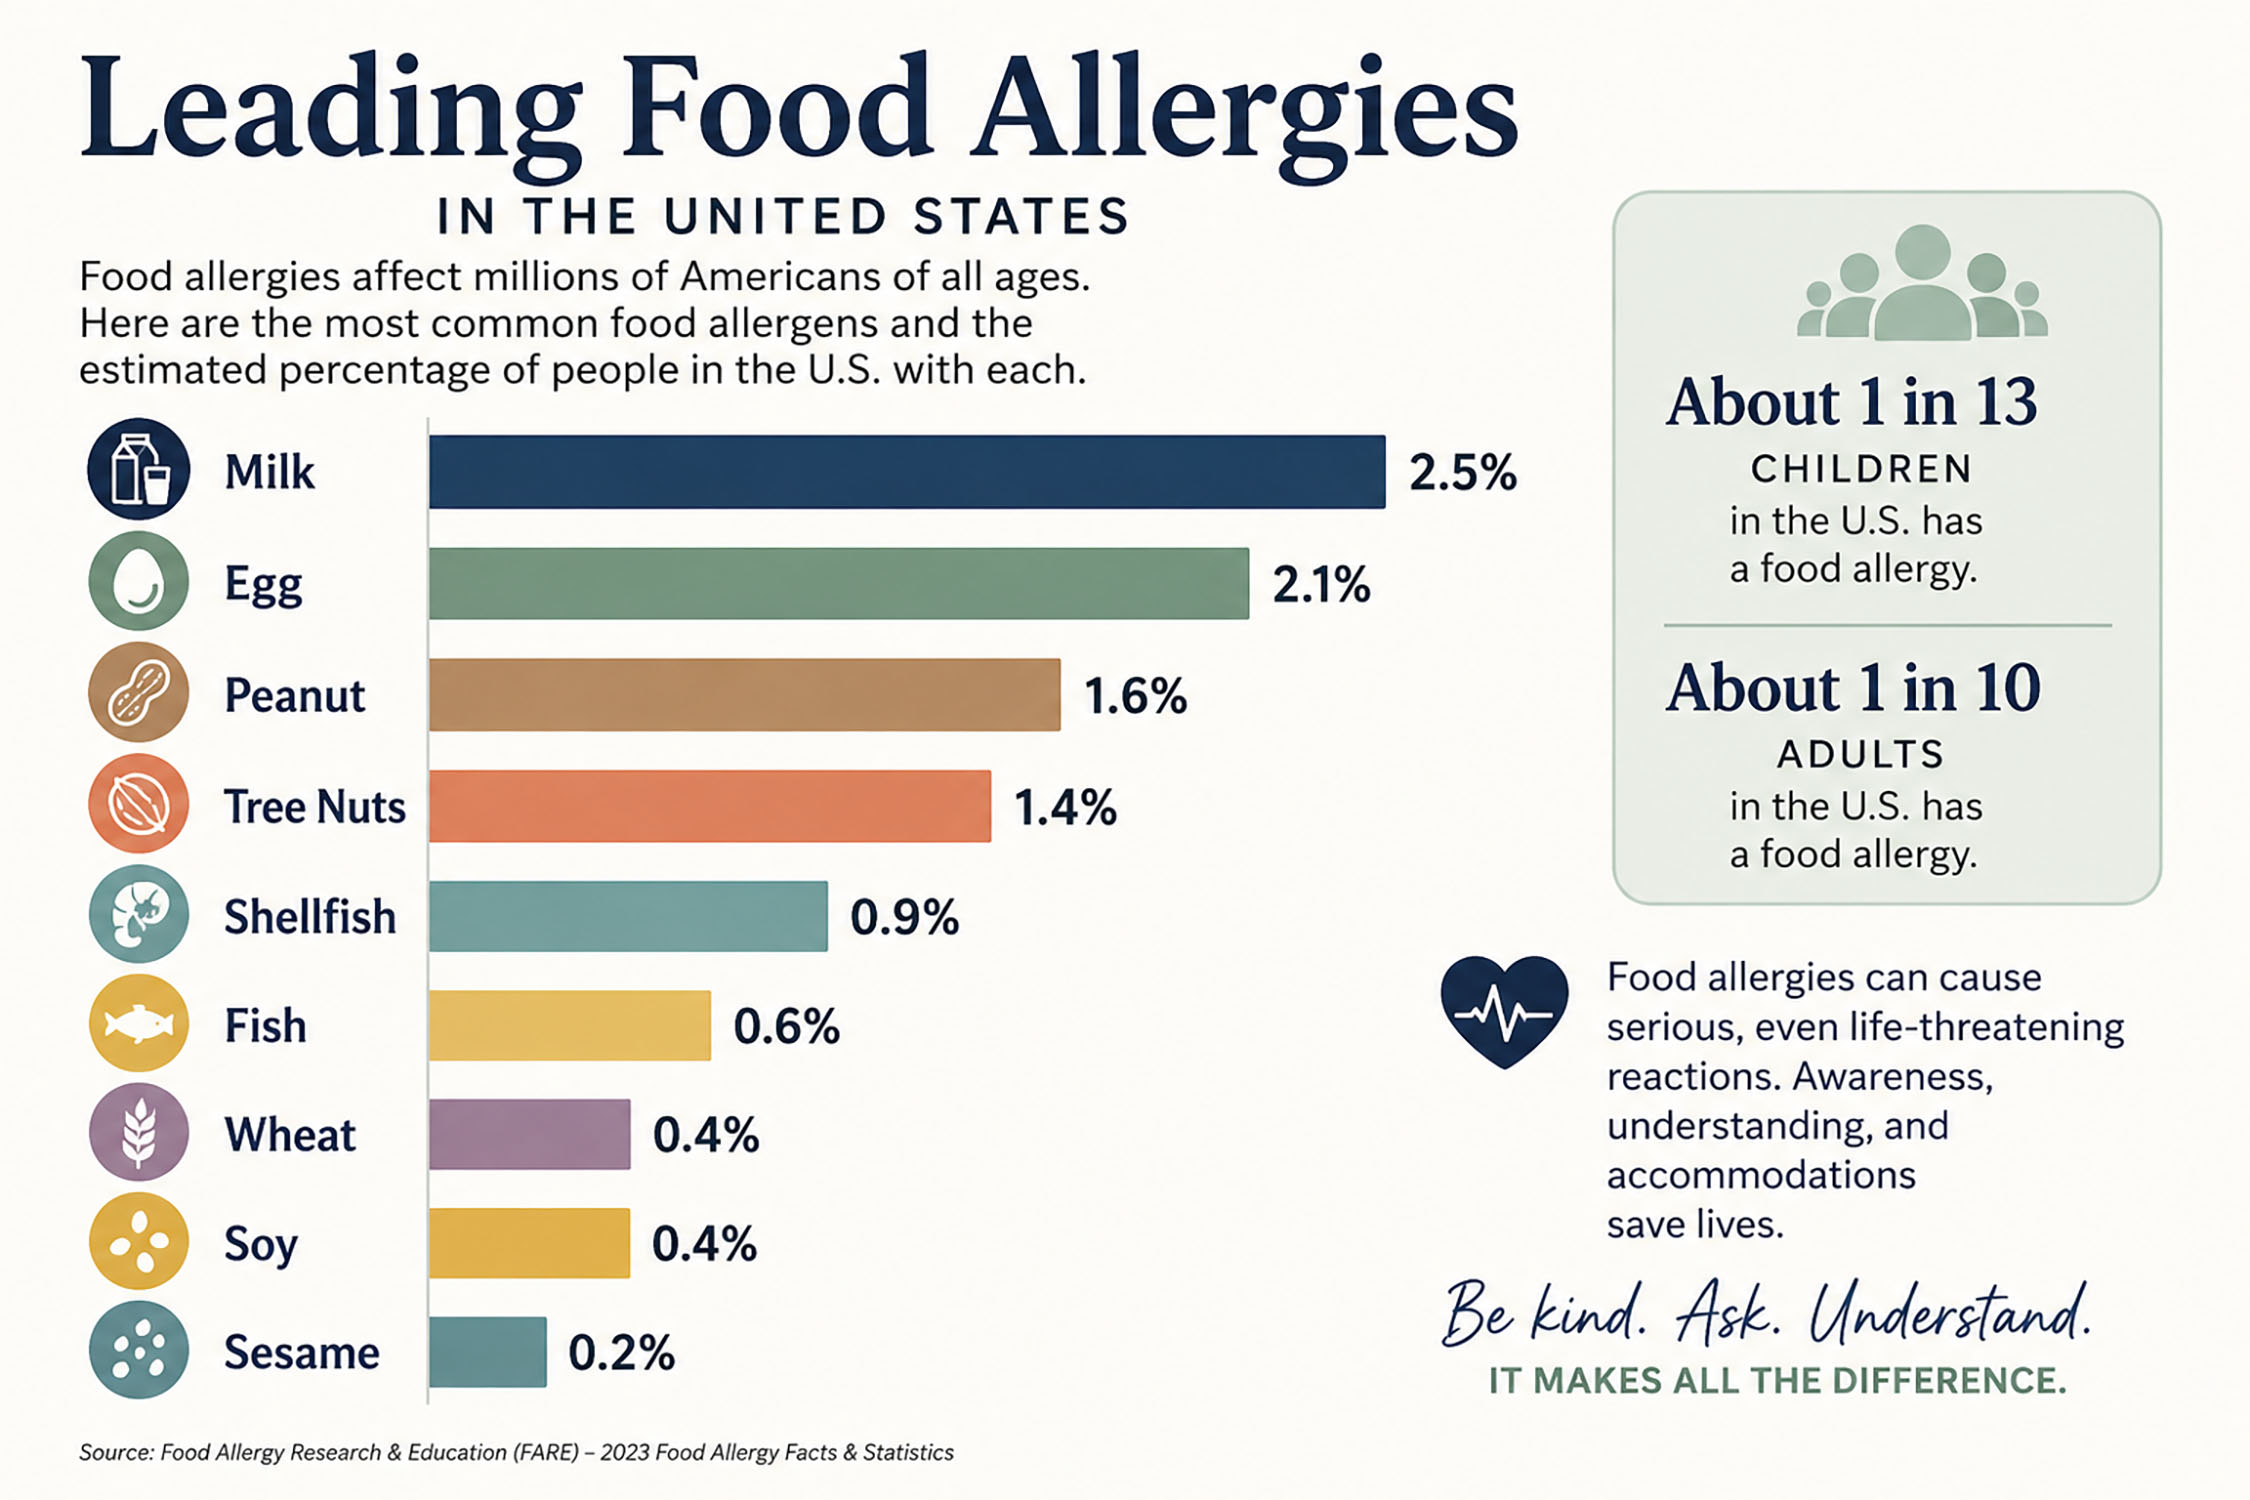
Food is supposed to bring people together.
It sits at the center of our holidays, church potlucks, birthday parties, first dates, family reunions and late-night kitchen conversations. In Texas especially, I feel like feeding people is one of the purest forms of love we know. We celebrate with casseroles, comfort with pies, and gather around smoked meats and shared desserts.
Food is hospitality. Food is belonging.
But for some people, food is also calculation.
Before the appetizers even arrive, some of us are already scanning ingredients, evaluating risk, rehearsing questions, and trying to determine whether asking those questions is about to make everyone at the table uncomfortable.
Read the full feature in On The Table in your Thursday Bowie News.
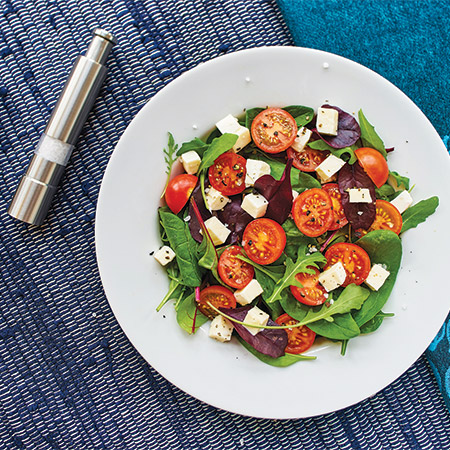
(Feature Impact) While most people think of dirty kitchens, cramped closets and grimy garages when they hear “spring cleaning,” the popular phrase can apply to your menu, too. Refresh your family’s regular dining routines with fresh ingredients that call to mind the flavors of the season.
When it’s time to put the slow cooker away, consider this Spring Greens Salad with Mozzarella. Paired with an easy homemade lemon vinaigrette, it’s a delicious way to swap out heavier meals for a lighter lunch.
To find more springtime solutions, visit Culinary.net.

Spring Greens Salad with Mozzarella
Recipe adapted from Organic Authority
Servings: 4
- 4 cups baby arugula or spring mix
- 1/2 cup cubed mozzarella cheese
- 1 tablespoon lemon zest
- 2 tablespoons extra-virgin olive oil
- 1 tablespoon fresh lemon juice
- sea salt, to taste
- freshly ground black pepper, to taste
- halved cherry tomatoes (optional)
- In large mixing bowl, combine arugula or spring mix, mozzarella and lemon zest; set aside.
- In small bowl, whisk olive oil and lemon juice vigorously with fork until smooth. Season with salt and pepper, to taste.
- Pour vinaigrette over greens; toss gently to coat. Top with halved cherry tomatoes, if desired.
Photo courtesy of Unsplash
SOURCE:


-

 NEWS3 years ago
Suspect indicted, jailed in Tia Hutson murder
-
 NEWS4 years ago
2 hurt, 1 jailed after shooting incident north of Nocona
-
 NEWS3 years ago
SO investigating possible murder/suicide
-

 NEWS3 years ago
Wreck takes the life of BHS teen, 16
-

 NEWS3 years ago
Murder unsolved – 1 year later Tia Hutson’s family angry, frustrated with no arrest
-
 Show us something good9 years ago
Country music star children perform in Bowie
-
NEWS3 years ago
Sheriff’s office called out to infant’s death
-
 100th Birthday4 years ago
Looking back at the 1958 Centennial edition of The Bowie News