

EDIBLES
Melted snowmen oreo balls

By The Girl Who Ate Everything
Melted Snowmen Oreo Balls
Fri, 28 Nov 2014 by
These Melted Snowmen Oreo Balls are festive and a great addition to any holiday party. I guarantee they’ll be the first to go.
Oreo truffles are one of my all time favorite desserts. I can pop about 20 and then start to feel guilty.
I always bring them to parties because people just can’t get enough. Nabisco asked me to make their holiday version of these and these melted snowmen Oreo balls couldn’t get any cuter.
Start by making your Oreo truffles. Mix the cream cheese and crushed Oreos and form them into balls. Place them in the freezer to get hard. You can do this step way ahead to save time. 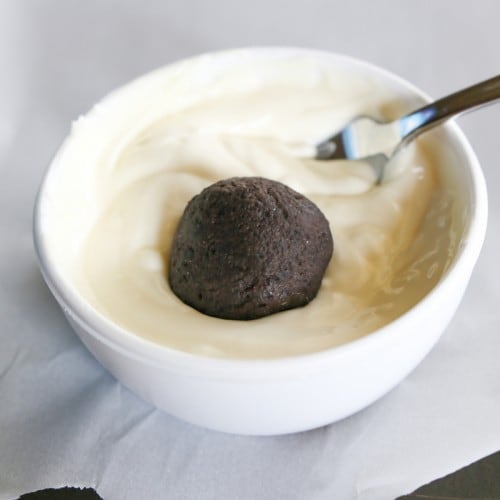 Once they’re frozen, dip them in your melted candy coating. In the past I’ve dipped mine in milk chocolate so I didn’t have to mess with getting any of the Oreo in the white coating.
But for these snowman we obviously want to use a white coating. I’ve noticed that the actual vanilla candy wafers work better than almond bark and don’t leave the trail of Oreos in the coating.  Usually with Oreo truffles you have to dip them and then shake off the excess coating to get a nice round ball. The great thing about these is you don’t have to worry about that.
Once you’ve dipped them let the coating pool at the bottom to give you the melting snowman effect. These mini Oreos work perfectly for the snowman’s hat.  You can decorate the faces with frosting or even use sprinkles for the eyes and nose. I used the frosting in the tubes in the baking aisle.
Just make sure after you decorate them, stick them in the fridge so the faces can harden. These take a little time but my kids loved them!
To get some fresh new holiday party inspiration, make sure to visit The Ultimate Party Planner.
It features lots of yummy and festive holiday recipes along with tips on how to host the perfect party this holiday season and you can print Publix coupons to use for your grocery shopping this holiday season. Visit nabiscopublixpartyplanner.com to get inspired and save.
Melting Snowman Oreo Balls
Prep Time
40 mins
Total Time
40 mins
Servings: 40
Ingredients
- 1 pkg. (8 oz.) brick cream cheese, softened
- 36 OREO Cookies (regular size), finely crushed
- 16 oz . vanilla candy coating , melted (like Candiquick or almond bark)
- 48 Mini OREO Bite Size Cookies
- decorations: decorating icing or gel; multi-colored sprinkles

Instructions
-
Mix cream cheese and cookie crumbs until well blended. I like to crush the Oreos in a food processor and then add the cream cheese and process it together. It can also be done by hand though.
-
Shape into 48 (1-inch) balls; place in single layer in shallow pan. Some readers have stuck toothpicks in the top before freezing for easier dipping later. Freeze for at least 20 minutes. They can be frozen for longer. Dip balls in melted coating (see note); I do this by using a fork and tapping the fork on the bowl of my candy coating to remove some of the extra coating. If you used the toothpick option dip balls and then gently remove the toothpick and fill in the hole with melted candy coating. Place in shallow waxed paper-lined pan, allowing excess coating to pool at bottom of each ball.
-
Chill balls until coating is set.
-
Decorate with remaining ingredients as shown in photo. You can use the candy coating to adhere the hat to the head. Place in the fridge immediately to set up the decorations.
-
Refrigerate 1 hour or until firm. Keep refrigerated.
Recipe Notes
I have used almond bark before to dip these but found that the candy wafers work better. Sometimes when you dip the balls the Oreos can leave some crumbs in the coating but the wafers tend to do this way less.
I like to divide my coating into half or fourths so that if for some reason dark oreo bits get in one bowl you have others as back up. You can even dip them twice. Once in a layer and if it has oreo bits, oh well. The second time dip them in a fresh melting coating bowl and then there are no crumbs to worry about. I only had to dip these once but in the past I’ve had oreo bits sneak in my white coating
Source: http://www.snackworks.com/recipe/melting-snowmen-cookie-balls-128120.aspx
Continue Reading

(Family Features) If you’re in need of a soup outside the usual mushroom or celery varieties, turn to another springtime favorite: carrots. More than just a veggie you can serve with dip, they’re creamy, delicious and pair well with ginger in this Creamy Carrot Soup. Discover more easy recipes for family meals at Culinary.net.

Creamy Carrot Soup
Recipe courtesy of “Cookin’ Savvy”
Servings: 4-6
- 2 cans (14 ounces each) carrots
- 2 cups broth of choice
- 1/2 cup brown sugar
- 1 tablespoon garlic powder
- 1 tablespoon onion powder
- 2 teaspoons ginger
- 1/4 cup orange juice
- 1/4 cup heavy cream
- salt, to taste
- pepper, to taste
- honey
- BLT wraps, for serving
- In blender, blend canned carrots, including juices, until smooth. Transfer to pot and add broth.
- Mix in brown sugar, garlic powder, onion powder, ginger and orange juice. Bring to simmer then add cream. Add salt and pepper, to taste.
- Drizzle honey over each bowl. Serve with BLT wraps.
SOURCE:

(Family Features) Permanent heat may be on the way, but spring still offers plenty of chilly, rainy opportunities for a warmup from the inside-out. Serve a comforting bowl of Lemon Chicken Orzo Soup to keep spring chills away. Discover more seasonal recipes at Culinary.net.
Watch video to see how to make this recipe!

Lemon Chicken Orzo Soup
Recipe courtesy of “Cookin’ Savvy”
Servings: 4-6
- 2 carrots
- 2 celery stalks
- 3 tablespoons butter
- 2 cups cooked, chopped chicken
- 1/3 cup lemon juice
- 2 teaspoons lemon pepper
- 6 cups broth
- 1 cup orzo
- 1 tablespoon garlic powder
- 1 tablespoon onion powder
- 1 tablespoon thyme
- 1 tablespoon sugar
- 1 cup heavy cream
- salt, to taste
- pepper, to taste
- cucumber sandwiches, for serving
- Chop carrots and celery. In pot, saute with butter.
- In bowl, mix chicken with lemon juice and lemon pepper then set aside.
- After carrots and celery are tender, add broth and orzo to pot. Then add garlic powder, onion powder, thyme and sugar. Simmer 10 minutes then add chicken and cream; simmer about 5 minutes.
- Add salt and pepper, to taste. Serve with cucumber sandwiches.
SOURCE:

By Suzanne Storey
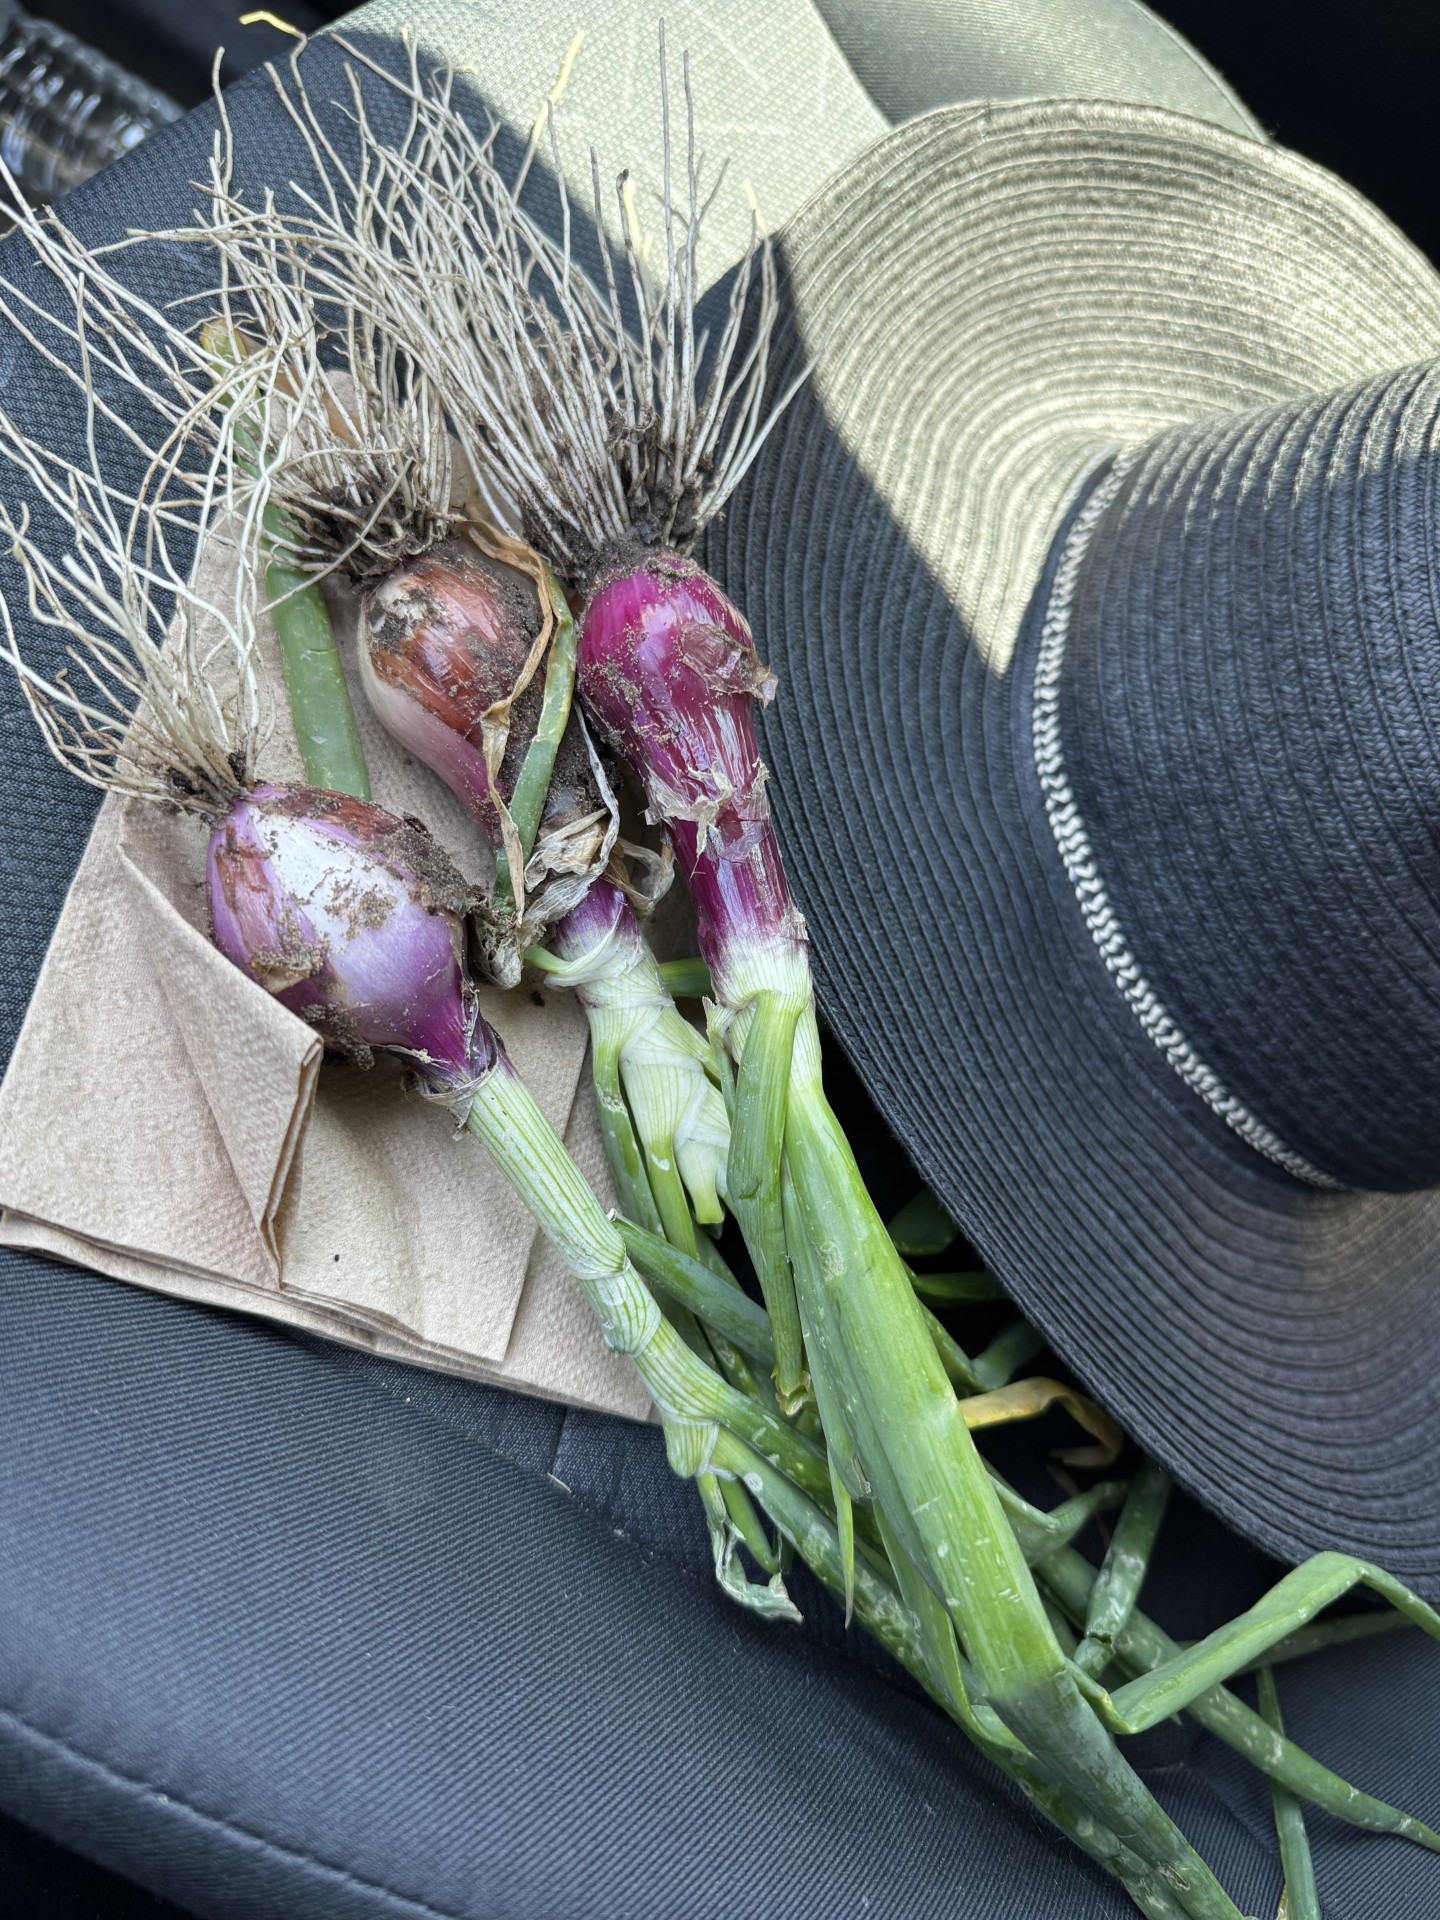
Do you have an abundance of green onions this time of year? If you’re fortunate enough to experience this, consider yourself lucky! First, let’s clarify a few terms.
Essentially, green onions and scallions refer to the same vegetable; however, the terminology often depends on cultural context. I often call them spring onions, and my parents referred to them the same way. On the other hand, fancy chefs and culinary experts typically use the term “scallions.”
I wasn’t even aware of what a scallion was until about 10 years ago, so don’t be too hard on yourself if you’re in the same boat.
Read the full story on spring onions, along with definitions of onions and the efforts to grow a community garden in Nocona in your Thursday Bowie News.


-
 NEWS2 years ago
2 hurt, 1 jailed after shooting incident north of Nocona
-

 NEWS1 year ago
Suspect indicted, jailed in Tia Hutson murder
-
 NEWS2 years ago
SO investigating possible murder/suicide
-

 NEWS2 years ago
Wreck takes the life of BHS teen, 16
-

 NEWS2 years ago
Murder unsolved – 1 year later Tia Hutson’s family angry, frustrated with no arrest
-
NEWS2 years ago
Sheriff’s office called out to infant’s death
-
 NEWS2 years ago
Bowie Police face three-hour standoff after possible domestic fight
-
NEWS2 years ago
Driver stopped by a man running into the street, robbed at knifepoint