
Live Better
Installing bathroom tile like a pro


(Family Features) Updating the flooring can help infuse new life into tired, outdated bathrooms. For an upscale, polished look that doesn’t have to break the bank, consider installing tile flooring.
Before you get started, you’ll want to make some decisions about the look and feel of your flooring:
Ceramic or stone? Weigh factors such as porosity, how slippery the surface may be when wet and how well it retains heat or cold. Ultimately, your decision hinges on the needs and uses of your family.
Complement or contrast? Define the overall style you want as well as the colors and tones that will help best achieve your vision.
Big or small? Generally, the larger the tile, the fewer grout lines, and too many grout lines in a smaller space can create the illusion of clutter. However, smaller tiles can eliminate the need to make multiple awkward cuts, and small tiles are perfect for creating accent patterns or introducing a splash of color.
When you’ve got your overall look and materials selected, keep these steps in mind as you begin laying the flooring:
- Prepare your subfloor. Use a level to check for uneven spots; you need an even surface to prevent cracks in the tile or grout as well as rough spots that could pose tripping hazards. Use patching and leveling material to create a consistent surface. Apply a thin layer of mortar then attach your cement backer board with screws. Cover joints with cement board tape, apply another thin layer of mortar, smooth and allow to dry.
- To ensure square placement, draw reference lines on the subfloor using a level and carpenter square. Tile should start in the middle of the room and move out toward the walls, so make your initial reference lines as close to the center as possible. Mark additional reference lines as space allows, such as 2-foot-by-2-foot squares.
- Do a test run with your chosen tile by laying it out on the floor. There are color variations in most tile patterns, so you’ll want to verify each tile blends well with the next.
- Mix tile mortar and use the thin side of a trowel to apply mortar at a 45-degree angle. Use the combed side to spread evenly and return excess mortar to the bucket. Remember to apply mortar in small areas, working as you go, so it doesn’t dry before you’re ready to lay the tile.
- When laying tile, use your reference lines as guides. Press and wiggle tile slightly for the best adherence.
- Use spacers to create even lines between one tile and the next, removing excess mortar with a damp sponge or rag.
- As you complete a section of tile, use a level and mallet to verify the tiles are sitting evenly.
- Let mortar dry 24 hours before grouting.
- Remove spacers then apply grout to joints, removing excess as you go.
- Allow grout to dry per the manufacturer’s instructions then go back over tile with a damp sponge to set grout lines and clean grout residue.
- Once grout has cured – usually at least a couple weeks – apply sealer to protect it.
Find more ideas and tips for updating your bathroom at eLivingtoday.com.
Photo courtesy of Unsplash
SOURCE:
Family Features

(Feature Impact) Owning a small business has been a cornerstone of the “American Dream” for generations. It represents the chance to transform a passion into a livelihood and legacy. However, turning dreams into reality is rarely a smooth or easy process and requires more than ambition alone. Today’s business owners need support and access to tools that enable them to overcome challenges and keep growing.
Recent research conducted by the Capital One Insights Center shows 75% of more than 1,000 surveyed small business owners with more than one employee and annual revenues of up to $20 million are confident about the future, and 69% believe their business is actively primed for growth.
While this optimism is promising, 47% of business owners still said their operations either stayed the same or became less efficient over the past year, citing issues like back-office friction and fragmented financial systems that make it difficult to get a clear picture of the health of their businesses.
If you’re a small business owner eager to grow but not sure how to get there, start with this advice from real small business owners and experts at Capital One.
//www.youtube.com/embed/VX48mqEaSnE
Identify Sources of Friction
Before you can pour effort into growth, you must understand what barriers are holding you back. Take time to look under the hood of your business to identify where time and energy is being lost.
For example, you may be among the 78% of small business owners who feel stressed and uncertain about expense management – think hours spent hunting for receipts, manually entering numbers into software and reconciling accounts. Operational challenges aren’t just a hassle; they also pull attention away from important priorities like serving your customers and planning for growth.
“We were focused on making as many candles as possible, especially during the busy season,” said Katie Roering, co-owner of Fontana Candle Co. “A lot of the back-office tasks like procurement, raw material purchasing, forecasting – all the really important things – were done at 3 a.m., 8 p.m. or on Saturday and Sunday, and there really just was not enough time in the day to get everything done that we needed to. We just knew as we continued to grow, we needed to streamline our processes, build out our team and keep moving forward.”
 Use Integrated Tools to Manage Finances
Instead of balancing 10 different tracking and analysis tools, you can turn to one-stop solutions to improve efficiency. Time gets lost when you’re forced to manually gather and interpret relevant data before you’re able to act. You need a platform that handles the busywork for you.
Integrated, or “all-in-one,” financial tools – like accounting and bookkeeping platforms with automation capabilities or business credit cards featuring built-in analytical tools – allow you to easily stay on top of cash flow and day-to-day operations. For small businesses where every hour and dollar makes a difference, consolidating and automating systems can have an immediate impact. In fact, 51% of survey respondents said integrated tools have already fueled their growth.
Leverage Credit Access and Rewards Wisely
Growth requires capital, so access to credit is a game-changer for many business owners, with 77% describing it as a key factor in achieving business resilience. Having funds accessible when you need them makes your business more capable of weathering storms such as equipment failures and seasonal slowdowns. It also puts the power in your hands to act when an exciting opportunity presents itself, like an inventory flash sale or the chance to advertise in a new market.
Access to credit comes with another advantage: rewards. By using credit cards for your daily business expenses, you can earn cash back, points or travel rewards. Whether you redeem these to cover everyday expenses, book business trips or reinvest in the business, they can act as a bonus source of income. Learn to maximize rewards like the 84% of small business cardholders surveyed so you aren’t leaving money on the table.
To learn more about how small business owners can identify obstacles, employ integrated financial tools and use credit as a tool for growth, read the full report at capitalone.com/about/insights-center.
Photos courtesy of Shutterstock

SOURCE:
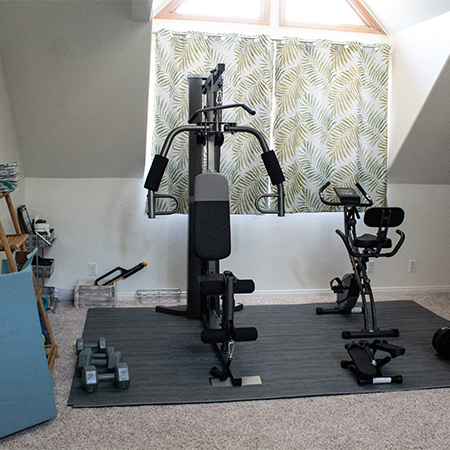
(Feature Impact) It’s a tale as old as treadmills: You buy a new exercise machine with the best of intentions, only for it to become an expensive laundry rack that makes you feel guilty every time you glance over at it. When it comes to making lifestyle changes, the key is not to overhaul your whole routine at once, but to figure out what habits match your lifestyle, personality and passions.
Use these tips to create a home workout space you’ll keep using after the novelty wears off.
Figure Out What Exercises You Enjoy
Before you commit to a big equipment purchase, think about what kinds of exercise feel natural and enjoyable (and which ones make you groan).
If you love running, a treadmill may be worth the space it takes up. However, a rack of dumbbells might just wind up collecting dust if you hate lifting weights. Yoga or dance enthusiasts may prefer to design a more studio-like home gym, while bodyweight strength trainers could be happy with a pull-up bar in the doorway and a mat to do planks on. Consider joining a workout class or gym for a month or two to try different kinds of exercises and machines so you’ll have a better idea of what’s worth investing in permanently.
Evaluate the Space You Have
A good home workout area needs to work around the physical realities of your house or apartment. If you have a whole room or finished basement to dedicate to the cause, this won’t constrain you too much. If you’re working with a corner of your home office, bedroom or garage, saving space becomes a more critical factor.
In these cases, it all comes down to priorities. If you only have room for one piece of bigger equipment, get the one you know you’ll actually use, whether that’s an elliptical, strength machine, standing bicycle or rowing machine. Then build out your collection with other items that can be easily moved and stored, like resistance bands and small weights or dumbbells.
Start Small and Expand as Needed
Don’t fall into the trap of thinking you need to have everything before you can get started. It’s often better to build out your workout space slowly – get a few things at a time, see what you use regularly and figure out what you might be missing along the way. Maybe you realize you enjoy lifting weights and keep wishing you had heavier ones, signaling a need to upgrade.
Add Some Atmosphere
Dark, dismal home gyms are more likely to make your workout feel like a punishment instead of a part of your day worth looking forward to. Creating a space you enjoy being in is just as important as choosing a workout you enjoy doing.
For you, that might look like choosing an area of the home with plenty of natural lighting to make you feel more awake – or adding string lights and color-changing wall sconces for a relaxing yoga session. Maybe it means adding art on the walls or a floor-to-ceiling mirror so you can check your form. A large rubber floormat with a cheerful design, a sound system to play your favorite hype songs or a daily calendar of motivational quotes could be the magic ingredient to get you into the right mindset so you can crush your workout. As long as it works for you, anything goes.
For more tips on home design that fits your life, visit eLivingtoday.com.
Photo courtesy of Unsplash
SOURCE:

(Feature Impact) As temperatures cool, now is an ideal time to prepare your home for winter. Taking care of seasonal maintenance before the cold weather arrives can help protect you and your wallet from unexpected and costly repairs.
From clearing gutters to scheduling an HVAC tune-up, tackling a few projects now can help set your home up for a safe and comfortable winter. Consider this your ultimate fall home maintenance checklist from the experts at Carrier.
1. Clean Gutters
Leaves and debris collect quickly in home gutters and downspouts. Make sure they are clear so water can drain properly and away from your home’s foundation. If you wait until after temperatures drop, you run the risk of ice dams and water damage.
2. Inspect Your Outdoor HVAC Equipment
Remove leaves, grass clippings and debris that may have accumulated around your outdoor unit. Maintaining proper clearance can help support airflow and system performance throughout the season.
3. Replace HVAC Filters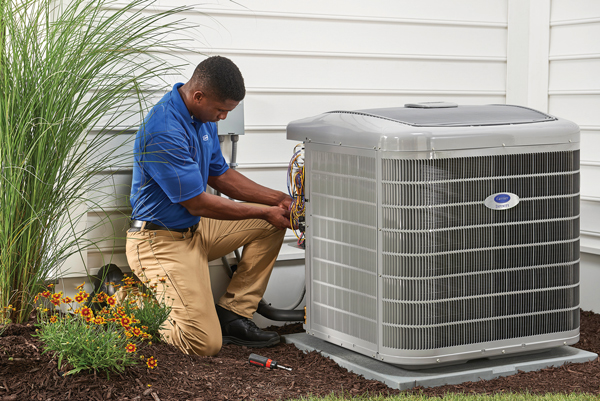
A dirty filter can restrict airflow and force your system to work harder, potentially increasing energy use and reducing comfort. A simple filter check can also help prepare your heating system for increased use. Check your HVAC filter before turning on your heating system and continue inspecting it throughout the winter. To help maintain proper airflow, Carrier typically recommends replacing air filters every 1-3 months.
4. Test Smoke and Carbon Monoxide Detectors
When changing clocks, test your smoke alarms and carbon monoxide detectors. Replace batteries as needed. Working carbon monoxide alarms are especially important as temperatures fall and home heating systems begin running more frequently.
5. Schedule Your HVAC Tune-Up Before Winter Arrives
Don’t wait until the first cold day of the season to find out your heating system isn’t ready for winter. Annual maintenance can help improve efficiency, extend equipment life and identify potential issues before the heating season begins. Experts often recommend having an HVAC professional perform annual furnace maintenance in the fall before heating season begins. Routine maintenance can help keep a system operating in tip-top shape and allow a technician to identify smaller issues before they become costly repairs.
However, if replacement is recommended, the upfront price doesn’t necessarily have to stand between you and a more comfortable home. Consider options from Carrier, which offers flexible financing options through participating dealers. Depending on the financing plan you qualify for and your home’s heating and cooling needs, a new system could cost less than you think. Homeowners can also explore utility rebates on qualifying equipment.
6. Test Your Thermostat
Testing your thermostat early helps ensure your heating system is communicating properly before temperatures drop. Switch to heating mode early to make sure your system responds properly (just don’t forget to turn it back off). Replace batteries, if necessary, and consider whether a smart thermostat could provide additional comfort and control over your home’s heating schedule.
7. Seal Air Leaks Around Doors and Windows
Drafts can make a home feel colder and allow warm air inside your house to escape. Inspect weatherstripping around doors and windows and replace it where needed. Caulk visible gaps to help keep conditioned air inside and improve your family’s comfort.
8. Check Your Home’s Insulation
Finally, look at insulation in areas such as the attic, crawl spaces and basement. Doing so can help keep heated air where it belongs and reduce the workload on your heating system all winter long.
To learn more about preparing your heating or cooling system for the season, exploring financing and rebates or finding a local expert, visit Carrier.com.
SOURCE:






-

 NEWS3 years ago
Suspect indicted, jailed in Tia Hutson murder
-

 NEWS4 years ago
Wreck takes the life of BHS teen, 16
-
 NEWS4 years ago
2 hurt, 1 jailed after shooting incident north of Nocona
-
 NEWS3 years ago
SO investigating possible murder/suicide
-

 NEWS3 years ago
Murder unsolved – 1 year later Tia Hutson’s family angry, frustrated with no arrest
-
 Show us something good9 years ago
Country music star children perform in Bowie
-
 100th Birthday4 years ago
Looking back at the 1958 Centennial edition of The Bowie News
-
NEWS3 years ago
Sheriff’s office called out to infant’s death