
EDIBLES
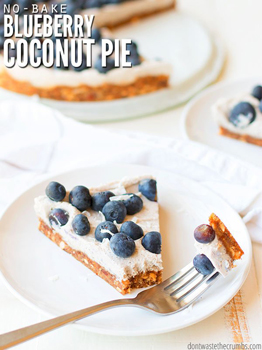
No-bake coconut blueberry pie
When you’re on the Whole30, desserts and snacks are off limits. Removing certain food groups (sugar, gluten, grains, dairy, alcohol and legumes) is just as important as re-training the way your brain and stomach communicate so that everything is working the best way possible.
No sugar wasn’t too bad since we’ve been in the process of quitting sugar anyway. We followed the no-snacks and no-dessert rule pretty strict. Anytime the kids had a “snack” it was actually a mini-meal, and there was fruit at the dinner table to satisfy that “sweet” craving after our meal.
The only time I broke the rule was on Easter Sunday, when my good friend Katie visited with her family. On that day, I busted out avocado chocolate pudding cups and this no-bake coconut blueberry pie recipe.
And I don’t regret it for one moment.
It was a special occasion AND we had company… and despite the fact that it was technically dessert, we served it as soon as dinner was over AND the ingredients are entirely Whole30 compliant.
- No gluten
- No dairy
- No sugar
There’s also no baking involved either, but that’s just a perk!
You’d think that this no-bake coconut blueberry pie would be have no taste, given the lack of ingredients we usually think of when it comes to dessert (i.e. sugar, butter and flour in homemade chocolate cake or pumpkin cookies with cream cheese icing or even healthy sugar cookies), but it’s quite the opposite – this dessert is a flavor bomb!
NO-BAKE COCONUT BLUEBERRY PIE RECIPE
Let’s break down what this no-bake coconut blueberry pie recipe consists of:
THE CRUST
My famous homemade pie crust consists of flour, butter and a smidgen of milk. All three of which are a no-go on the Whole30.
I still wanted that defined “crust,” so I used whole almonds and dates.
Once the almonds are put through a food processor or blender, they become a combination of almond flour and finely chopped almonds.
Add the dates to the mix and you get what looks like a huge ball of sticky almonds… But this sticky ball is malleable, and can be pushed down into the bottom of your springform pan to make a lovely crust.
It also hardens in the fridge, making it more “crust-like” than soft ball of dates
WHICH COCONUT MILK SHOULD YOU BUY FOR THE FILLING?
I tested more cans of coconut milk than I could count trying to perfect this recipe, so take note of my cautions.
First, you need canned coconut milk. The coconut milk you find in the dairy case by the regular milk will not work.
Second, your canned coconut milk should have these ingredients, in this order: coconut, water, guar gum. If you can find coconut milk without guar gum, that’s awesome because it’s one less additive you’re eating.
You DON’T want is coconut extract or coconut milk to be listed as an ingredient.
Once you find the right coconut milk, put it in the fridge for at least 24 hours. The longer the better really, because as it sits, the coconut solids will separate from the water and rise to the top of the can. These solids are called coconut cream and they MUST rise to the top and become a solid in order to make the filling for the pie.
If you just went to the store and you’re hankering for this no-bake coconut blueberry pie, I’m so sorry. Please put your cans of coconut milk in the fridge and patiently wait until tomorrow. Or preferably, the next day.
THE BEST WAY TO GET COCONUT CREAM OUT OF THE CAN
I forget where I saw this, but here’s the best way to get coconut cream out of the can.
- Remove the can from the fridge.
- Turn it upside down.
- Open the can with a can opener.
- Pour out the water from the can.
- Scoop out the coconut cream with a spoon or spatula.
I’ve tried it the other way – where you open the can from the top and scoop until you reach the liquid – but you sometimes scoop out water with the solids when you use that method… and you certainly don’t want the liquid in this recipe!
Opening the can upside is a game changer – I’ll never go back!
THE FILLING
The filling is nothing more that whipped coconut cream. To make whipped coconut cream, you put the coconut solids (and no liquids) in the bowl of a stand mixer. Attach the whisk, turn the speed up to high and let it whip for 3-5 minutes. The whipped coconut cream is ready when you pull the whisk through the cream and it leaves a clear line and the coconut does not fill in on itself.
I added vanilla powder for a bit of extra flavor, but it’s not necessary.
You can’t have vanilla extract on the Whole30, so I have not tested making whipped coconut cream with it. I personally wouldn’t recommend it, if anything, because the additional liquid might interfere with whipping the coconut cream.
THE TOPPING
I kept the topping super simple: fresh blueberries.
I added a smidgen of shredded coconut for the sake of pretty pictures, but you don’t have to do that if you don’t want to.
For that matter, you don’t even have to use blueberries if you don’t want to… fresh
strawberries, blackberries or raspberries would all work.
Granted, it wouldn’t be a coconut blueberry pie anymore, but it would still be amazing!
FINAL THOUGHTS BEFORE YOU DIG IN
Please read this recipe through all the way before you start making it. The coconut milk needs to be refrigerated, the crust needs to be refrigerated and the entire pie needs to be refrigerated. The timing of all of this should be taken into account before you dig in.
This pie keeps well in the fridge for 2-3 days. I’m sure it can last 4, but my family eats the entire thing well before then!
To cut, I recommend using a sharp knife. Run the knife through water before slicing to help get a clean cut.
You can freeze the pie to speed up the process. The first time I made this pie, it was just a few hours before Easter dinner. I put the pie in the freezer to speed up the cooling and solidifying process and it worked, but the filling was more icey than creamy. It wasn’t bad, just different. If you’re short on time, the freezer can work in a pinch.
The cost of the dates prevent this recipe from being super frugal… but if you’re on a restricted diet, sometimes its worth the splurge to feel like you can eat normal again.
COCONUT BLUEBERRY PIE IS AN ALLERGY FRIENDLY DESSERT, PERFECT FOR CELEBRATING ANY OCCASION.
- Get a perfectly round pie that’s easy to slice with a springform pan like this one.
- Blend up your almonds and dates in a food processor or high-powered blender to get the best consistency.
- Don’t end up with a “coconut milk emergency” and keep a can of this type of coconut milk in your fridge.
- If blueberries aren’t in season, use a different seasonal fruit to save money and try new flavors!
While ingredients like almonds and dates aren’t typically frugal, you CAN stock your real food pantry with healthy options like these with the techniques learned in Grocery Budget Bootcamp!
- ¾ cup whole almonds
- 1½ cups dates, quartered (about 15 dates)*
- pinch of salt (optional)
- 2 cans canned coconut milk OR canned coconut cream, refrigerated for at least 24 hours**
- ½ tsp vanilla powder (optional)
- 1 pint fresh blueberries
- This recipe requires the canned coconut milk to be refrigerated for at least 24 hours BEFORE starting. The pie itself requires at least 2 hours of cooling in the fridge. Please keep this in mind before you begin.
- Prepare your pan: Line an 8-9″ springform pan with parchment paper. Put the ring on the base and tighten.
- In a food process or blender (I used my Blendtec with the four-sided jar), place whole almonds and quartered dates. If your almonds are unsalted, add just a pinch of salt, if desired.
- Pulse until the almonds are finely chopped and the dates are no longer in large chunks. This took several rounds in my Blendtec and I ended up with a large ball of mashed dates and almonds. This is normal.
- Put the almond date mixture into the bottom of the lined springform pan. Using wet knuckles, push the mixture to the outer edges of the pan, doing your best to make an even layer of crust. Re-wet your knuckles as kneeded.
- Put the crust in the fridge as you prepare the filling.
- Remove the cans of coconut milk from the refrigerator. Turn them upside down, open them with a can opener and pour out the water. Use a spoon and/or spatula to get ALL of the remaining solid (coconut cream) from the can and place it in the base of a stand mixer. Add the vanilla powder, if using.
- Using the whisk attachment, turn the mixer on high and whip the coconut cream for 3-5 minutes. The coconut cream is done when you can make a line through the cream with the attachment and the coconut cream does not fold in on itself.
- Remove the crust from the fridge. Using a spatula, very gently spread the whipped coconut cream evenly over the crust.
- Top with fresh blueberries and place in the fridge to set for at least 2 hours.
- Cut and serve, storing the pie in the fridge.
** See notes for choosing the right coconut milk.
(Feature Impact) Whether you’re grilling in the backyard, at a picnic or simply relaxing poolside to celebrate America’s 250th anniversary, this summer is sure to be filled with special celebrations. Throughout those 250 years, food has brought people together – and continues to do so.
From barbecues to patios, fresh foods are at the heart of American celebrations. Healthy, fresh ingredients help elevate classic recipes with sweet corn taking center stage in many iconic summer dishes. As a trusted American grower, Duda Farm Fresh Foods provides equally healthy and flavorful recipes using Dandy Sweet Corn to build the heart of your menu.
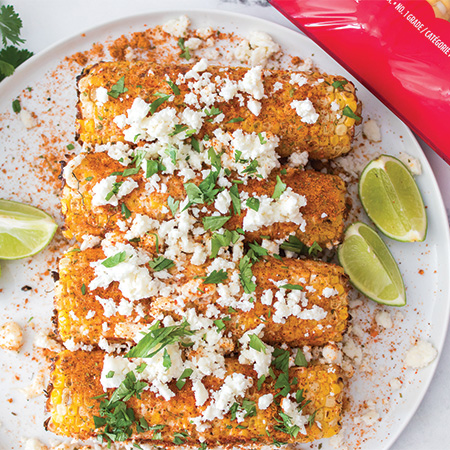
While corn on its own is a classic side dish – with Americans consuming approximately 1,400 bushels per year, according to the U.S. Department of Agriculture – you can put a twist on tradition by serving Elote, also known as Mexican street corn, as a bold and delicious way to enjoy fresh corn at its best. Cooked to perfection then slathered in a creamy, zesty mix of mayonnaise, lime juice, cheese and chili powder, Elote transforms a simple ear of corn into an irresistible snack or side.
You can add its vibrant flavor and fun to your table with a number of easy cooking methods:
- Grill: For the traditional method of cooking Elote, preheat your grill to medium-high heat. Place the corn directly on the grill grates then cook 10-15 minutes, turning every 2-3 minutes until nicely charred and cooked through, like these recipes for Easy Elote Corn or Vegan Elote.
- Boil: Bring a large pot of salted water to a boil. Add corn and cook 5-7 minutes until tender.
- Roast: Preheat the oven to 400 F. Place corn on a baking sheet and roast 20-25 minutes, turning halfway through.
- Air Fryer: Preheat the air fryer to 400 F. Cook corn for 12-15 minutes, turning once.
Visit DudaFresh.com to find more ways to elevate your patriotic celebrations.
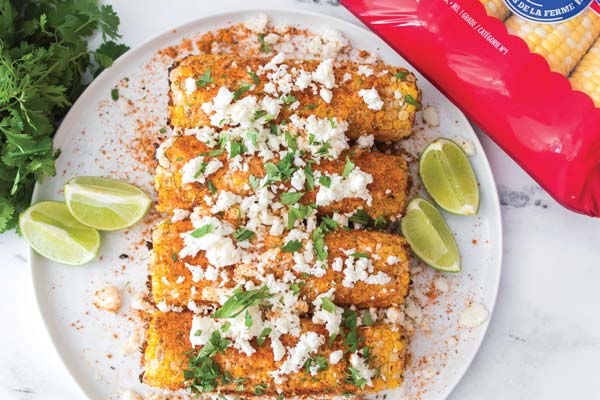
Easy Elote Corn
Recipe courtesy of The Produce Moms on behalf of Duda Farm Fresh Foods
Servings: 4
- 1 Dandy Sweet Corn Tray (4 count)
- 1 lime, juice only (about 2 tablespoons)
- 1 cup mayonnaise or Mexican crema
- 2 tablespoons Elote seasoning
- 1 cup cotija cheese, crumbled
- fresh cilantro, chopped, for garnish
- hot sauce or chili powder (optional)
- Heat grill to medium-high heat.
- Place corn directly on grates and cook 10-15 minutes, turning every 2-3 minutes, until charred and cooked through.
- While corn is still warm, squeeze lime juice on all sides. Brush or spoon mayonnaise on each ear, ensuring all sides are coated.
- Evenly sprinkle Elote seasoning over coated corn. Using hands, gently press seasoning into mayo.
- Arrange Elote on serving platter, sprinkle with cotija cheese and garnish with fresh chopped cilantro. Serve with hot sauce or chili powder for extra heat, if desired.
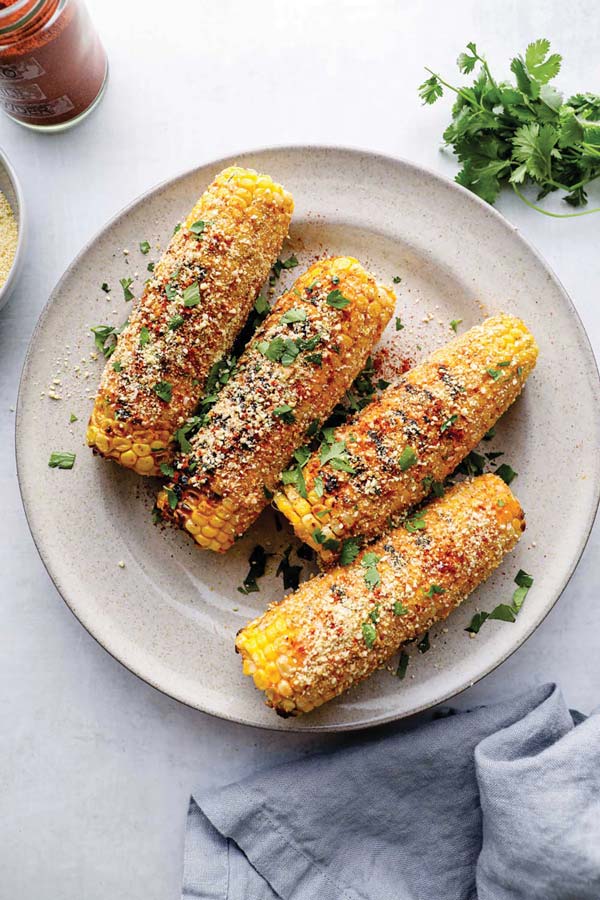
Vegan Elote
Recipe courtesy of Darn Good Veggies on behalf of Duda Farm Fresh Foods
Cook time: 16 minutes
Total time: 28 minutes
Servings: 4
Vegan Parmesan:
- 1/2 cup raw cashews
- 2 tablespoons nutritional yeast
- 1/2 teaspoon garlic powder
- 1/2 teaspoon salt
Elote:
- 1/3 cup vegan mayonnaise
- 1/2 teaspoon ancho chili powder
- 1 clove garlic, minced
- 1 tablespoon lime juice
- 1/4 teaspoon chipotle powder (optional)
- 1 pinch salt
- 4 ears Dandy Corn
- 2 tablespoons chopped cilantro
- To make vegan Parmesan: In small food processor or blender, pulse cashews, nutritional yeast, garlic powder and salt until it resembles grated Parmesan.
- Heat grill or grill pan to medium-high heat.
- In bowl, stir mayo, ancho chili powder, garlic, lime juice, chipotle powder and salt until smooth.
- Place corn on grill or grill pan and cook on all sides until corn is cooked and has grill marks, about 4 minutes per side.
- Spread corn with chili mayo then sprinkle with vegan Parmesan and cilantro.
SOURCE:
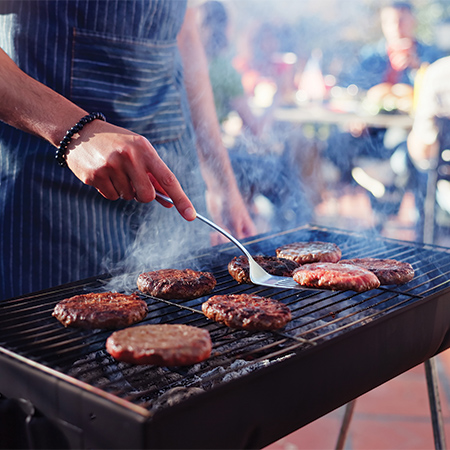
(Feature Impact) There’s just something timeless about a summer cookout with friends, family or neighbors. Whether it’s the sound of burgers sizzling on the grill or the smell of your favorite seasonal sides, the event invokes nostalgia and camaraderie.
While the spotlight may land on the burgers and barbecued fare, seasoned grill masters know the supporting cast matters, too. Makers of soft, delicious hamburger and hot dog buns fit to be the foundation of summer gatherings for more than 100 years, the bun experts at Wonder suggest a few ways to ensure your entertaining ventures are successful throughout the season.
Do What You Can Ahead of Time
Stick to a mix of easy favorites and make-ahead sides to keep prep manageable while offering something for everyone to enjoy. When possible, prep ahead of time so you can keep your focus on the fun and your attention on the hot grill. Chop vegetables, wash lettuce for burgers, make sure you have picked out the perfect buns, form and season beef patties and mix marinades the day before the big bash to avoid last-minute rushes around the kitchen.
Prep the Grill
Patience is key when it comes to grilling, as a properly heated grill is the foundation for good cooking. Give gas grills enough time to come to temperature, around 10-15 minutes, and allow charcoal to ash over completely. When grilling different types of food, it’s especially helpful to set up cooking zones – direct and indirect – so you can cook meat, veggies and buns differently or move finished food to one side, as needed.
Additionally, to help prevent sticking, lightly oil the clean grill grates before cooking. Using tongs and a paper towel dipped in oil is often more effective than coating foods with oil.
Use a Meat Thermometer
You may be a seasoned grill master, but guesswork can lead to mistakes, especially when cooking for a crowd. Avoid overcooked (or worse, undercooked) chicken and burgers by using an instant-read thermometer to help ensure meat is cooked safely while retaining its juicy flavor.
Grill Buns Correctly
 Burgers and hot dogs are classics for a reason, but avoiding soggy buns and mid-bite fallout requires the right bun for the job. Striking the perfect balance of pillowy softness with the structure to hold their shape through every loaded topping, condiment and bite is key when choosing the right bun for the job. More than just a vehicle for grilled favorites, Wonder Classic Hamburger and Hot Dog Buns are a familiar taste that makes cookouts delicious and have held it together, literally and figuratively, for more than a century. In continuing its longstanding partnership with the USO through the annual Deploy the Joy campaign, you can keep an eye out through Sept. 12 for special packaging on select products with scannable QR codes for a chance to win a $10,000 Birthday Bash.
For great grilled buns, follow a few easy steps:
- Brush cut sides of buns with softened butter, mayo or both to help the bun brown evenly.
- Lightly salt the buttered side before grilling.
- During the last 2 minutes of cooking burgers or dogs, place buns cut-side down over medium-low heat for 30-60 seconds. Look for a light golden toast, crisp enough to hold up.
Let Food Rest Before Serving
After grilling, give meat a few minutes to rest before serving or slicing. This allows juices to redistribute throughout the food for better texture and flavor.
Layer Burgers, Condiments and Toppings
After toasting buns, add a thin layer of sauce to coat the bun then lettuce that’s been patted dry to remove moisture. Add cheese to the opposite bun and be sure to place the burger and other toppings in the center to keep moisture away from the bread, preventing sogginess. Follow this simple order for sturdy buns:
- Toasted top bun
- Condiment or sauce
- Cheese
- Burger
- Tomato and onion
- Lettuce
- Condiment or sauce
- Toasted bottom bun
From simple, practical menus to crave-worthy twists on classics, you can find more ways to host a successful summer barbecue by visiting WonderBread.com/recipes.
Photo courtesy of Shutterstock (grilling hamburgers)
SOURCE:
Food is supposed to bring people together.
It sits at the center of our holidays, church potlucks, birthday parties, first dates, family reunions and late-night kitchen conversations. In Texas especially, I feel like feeding people is one of the purest forms of love we know. We celebrate with casseroles, comfort with pies, and gather around smoked meats and shared desserts.
Food is hospitality. Food is belonging.
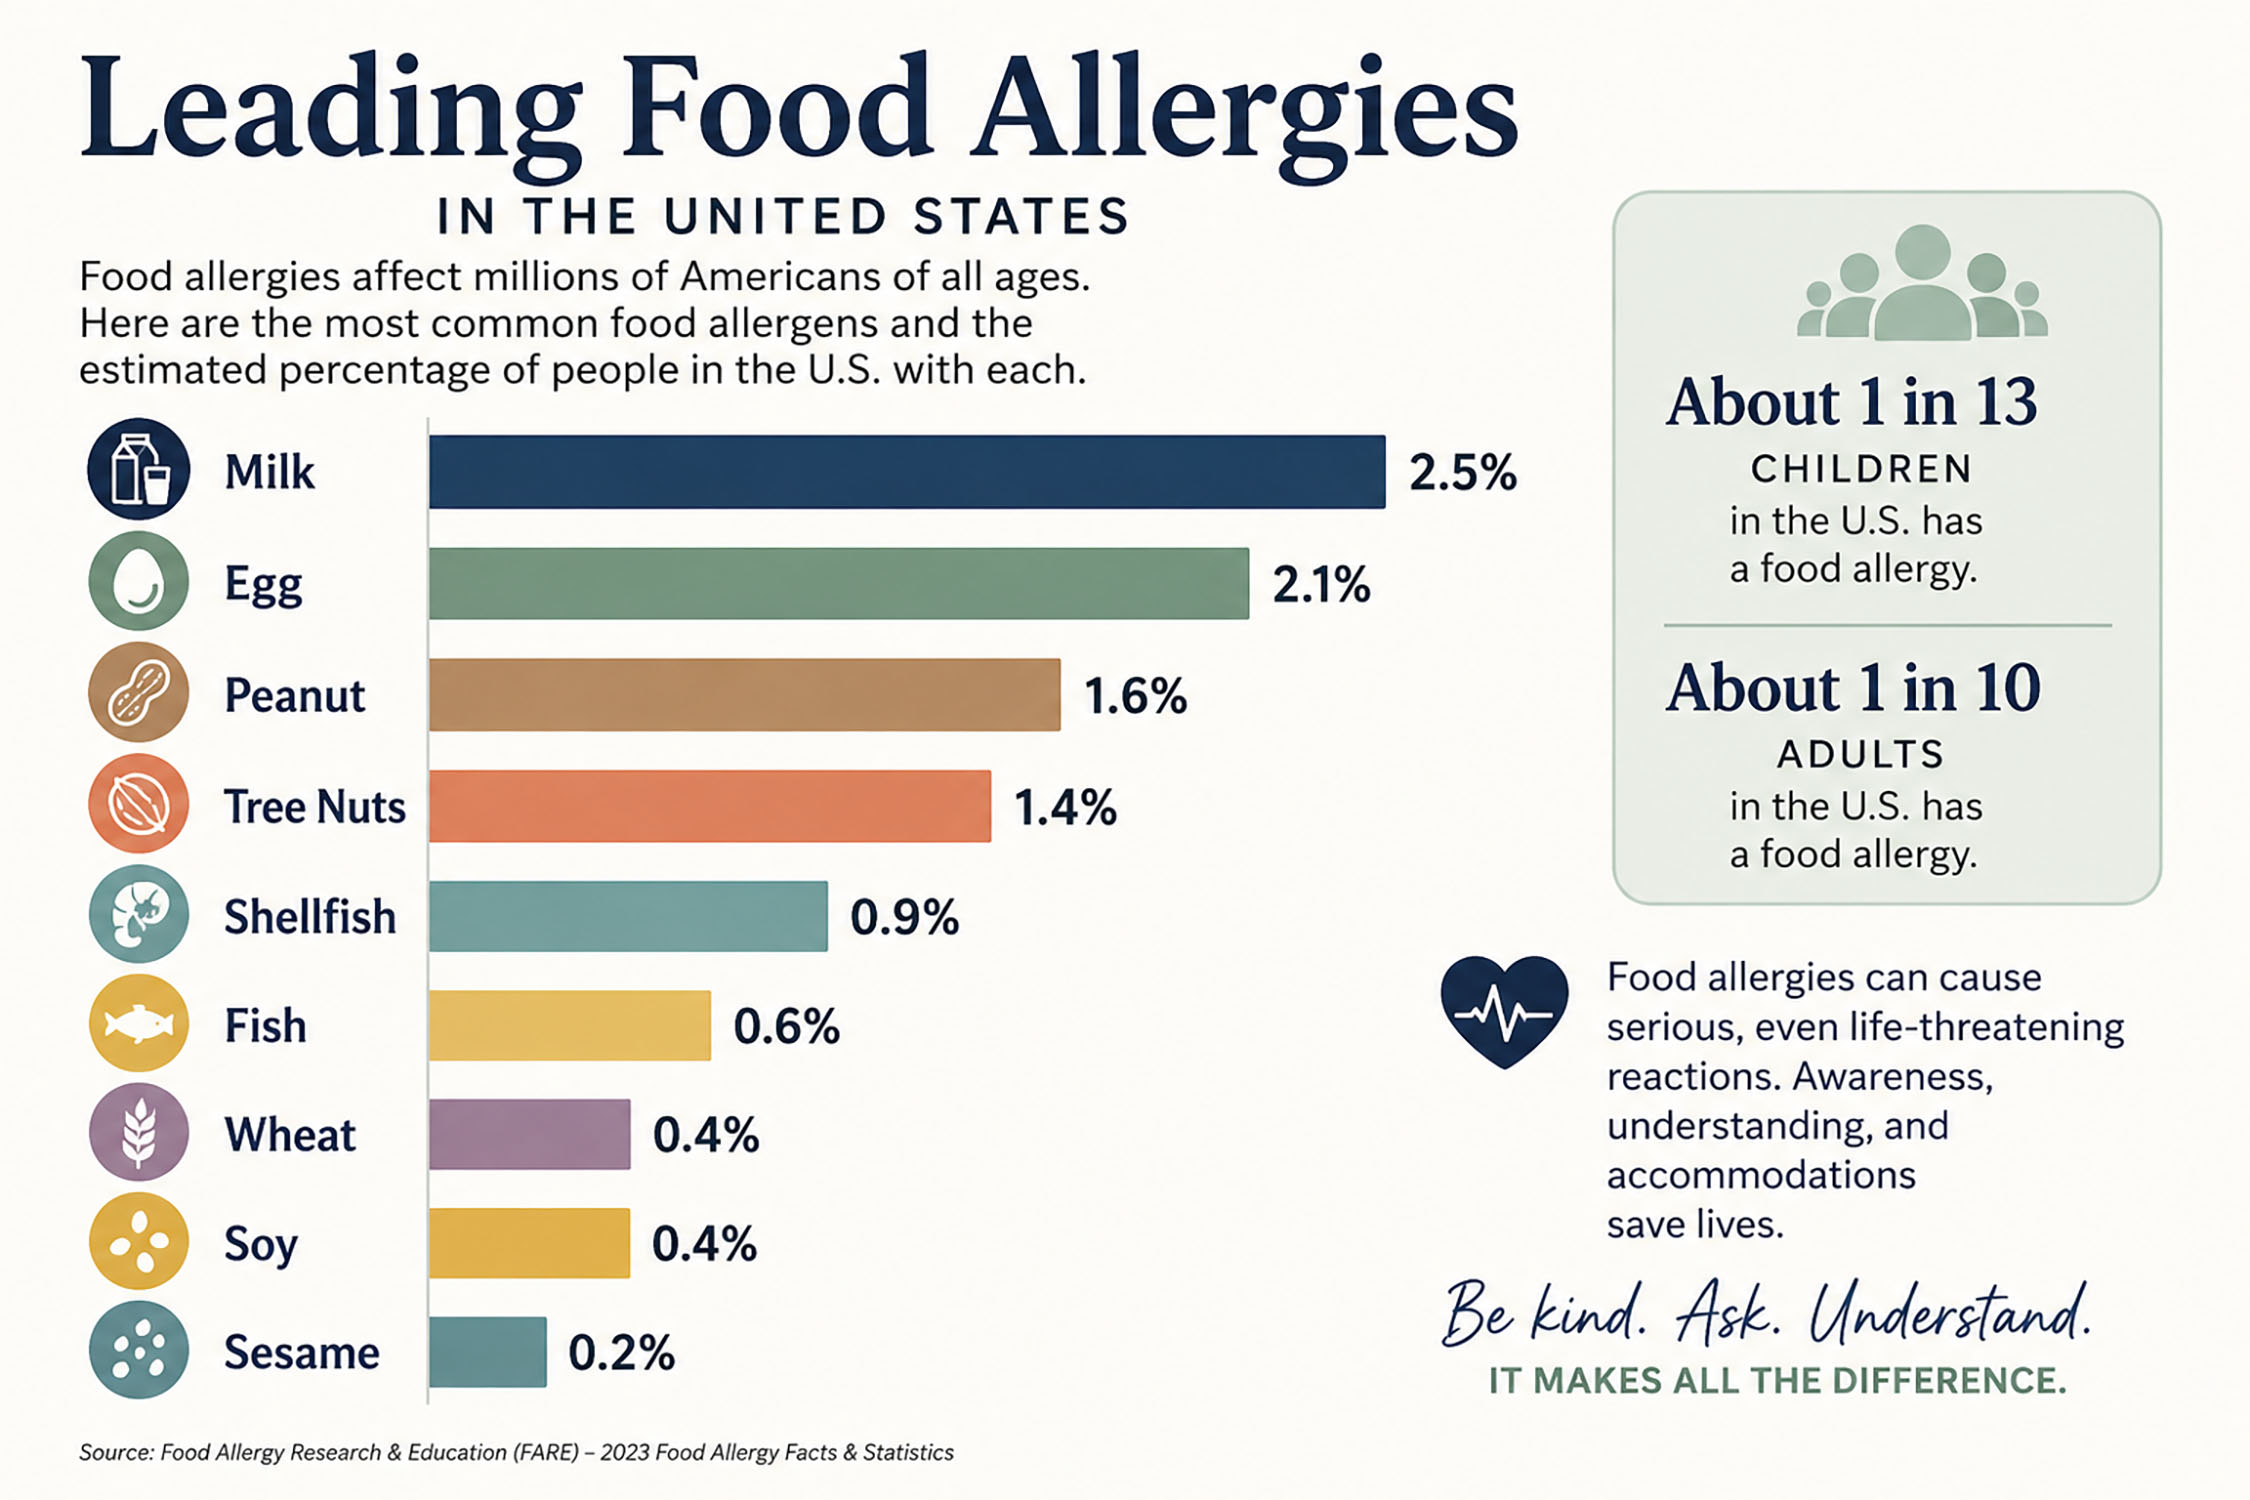
But for some people, food is also calculation.
Before the appetizers even arrive, some of us are already scanning ingredients, evaluating risk, rehearsing questions, and trying to determine whether asking those questions is about to make everyone at the table uncomfortable.
Read the full feature in On The Table in your Thursday Bowie News.


-

 NEWS3 years ago
Suspect indicted, jailed in Tia Hutson murder
-
 NEWS4 years ago
2 hurt, 1 jailed after shooting incident north of Nocona
-
 NEWS3 years ago
SO investigating possible murder/suicide
-

 NEWS3 years ago
Wreck takes the life of BHS teen, 16
-

 NEWS3 years ago
Murder unsolved – 1 year later Tia Hutson’s family angry, frustrated with no arrest
-
 Show us something good9 years ago
Country music star children perform in Bowie
-
NEWS3 years ago
Sheriff’s office called out to infant’s death
-
 100th Birthday4 years ago
Looking back at the 1958 Centennial edition of The Bowie News