
EDIBLES
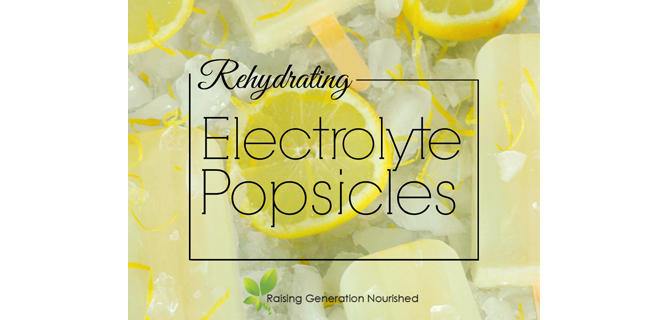
Rehydrating Electrolyte Popsicles
By: Raising Generation Nourished
It’s summer, and those kids play hard! Restock their electrolytes naturally with refreshing bursts of cool lemon in every bite!
I am really excited to share with you guys my summertime answer to long, hot summer afternoons!
Long gone are the days of the afternoon nap for 2 of my girls, and while we do a version of “quiet time” for a short while – it is just that at ages 6 and 4…a short while ? These 2 play hard and busy most of the afternoon.

I’m not a huge fan of afternoon snacks since they seem to ruin dinner appetites for my kids, so these lemon electrolyte popsicles are enough to give them a quick energy boost, but light enough not to ruin their next meal!
 A quick energy and mineral shot from some local, raw honey, and electrolyte balancing boost from real sea salt is all you need for refreshing the system in the heat of the summer. And in a much more natural way compared to store bought electrolyte drinks or snacks. Lemon not only tastes amazing, but it nourishes the body with real vitamin C and cleansing properties.
 These are also perfect for the kids when they get sick. You can even keep a stash of them away in the freezer for those illnesses that pop up out of nowhere so you are prepared. Similar to my quick, shake up homemade electrolyte drink, these popsicles can help keep kids hydrated and balanced while ill and not eating much.
 Product links in this section are affiliate links. It does not cost you anything and helps maintain the free information on this site, as well as answer the questions of “what brand do you use?” Please know I never personally recommend any product I wouldn’t use on my own family.
I love my 10-pop popsicle mold! I seriously love it! I can make a big batch all at once, wrap them up and store them away in the freezer for when I need them! The girls can help themselves that way too!
- 2 cups water
- Juice & zest of 2 lemons
- 3 TB raw honey (I get mine from a local farmer. Ask around at farmer’s markets to find some – if you don’t have access THIS
is a good brand.
- ¼ – ½ tsp real sea salt
(per your taste)
- Blend everything up and pour into your popsicle molds. This amount fills up my 10-pop popsicle mold
.
- Freeze the popsicles and serve!
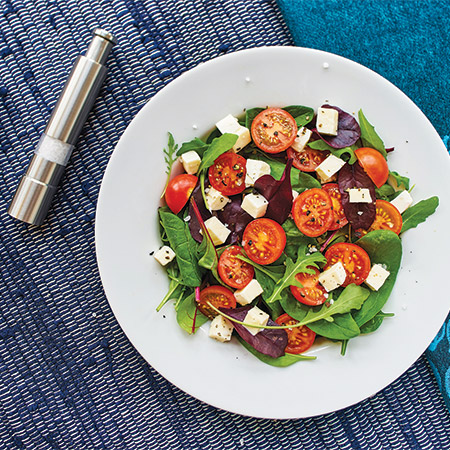
(Feature Impact) While most people think of dirty kitchens, cramped closets and grimy garages when they hear “spring cleaning,” the popular phrase can apply to your menu, too. Refresh your family’s regular dining routines with fresh ingredients that call to mind the flavors of the season.
When it’s time to put the slow cooker away, consider this Spring Greens Salad with Mozzarella. Paired with an easy homemade lemon vinaigrette, it’s a delicious way to swap out heavier meals for a lighter lunch.
To find more springtime solutions, visit Culinary.net.

Spring Greens Salad with Mozzarella
Recipe adapted from Organic Authority
Servings: 4
- 4 cups baby arugula or spring mix
- 1/2 cup cubed mozzarella cheese
- 1 tablespoon lemon zest
- 2 tablespoons extra-virgin olive oil
- 1 tablespoon fresh lemon juice
- sea salt, to taste
- freshly ground black pepper, to taste
- halved cherry tomatoes (optional)
- In large mixing bowl, combine arugula or spring mix, mozzarella and lemon zest; set aside.
- In small bowl, whisk olive oil and lemon juice vigorously with fork until smooth. Season with salt and pepper, to taste.
- Pour vinaigrette over greens; toss gently to coat. Top with halved cherry tomatoes, if desired.
Photo courtesy of Unsplash
SOURCE:
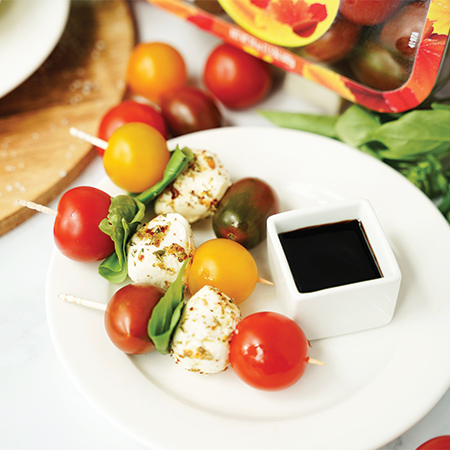
(Feature Impact) When it comes to snacking, ease is often at the top of the wish list. Not far behind, however, are fresh flavors and real ingredients.
That’s where NatureSweet shines by adding a little color to snack plates with its tomatoes, cucumbers and peppers. Fair Trade and B Corp-certified, the produce company is widely recognized for meeting the highest standards of social and environmental performance, supporting agricultural workers and making a positive impact.
That commitment and the belief that “the more you put into something, the more you get out” shows up in flavorful recipes like these Caprese Skewers. Coated in a flavorful, fresh balsamic glaze, these light, colorful snacks make everything from after-school bites to weekend entertaining more fun.
Perfectly paired with fresh basil leaves and mozzarella, the star is Constellation tomatoes – a blended, balanced mix of classic cherry tomatoes, sweet yellow tomatoes, mini-heirloom tomatoes and orange cherry tomatoes. Easy to enjoy as a standalone sweet-and-healthy snack or as a palette-pleasing ingredient in a variety of recipes, it’s truly a tomato for every occasion.
Or if you prefer savory, hearty snacks, these Bruschetta Bagels are packed with flavor. Homemade bagels are topped with juicy Glorys cherry tomatoes – perfect for grilling, sauteing, roasting, baking or simply snacking – creamy goat cheese and a splash of balsamic to create a bite that feels indulgent but is packed with fresh ingredients.
Find more fresh recipe inspiration at NatureSweet.com.
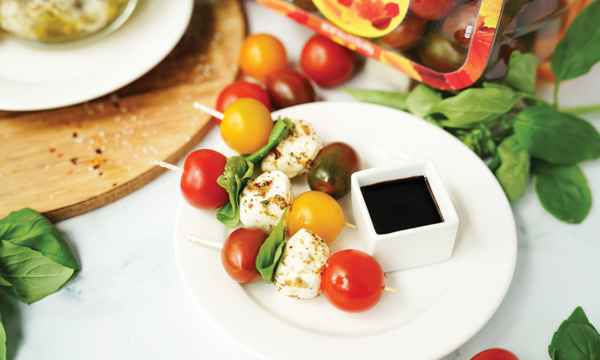
Caprese Skewers
Recipe courtesy of The Produce Moms
Prep time: 15 minutes
Yield: 12 skewers
- 2 tablespoons extra-virgin olive oil
- 1 teaspoon Italian seasoning
- 1/3 teaspoon cracked red pepper flakes
- 1/8 teaspoon garlic powder
- 1/8 teaspoon kosher salt
- 12 mozzarella balls, drained and patted dry
- 24 ounces NatureSweet Constellation tomatoes
- 24 small fresh basil leaves
- 1/4 cup balsamic glaze (optional)
- In small bowl, whisk olive oil, Italian seasoning, cracked red pepper flakes, garlic powder and salt.
- Add mozzarella balls. Gently toss to coat. For best flavor, marinate in fridge overnight.
- To assemble skewers: Thread tomato, folded basil leaf, marinated mozzarella ball, another folded basil leaf and another tomato. Repeat to make 12 skewers.
- Place on serving platter. If desired, drizzle balsamic glaze over skewers on serving platter.
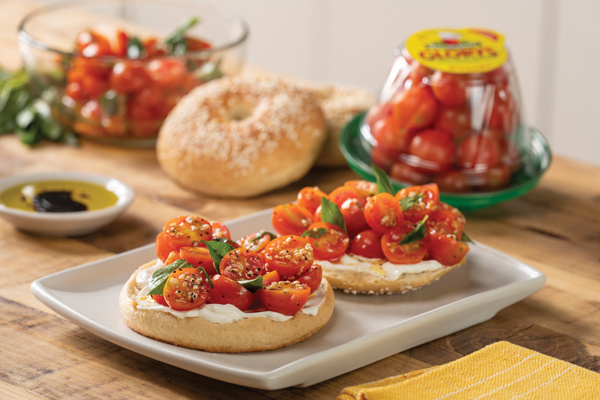
Bruschetta Bagels
Prep time: 1 hour, 20 minutes
Yield: 8 bagels
Bagels:
- 1 packet dry yeast
- 1 tablespoon sugar
- 1 1/4 cups lukewarm water, divided
- 3 1/2 cups flour
- 1 teaspoon salt
- sesame seeds
Bruschetta:
- 2 cups NatureSweet Glorys cherry tomatoes
- 1/4 cup olive oil
- 2 cloves garlic
- 1/2 cup basil
Topping:
- 1 cup goat cheese
- 1/4 cup balsamic vinegar
- salt, to taste
- pepper, to taste
- To make bagels: In bowl, mix yeast, sugar and 1/2 cup lukewarm water; let rest 5 minutes.
- In separate large bowl, place flour and add yeast mixture, remaining lukewarm water and salt. Mix thoroughly with hands until homogenous mixture is obtained. Transfer to greased bowl, cover with plastic wrap and let rise 1 hour.
- Once dough rises, place on flat surface and divide into eight equal parts. Form small dough balls and, using finger, make hole in center of each to form bagels. Place on baking sheet, cover with kitchen towel and let rise 15 minutes.
- Preheat oven to 390 F.
- In pot of hot water over medium heat, cook each bagel 5 seconds, making sure they do not stick to each other. Remove from water and drain thoroughly. Place on parchment paper-lined plate, sprinkle with sesame seeds and bake 25 minutes.
- To make bruschetta: On cutting board, use knife to cut tomatoes in half. Transfer to bowl; add olive oil, garlic and basil then mix. Set aside.
- To make topping and serve: Cut bagels in half, place on cutting board and use knife to spread goat cheese on each bagel half. Add bruschetta and drops of balsamic vinegar then sprinkle with salt and pepper, to taste.
SOURCE:
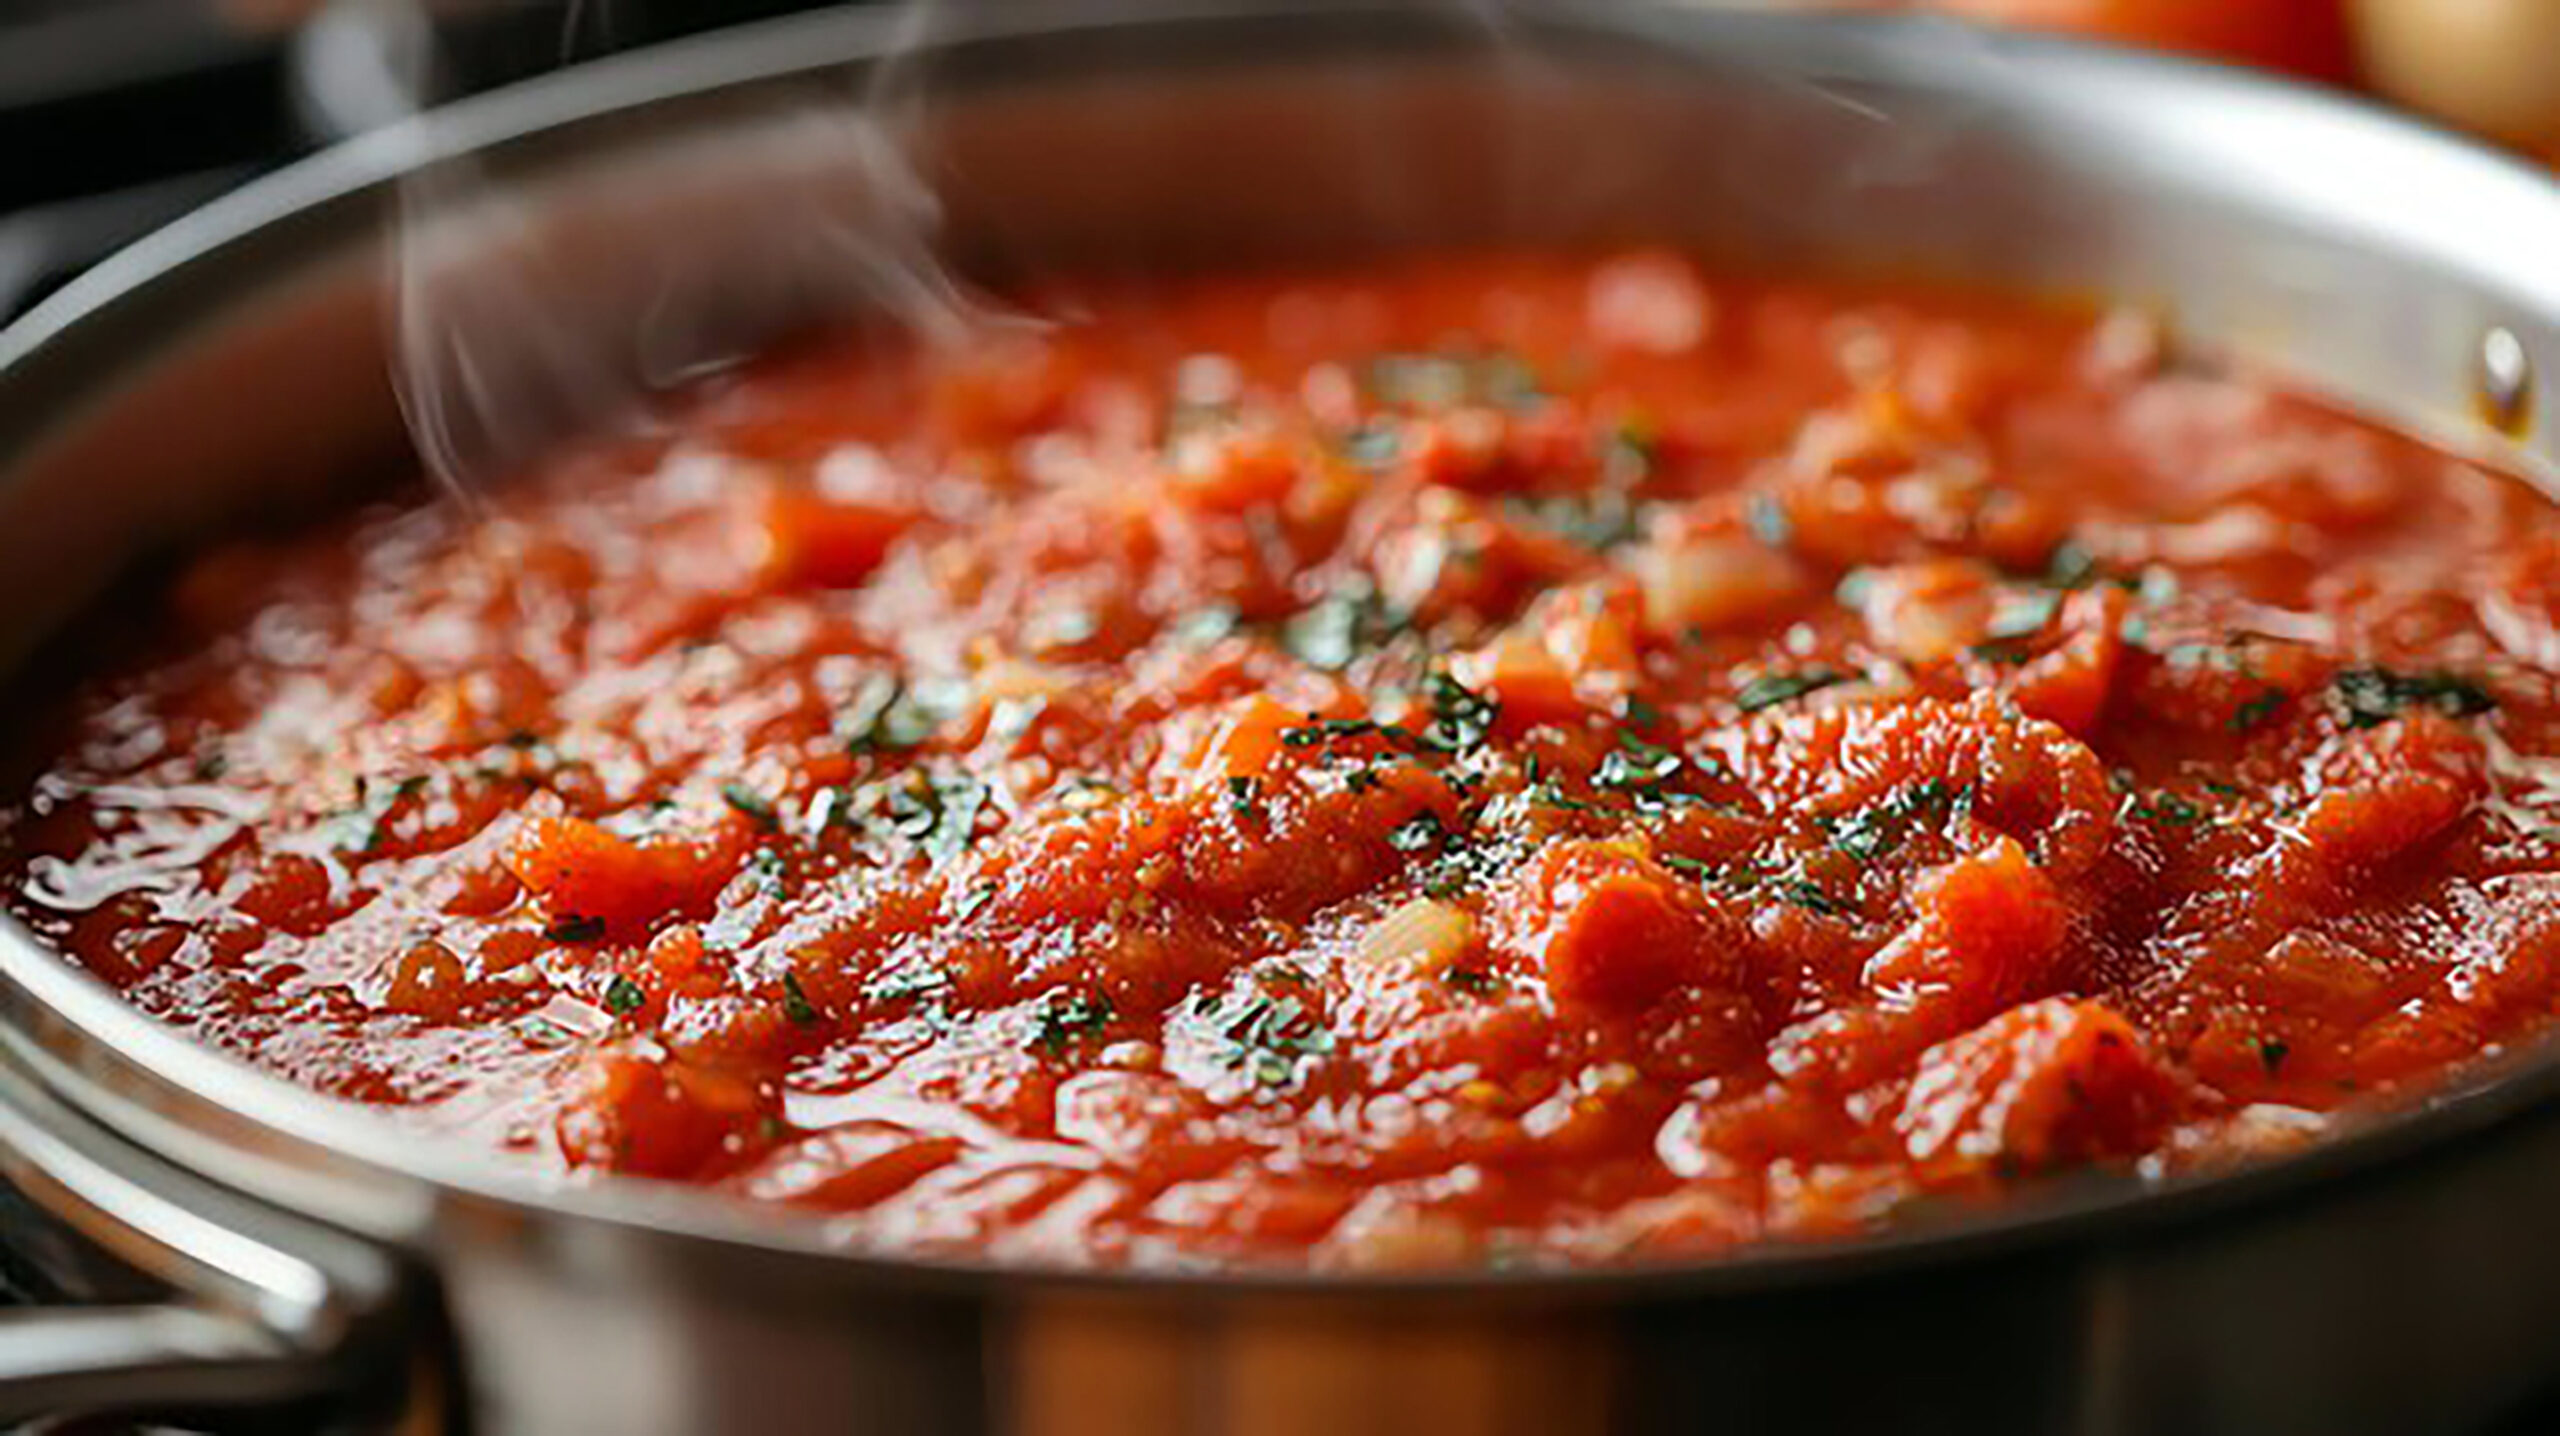
There are faster ways to make lasagna.
You can buy the noodles. You can twist open a jar of sauce. You can scoop ricotta from a plastic tub and call it done. And listen, I have done it that way plenty of times.
No shame in a weeknight shortcut. Some days are built for survival, not scratch cooking.
But lately, I have been taking the long way around.
What started as a simple plan turned into something closer to a three-hour tour. Think Gilligan’s Island… except instead of coconuts and castaways, it was flour, goat milk and just enough determination to get myself in over my head.
And I happily got lost in it. It began with milk from Cherry. Yes, I named her. Cherry, the nanny goat, has absolutely no idea she is now part of an Italian dinner situation.
Read the full feature from On The Table in your Thursday Bowie News.


-

 NEWS2 years ago
Suspect indicted, jailed in Tia Hutson murder
-
 NEWS3 years ago
2 hurt, 1 jailed after shooting incident north of Nocona
-
 NEWS3 years ago
SO investigating possible murder/suicide
-

 NEWS3 years ago
Wreck takes the life of BHS teen, 16
-

 NEWS3 years ago
Murder unsolved – 1 year later Tia Hutson’s family angry, frustrated with no arrest
-
 Show us something good9 years ago
Country music star children perform in Bowie
-
NEWS3 years ago
Sheriff’s office called out to infant’s death
-
 100th Birthday4 years ago
Looking back at the 1958 Centennial edition of The Bowie News